リモート管理トンネルの作成 (ダッシュボード)
Zero Trustを使用して最初のトンネルを立ち上げるためのステップバイステップガイドに従ってください。
始める前に、次のことを確認してください:
-
Log in to Zero Trust ↗ and go to Networks > Tunnels.
-
Select Create a tunnel.
-
Choose Cloudflared for the connector type and select Next.
-
Enter a name for your tunnel. We suggest choosing a name that reflects the type of resources you want to connect through this tunnel (for example,
enterprise-VPC-01). -
Select Save tunnel.
-
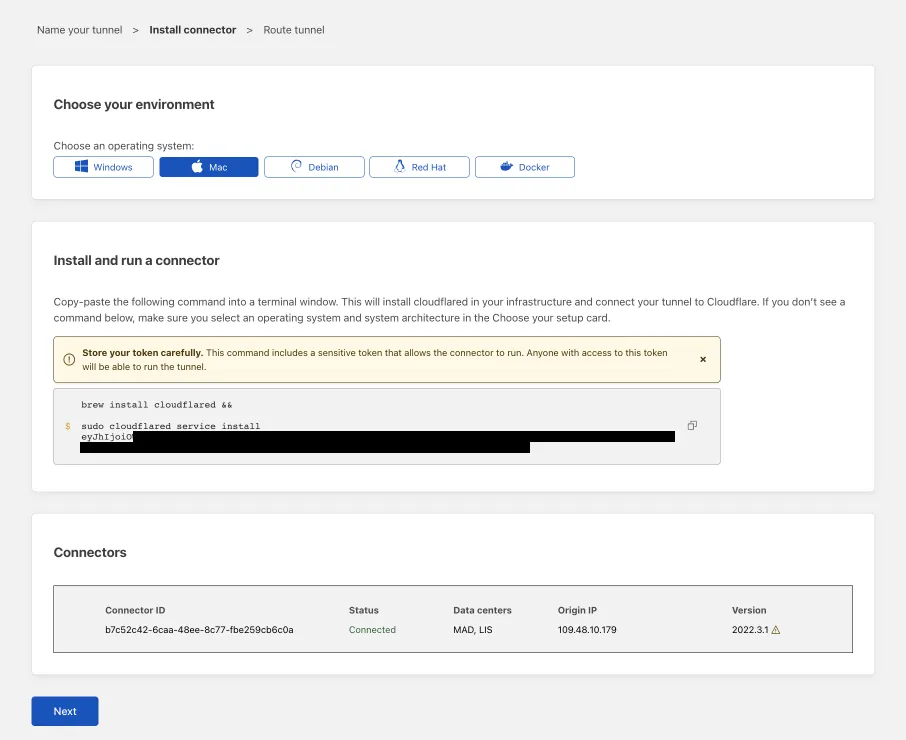
Next, you will need to install
cloudflaredand run it. To do so, check that the environment under Choose an environment reflects the operating system on your machine, then copy the command in the box below and paste it into a terminal window. Run the command. -
Once the command has finished running, your connector will appear in Zero Trust.
-
Select Next.
次のステップは、アプリケーションを接続するか、ネットワークを接続するかによって異なります。
トンネルを通じてアプリケーションを接続するための手順に従ってください。ネットワークを接続する場合は、ネットワーク接続セクションにスキップしてください。
-
In the Public Hostnames tab, choose a Domain and specify any subdomain or path information.
-
Specify a service, for example
https://localhost:8000. -
Under Additional application settings, specify any parameters you would like to add to your tunnel configuration.
-
Select Save tunnel.
トンネルを通じてプライベートネットワークを接続するための手順に従ってください。
-
プライベートネットワークタブで、IPまたはCIDRを追加します。
-
トンネルを保存を選択します。
トンネルを保存した後、トンネルページにリダイレクトされます。新しいトンネルがアクティブなコネクタと共にリストされているのを探してください。
