1 - ジャンクメールとメールセキュリティ(旧Area 1)管理者の隔離
このチュートリアルでは、Office 365のジャンクメールフォルダーおよびメールセキュリティの管理者隔離にメールを配信する方法を学びます。
You first need to configure the domains you are onboarding on the Email Security (formerly Area 1) dashboard. To configure your domains:
- Log in to the Email Security dashboard ↗.
- Go to Settings (the gear icon).
- Go to Email configuration > Domains & Routing > Domains.
- Make sure each domain you are onboarding has been added.
- For each domain you are configuring, select … > Edit, and set the following options:
- Domain -
<YOUR_DOMAIN>. - Configured as -
MX Records. - Forwarding to - This should match the expected MX record for each domain in your Office 365 account ↗.
- IP Restrictions - Leave this field empty.
- Outbound TLS -
Forward all messages over TLS. - Quarantine Policy - 「MALICIOUS」、「SPAM」、および「SPOOF」の処理を確認します。
- Domain -
To create quarantine policies:
-
Open the Microsoft 365 Defender console ↗
-
Go to Email & collaboration > Policies & rules.
-
Select Threat policies.
-
Under Rules, select Quarantine policies.
-
Select Add custom policy.
-
Set the Policy name to
UserNotifyAdminRelease. -
Select Next.
-
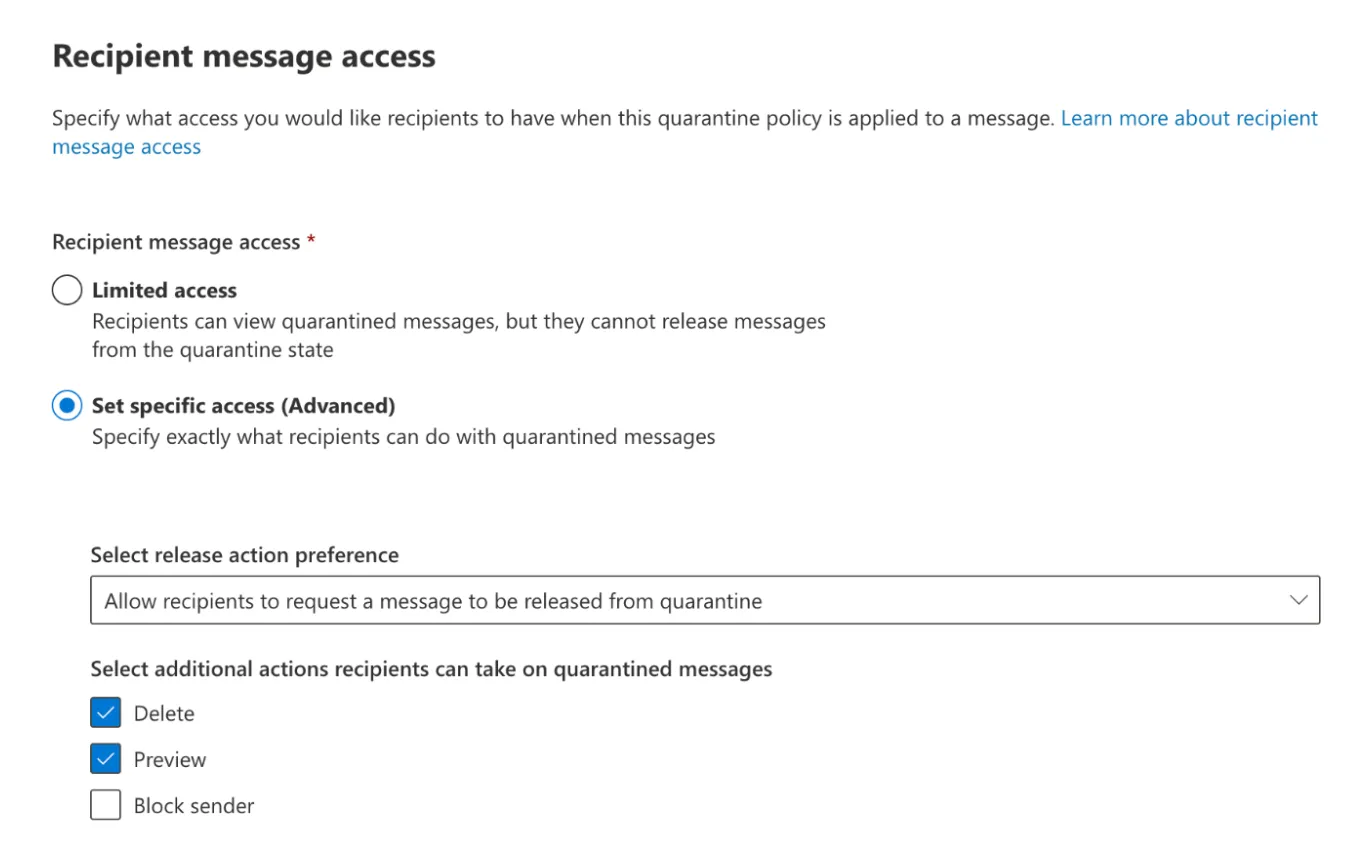
In Recipient message access, select Set specific access (Advanced), and then:
- In Select release action preference, choose Allow recipients to request a message to be released from quarantine.
- In Select additional actions recipients can take on quarantined messages, select the Delete and Preview checkboxes.
-
Select Next.
-
In Quarantine notification, select Enable.
-
Select Next.
-
Review your settings and select Submit.
-
Select Done.
To configure quarantine notifications:
-
Open the Microsoft 365 Defender console ↗.
-
Go to Email & collaboration > Policies & rules.
-
Select Threat policies.
-
Under Rules, select Quarantine policies.
-
Select Global settings.
-
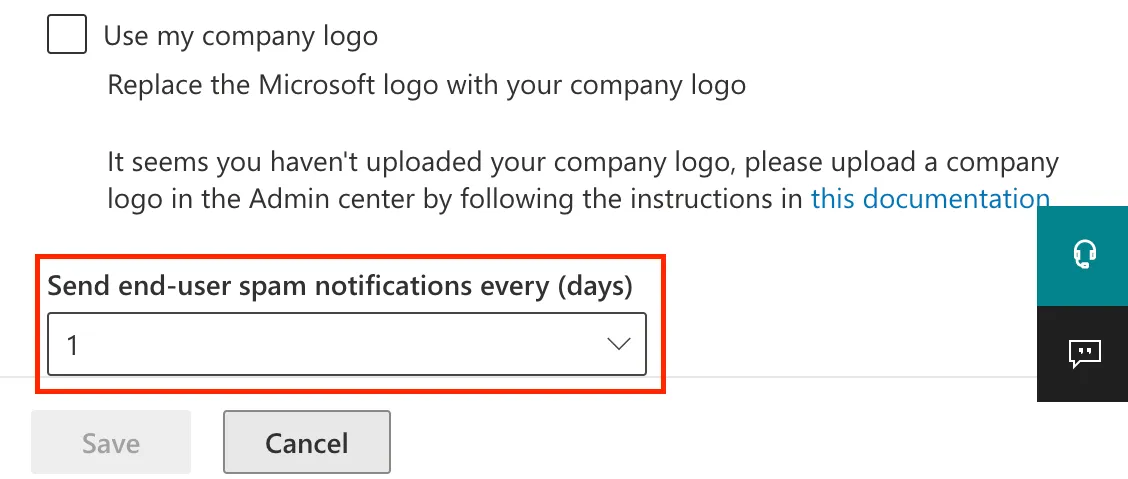
Scroll to the bottom and set the desired frequency in Send end-user spam notifications every (days). This value can only be incremented in days.
-
Select Save.
To configure anti-spam policies:
-
Open the Microsoft 365 Defender console ↗.
-
Go to Email & collaboration > Policies & rules.
-
Select Threat policies.
-
Under Policies, select Anti-spam.
-
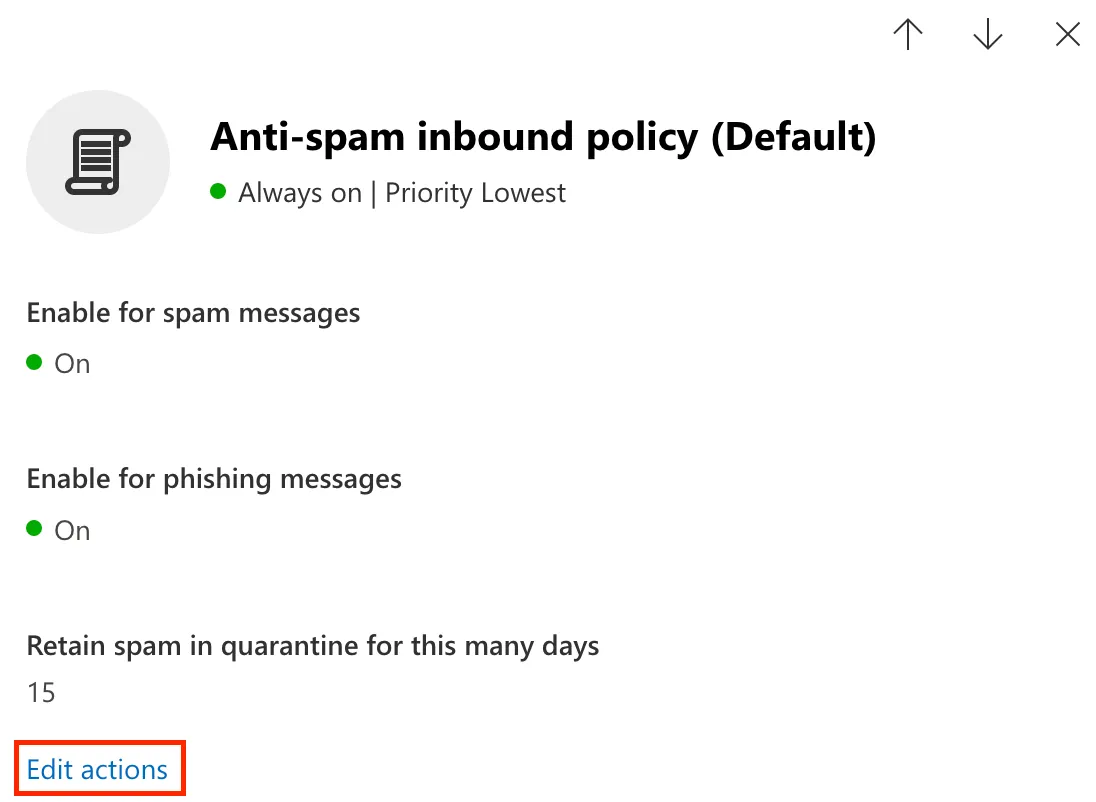
Select the Anti-spam inbound policy (Default) text (not the checkbox).
-
In Actions, scroll down and select Edit actions.
-
Set the following conditions and actions (you might need to scroll up or down to find them):
- Spam: Move messages to Junk Email folder.
- High confidence spam: Quarantine message.
- Select quarantine policy: _UserNotifyAdminRelease_.
- Phishing: Quarantine message.
- Select quarantine policy: _UserNotifyAdminRelease_.
- High confidence phishing: Quarantine message.
- Select quarantine policy: _UserNotifyAdminRelease_.
- Retain spam in quarantine for this many days: Default is 15 days. Email Security (formerly Area 1) recommends 15-30 days.

-
Select Save.
特定の処理を持つメールをメールセキュリティに送信するトランスポートルールを作成するには:
-
新しい Exchange管理センター ↗ を開きます。
-
メールフロー > ルール に移動します。
-
ルールの追加 > 新しいルールを作成 を選択します。
-
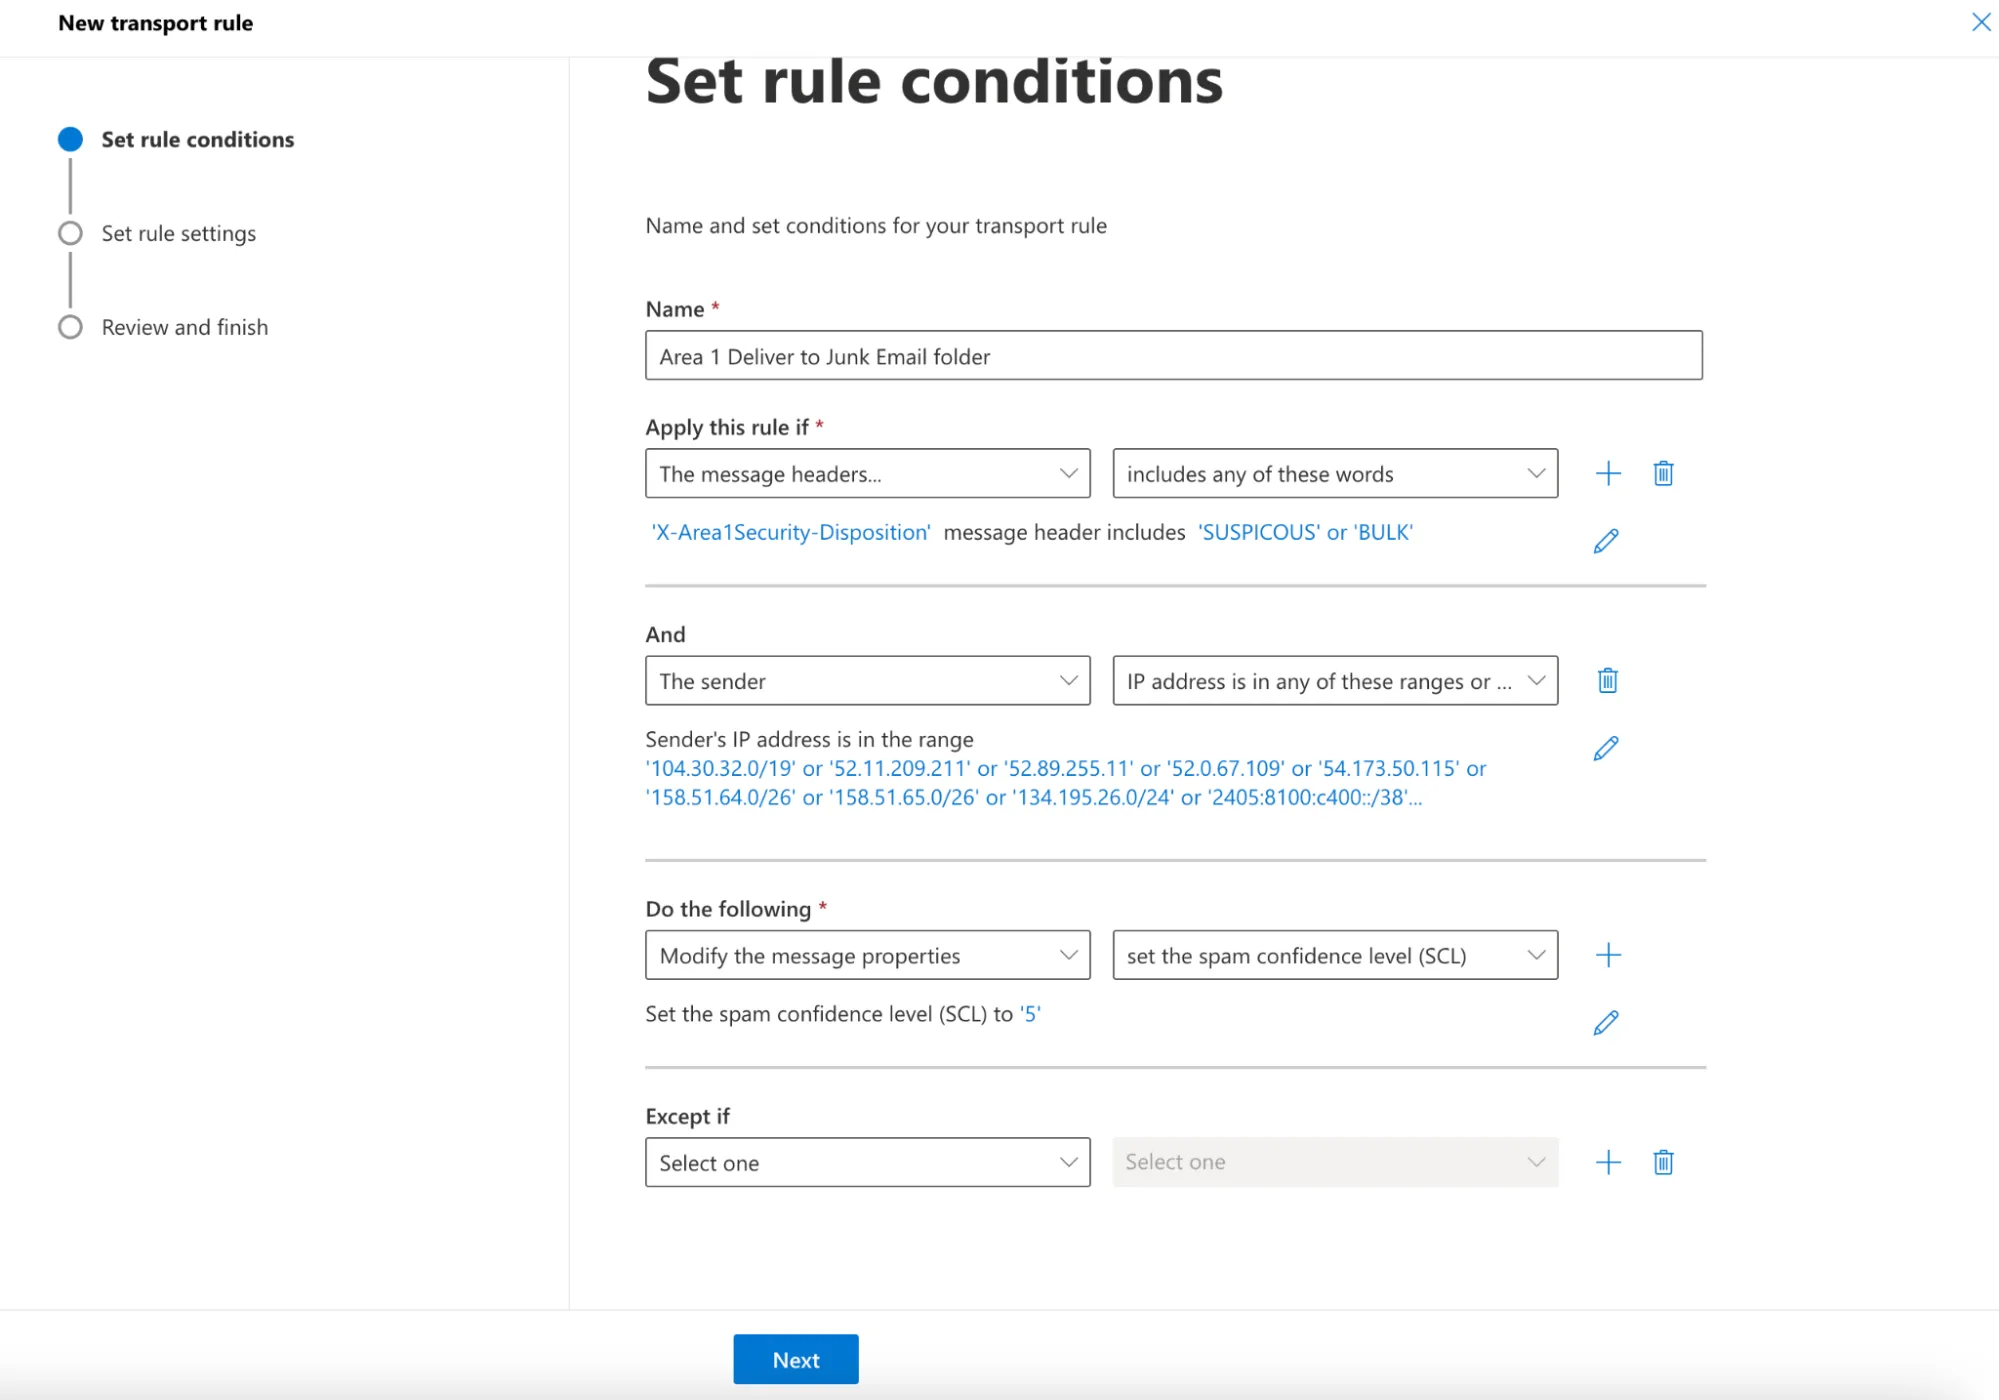
次のルール条件を設定します:
- 名前:
メールセキュリティをジャンクメールフォルダーに配信。 - このルールを適用する場合: メッセージヘッダー > これらの単語のいずれかを含む。
- テキストを入力:
X-Area1Security-Disposition> 保存。 - 単語を入力:
SUSPICIOUS,BULK> 追加 > 保存。
- テキストを入力:
- このルールを適用する場合: + を選択して2つ目の条件を追加します。
- かつ: 送信者 > IPアドレスがこれらの範囲のいずれかに含まれるか、正確に一致する > Egress IPsページにある出口IPを入力します。
- 次の操作を行う - メッセージプロパティを変更 > スパム信頼レベル(SCL)を設定 > 5。
- 名前:
-
次へを選択します。
-
この画面ではデフォルト値を使用できます。次へを選択します。
-
設定を確認し、完了 > 完了を選択します。
-
作成したルール
メールセキュリティをジャンクメールフォルダーに配信を選択し、有効にするを選択します。