Google Workspaces ディレクトリ統合
Email Security は Google と統合してユーザーおよびグループ情報を取得できます。これにより、ユーザーのなりすましを防ぐためのビジネスメール詐欺設定を強制することができます。
Email Security が Google テナントに接続してディレクトリの詳細を取得できるようにするために、承認が必要です。Cloudflare はこの目的のためにサービスアカウントを作成することを推奨します。このアカウントには以下の権限が必要です:
- ドメイン上のグループサブスクリプションを表示する。
- ドメイン上の組織単位を表示する。
- ドメイン上のグループを表示する。
- ドメイン上のユーザーに関する情報を見る。
まず、サービスアカウントを作成します。すでにアカウントを持っている場合は、このステップをスキップできます。
-
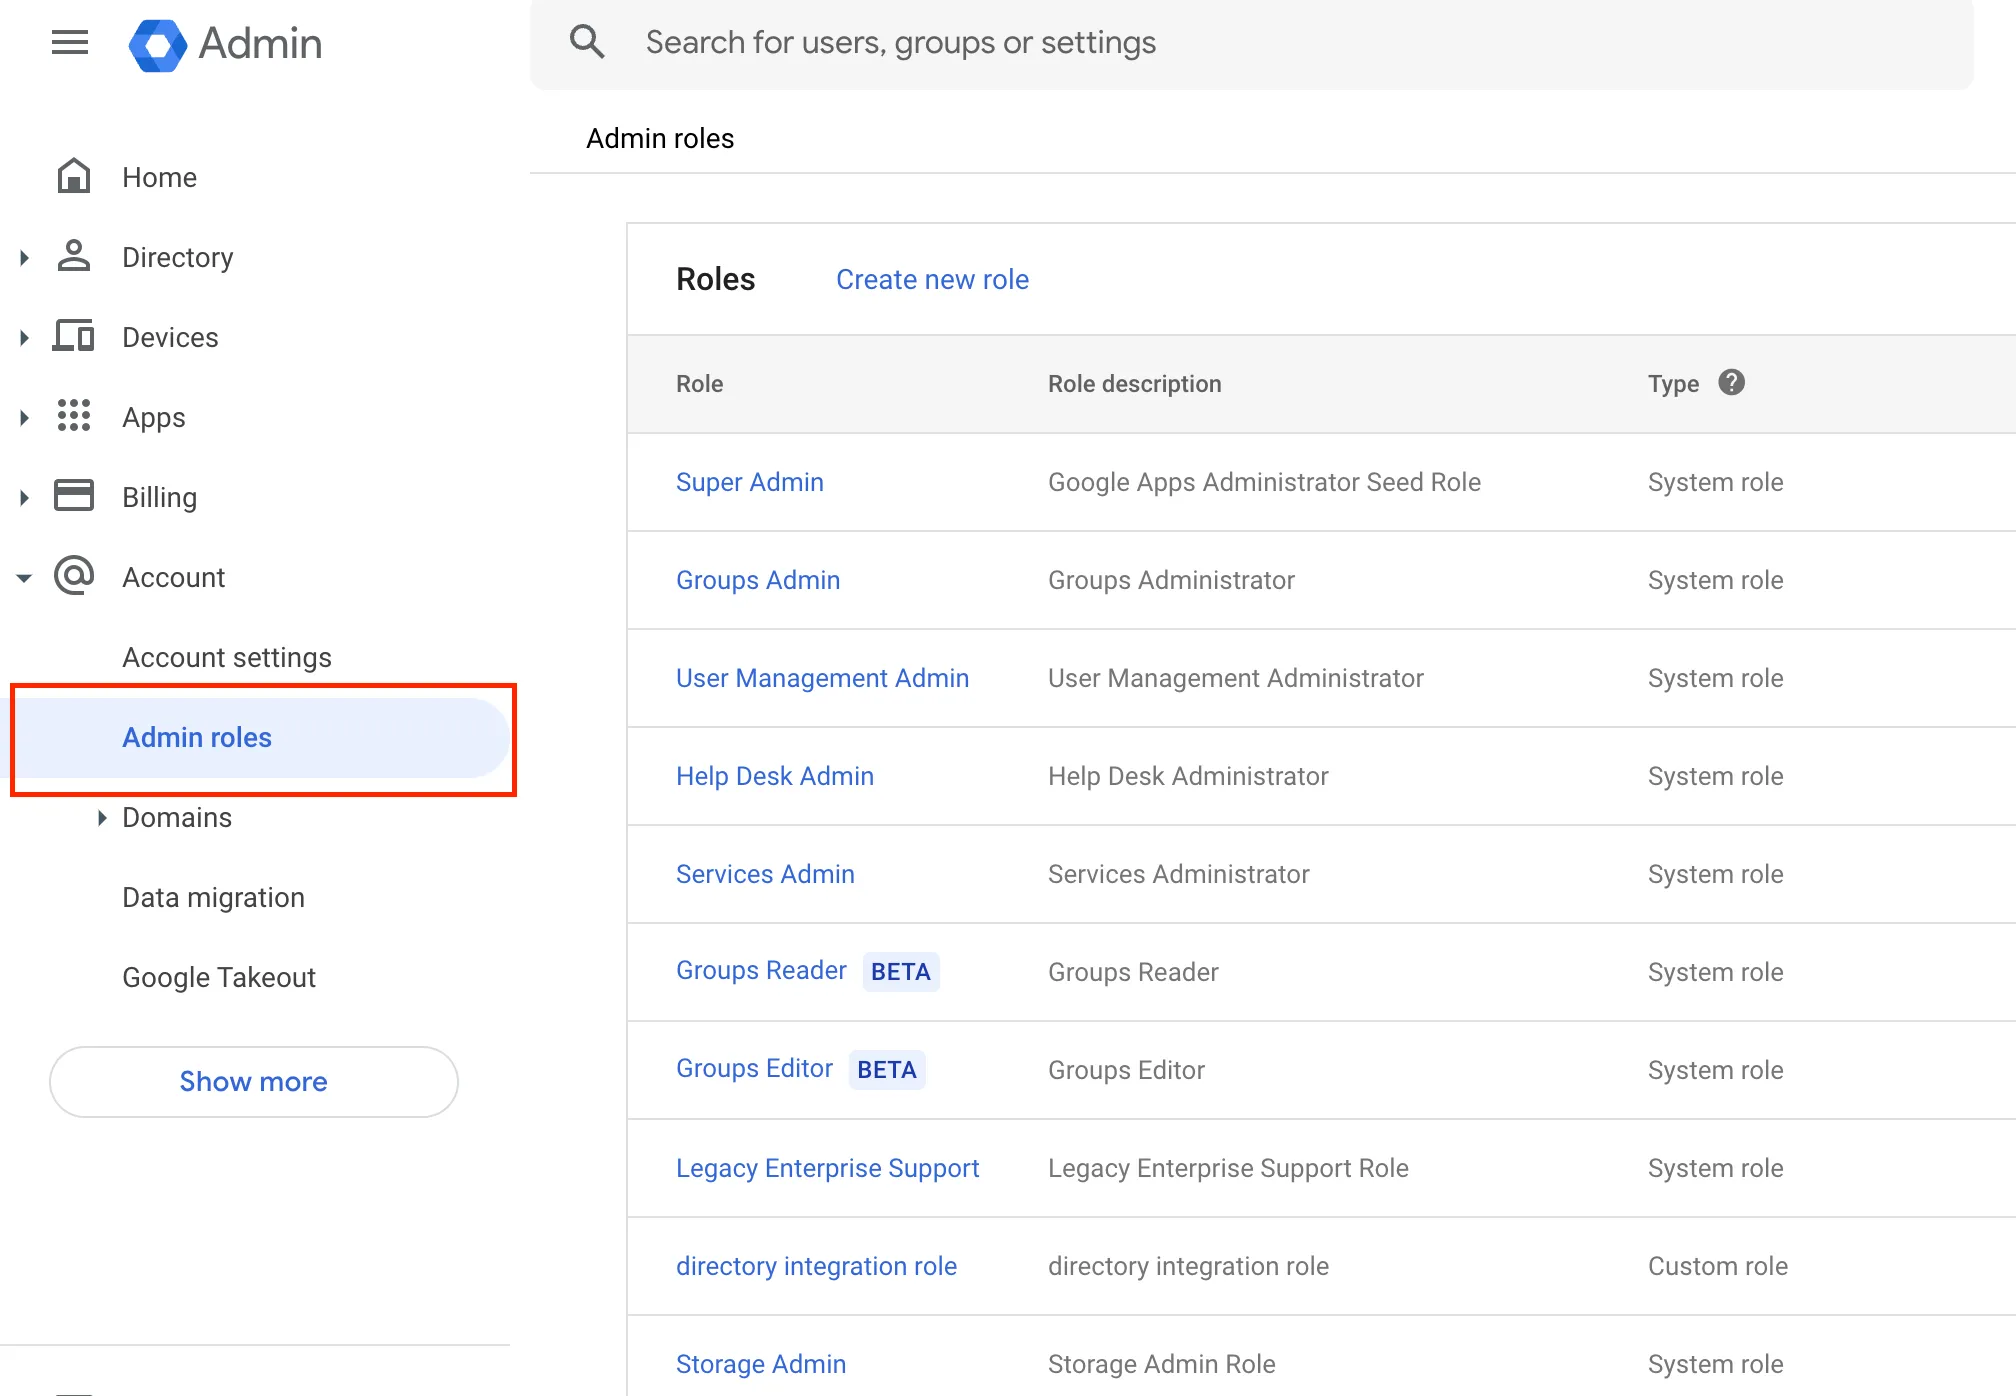
Google 管理コンソール ↗にアクセスし、アカウント > 管理者ロールに移動します。
-
新しいロールを作成を選択し、説明的な名前と説明を付けます。完了したら、続行を選択します。
-
管理コンソールの権限で、以下の権限を選択します:
- 組織単位 > 読み取り
- ユーザー > 読み取り
- ディレクトリ設定 > 設定 > Google サポート設定
- ディレクトリ同期 > ディレクトリ同期設定の管理 > ディレクトリ同期設定の読み取り

-
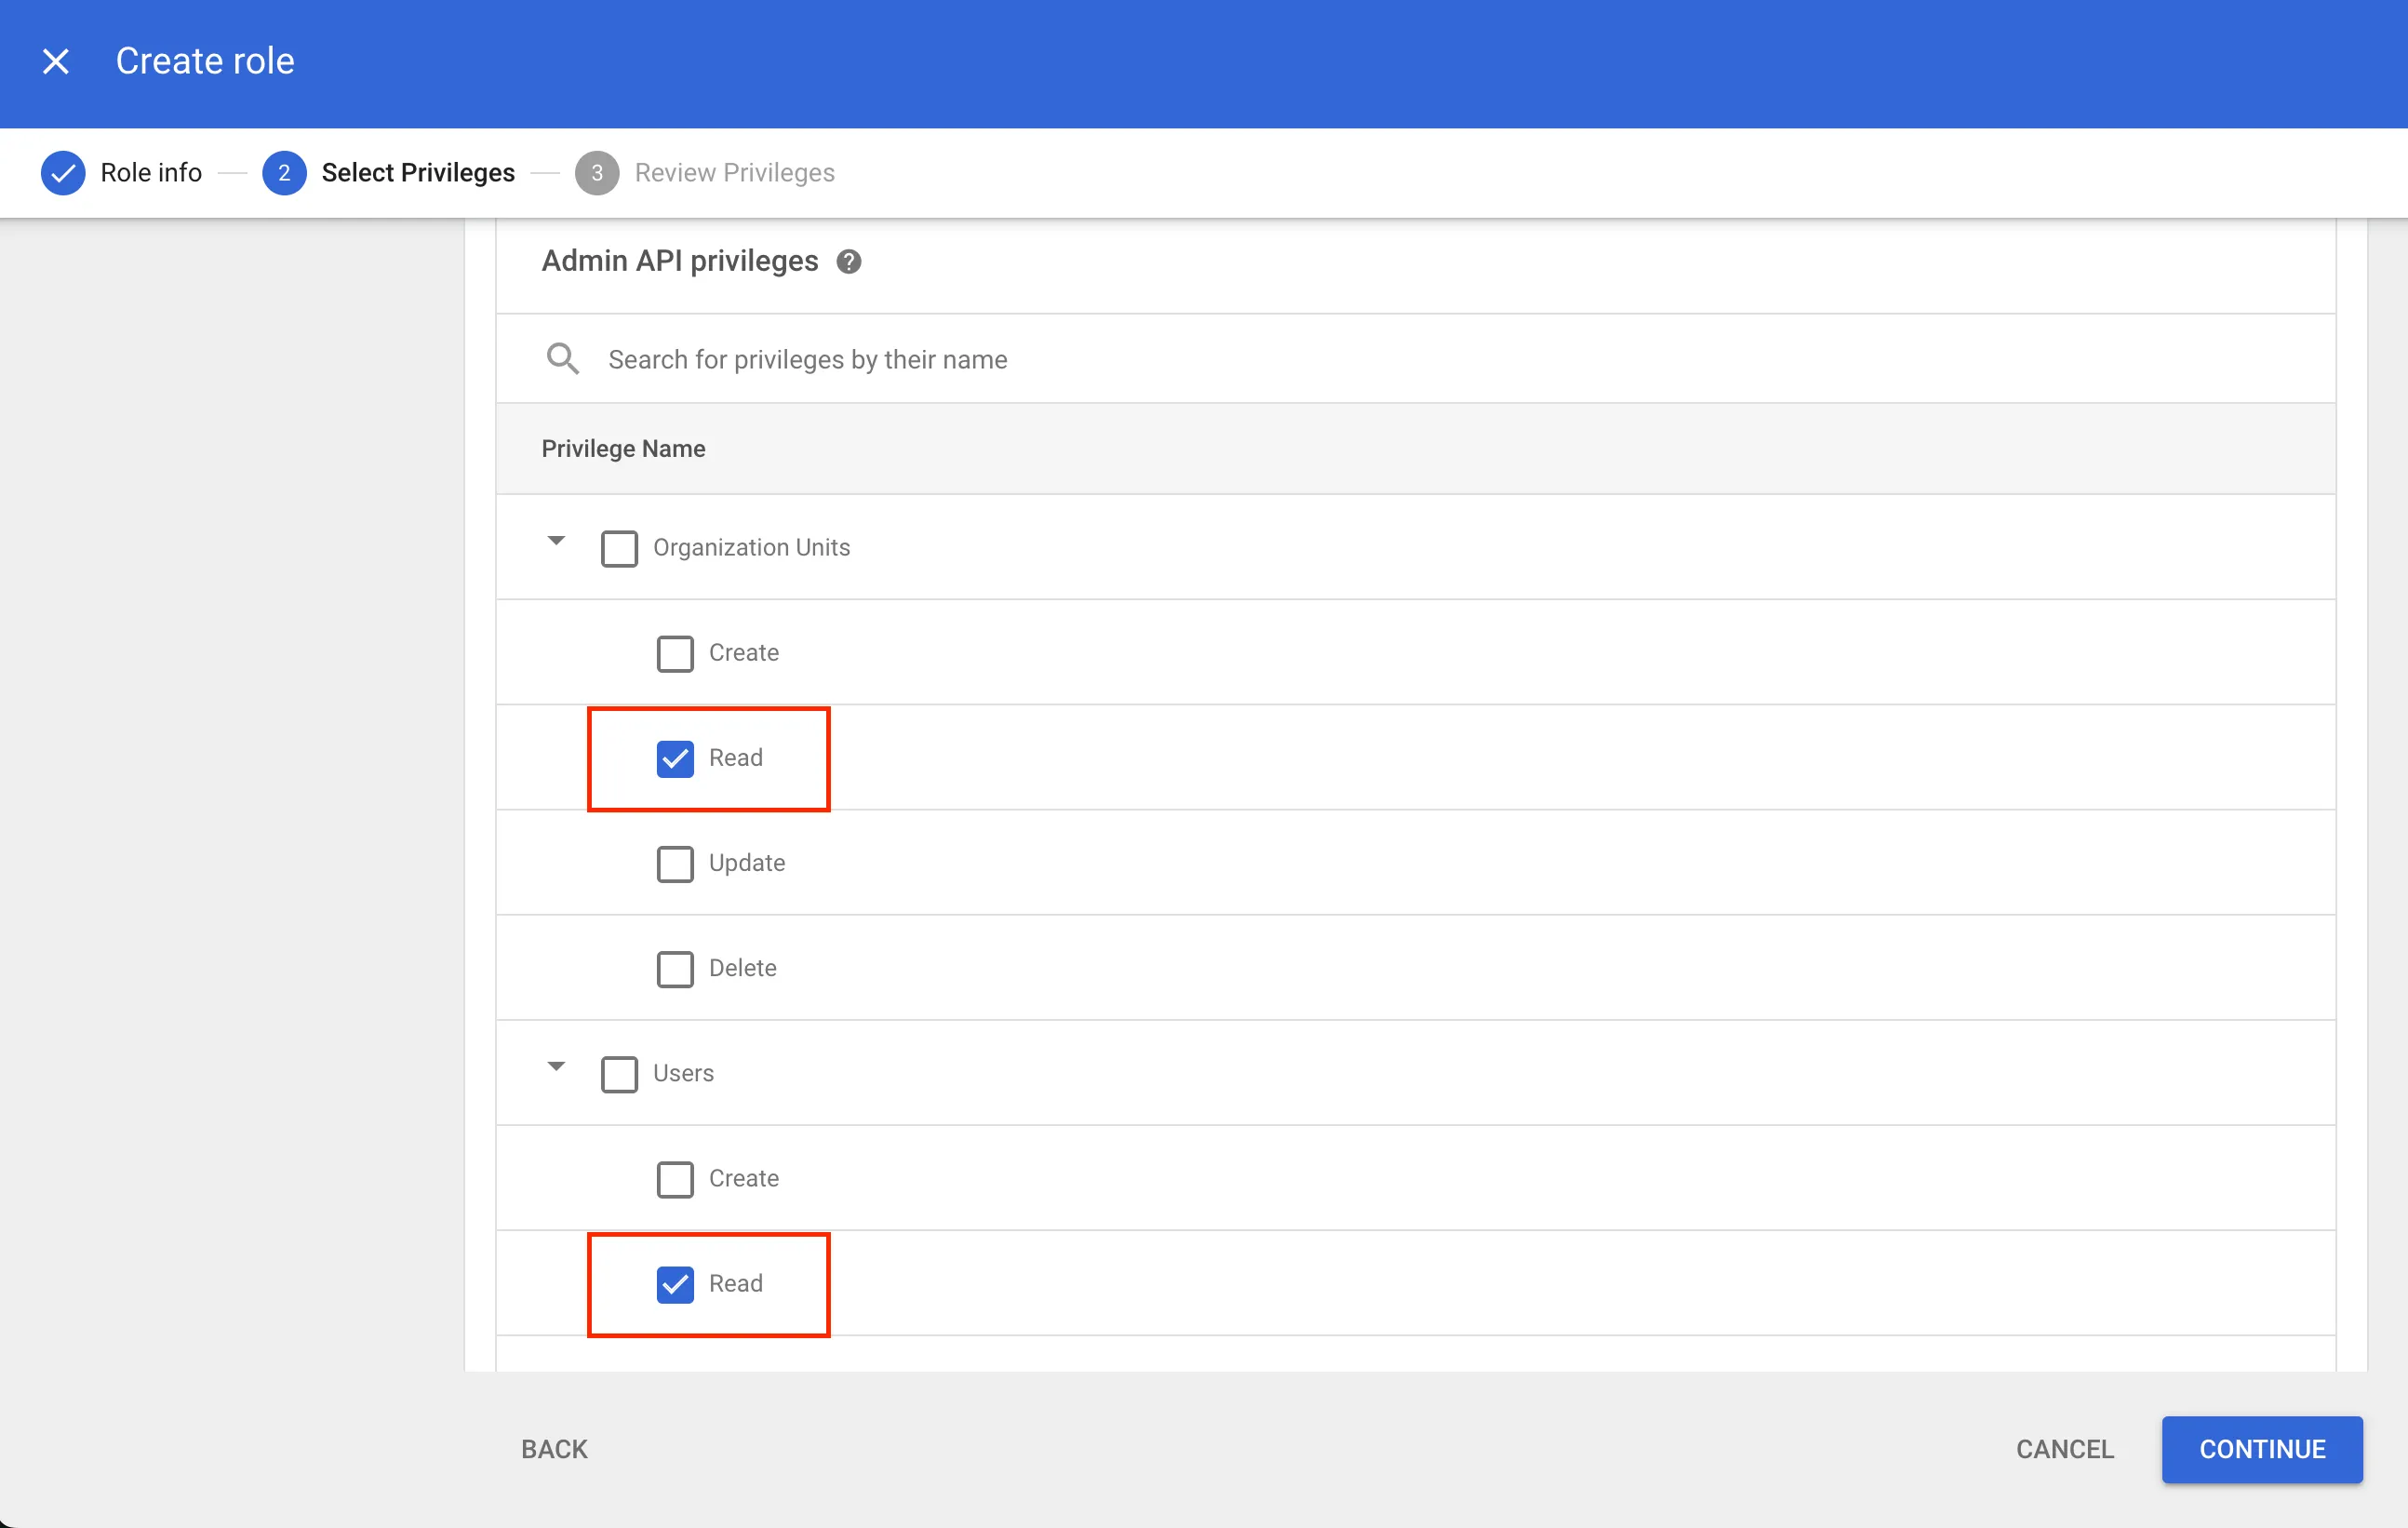
管理コンソールの権限を指定すると、対応する管理 API 権限も付与されます。いずれにせよ、管理 API 権限に対して以下の権限が選択されていることを確認してください:
- 組織単位 > 読み取り
- ユーザー > 読み取り
- グループ > 読み取り
-
続行を選択します。
-
情報を確認し、ロールを作成を選択します。
-
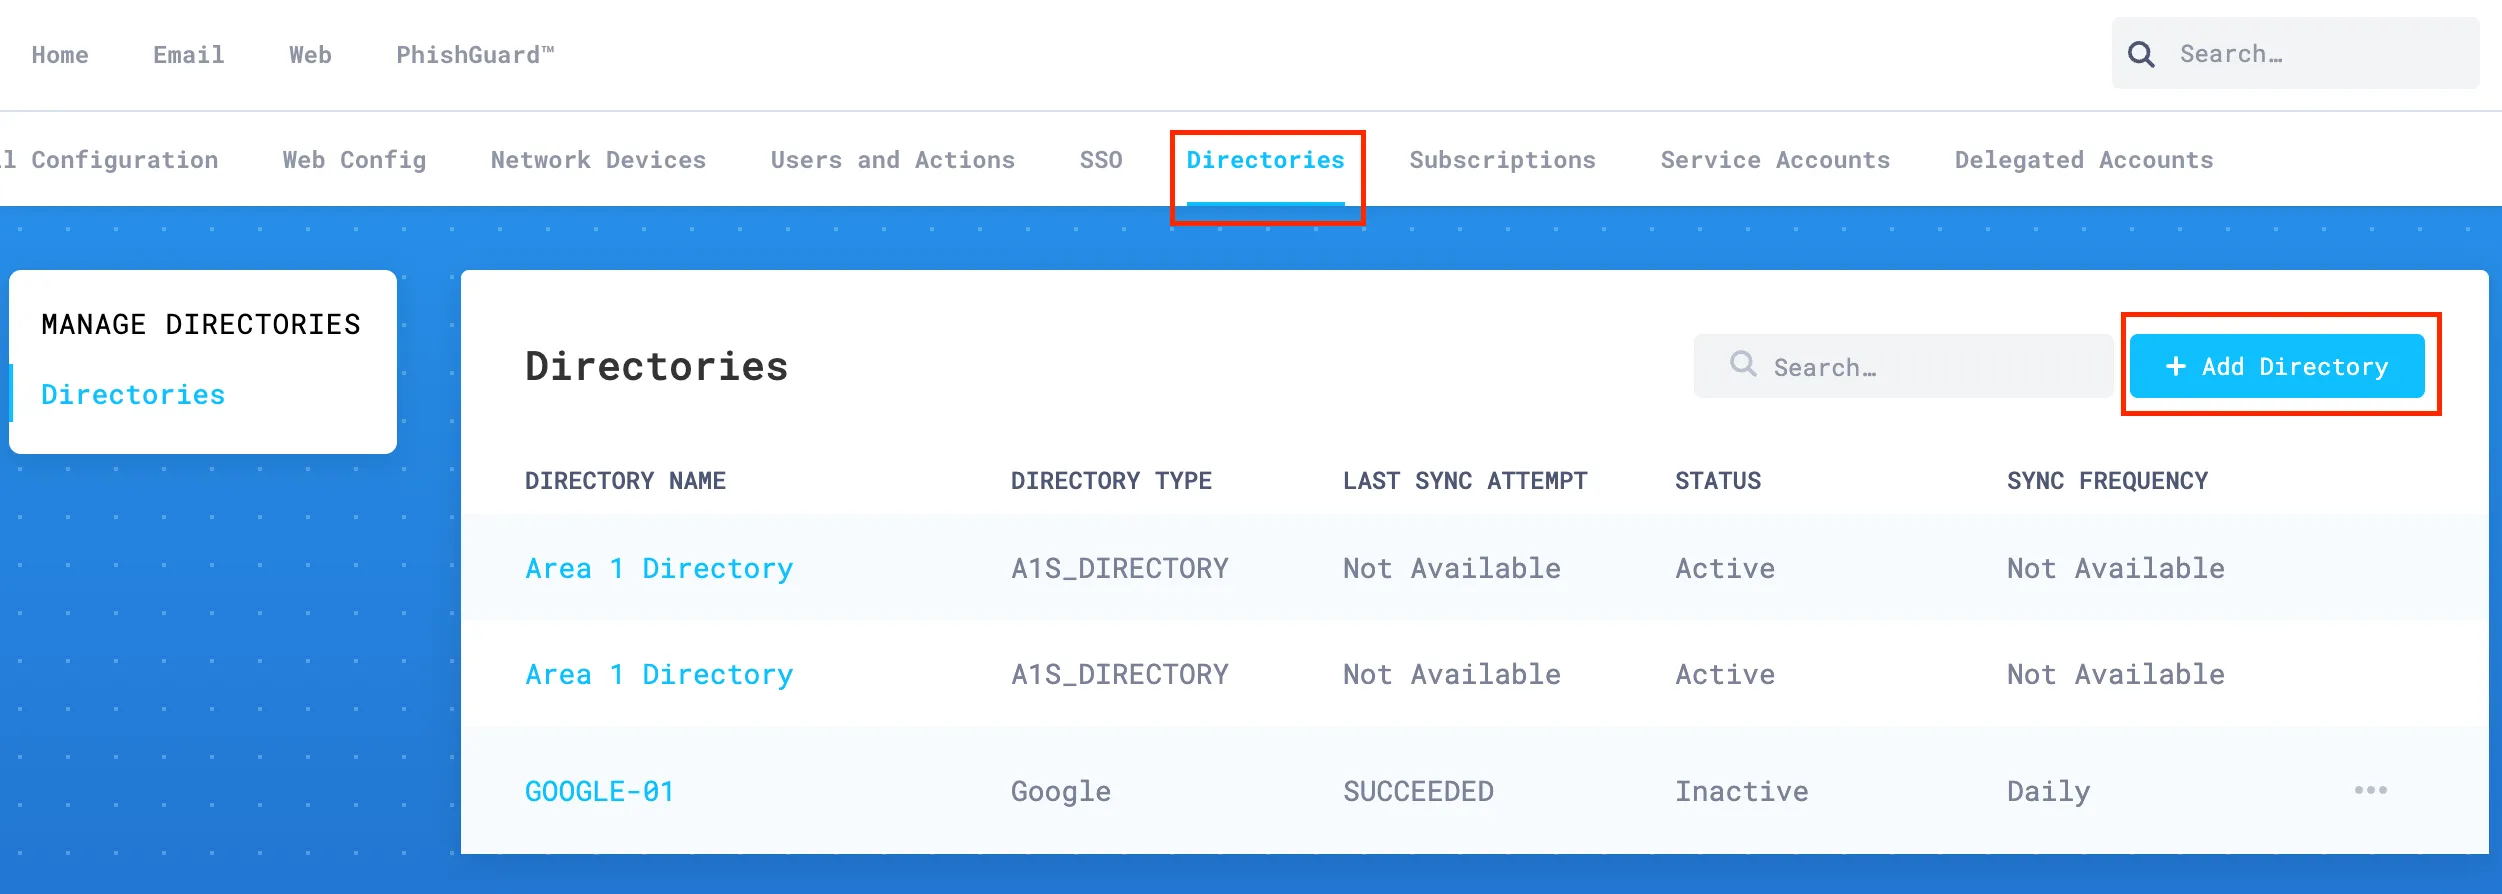
Email Security ダッシュボード ↗にログインし、設定(ギアアイコン)を選択します。
-
ディレクトリに移動し、ディレクトリを追加を選択して承認プロセスを開始します。
-
ディレクトリ追加の設定パネルで、以下の詳細を入力します:
- ディレクトリタイプ:ドロップダウンメニューを開き、Googleを選択します。
- ディレクトリ名:ディレクトリを表す文字列を入力します。この値はビジネスメール詐欺リスト設定セクションで参照されます。例えば、
Gmail。 - 同期頻度:値を好みに応じて更新します。
完了したら、承認を選択します。
-
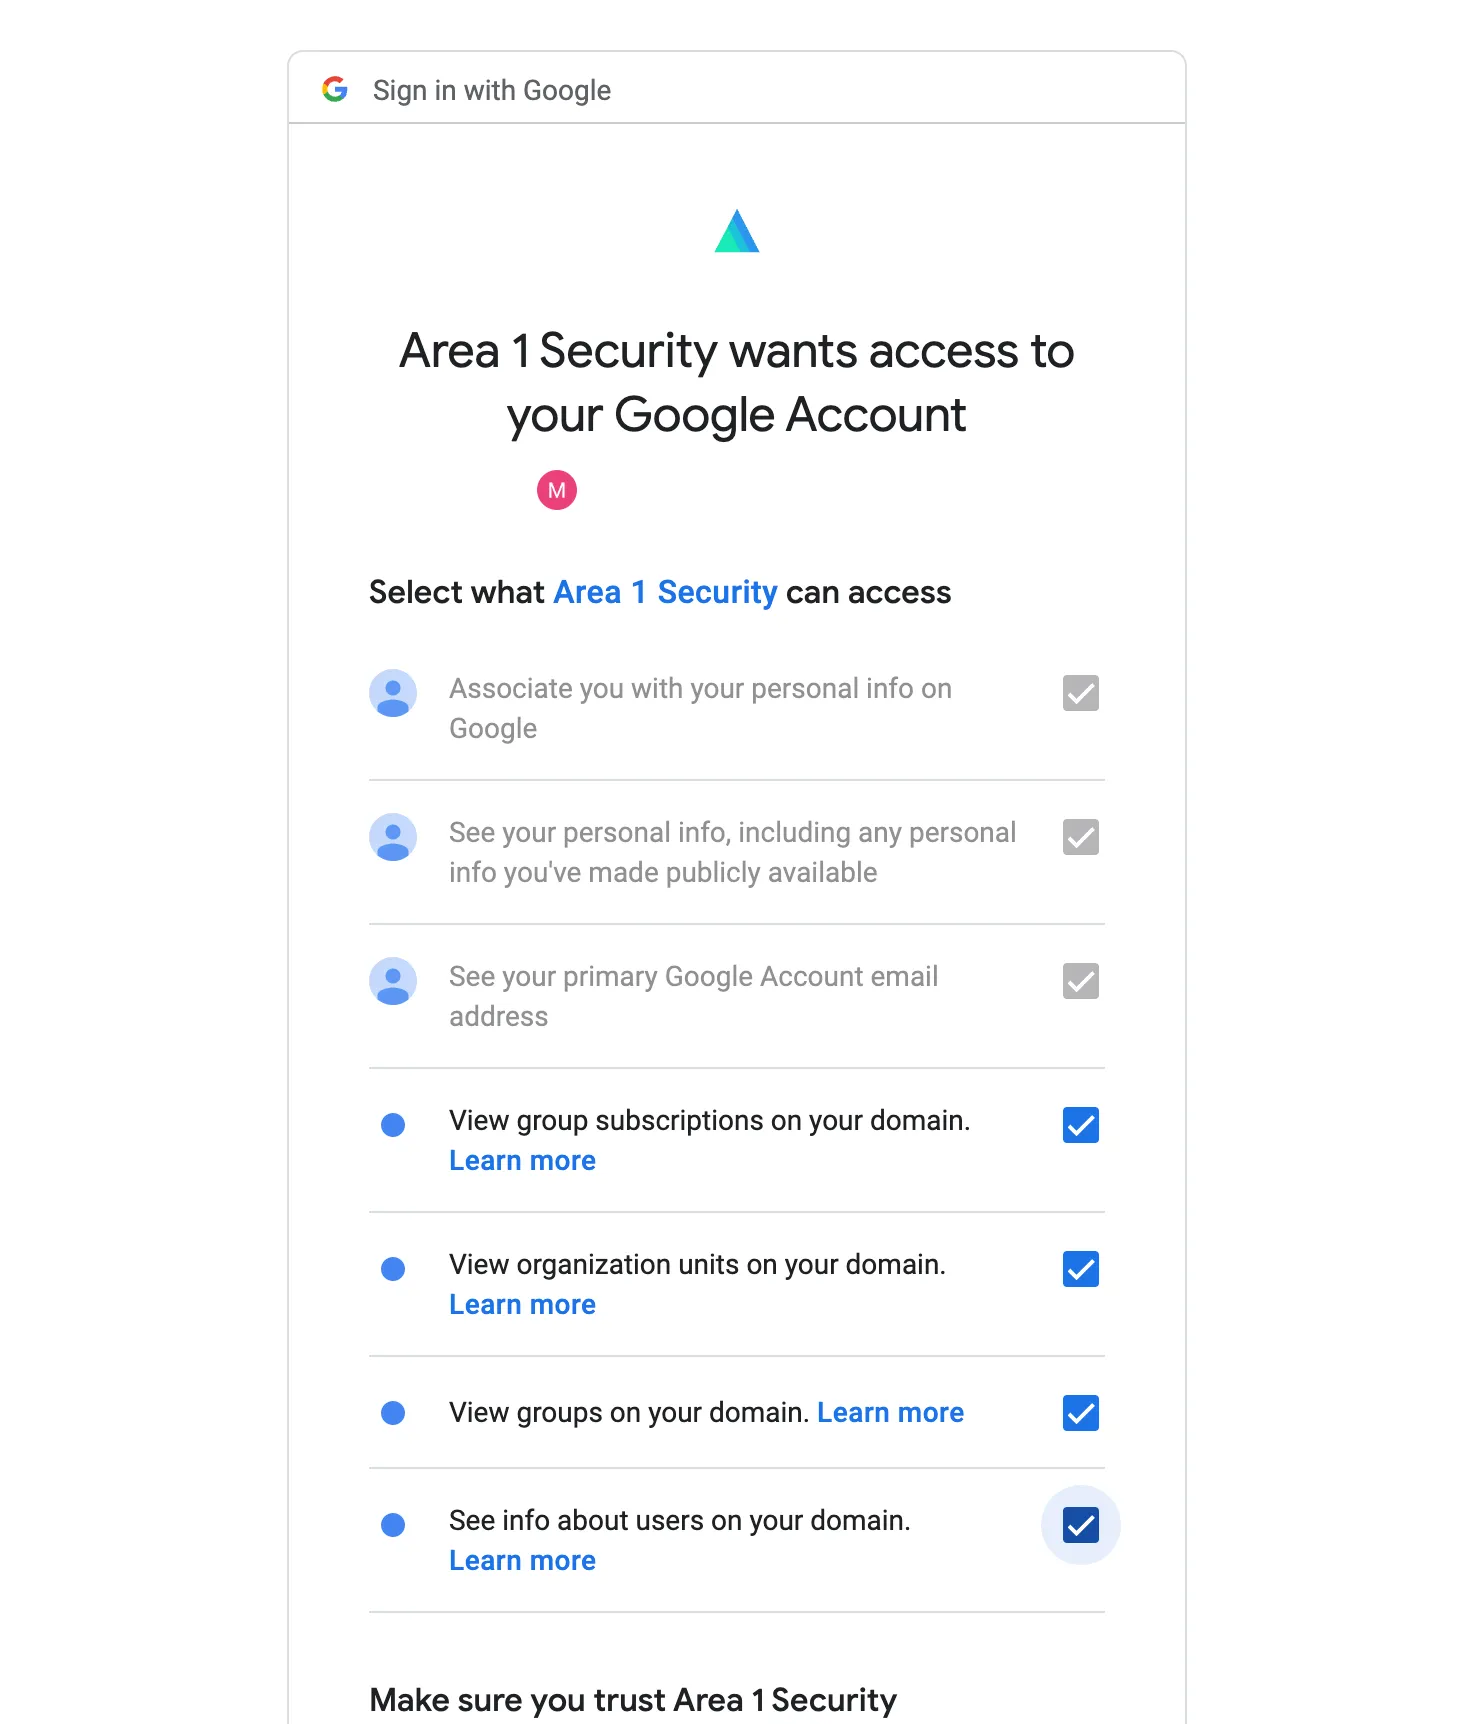
Email Security ダッシュボードは、Google のログインページにリダイレクトします。適切なアカウントを選択または入力して認証プロセスを開始します。
-
認証が完了すると、必要な権限のリストが表示されるダイアログボックスが表示されます。すべてのチェックボックスをチェックし、続行を選択して変更を承認します。
-
承認後、Add Directory 設定パネルに自動的にリダイレクトされます。保存を選択して承認プロセスを完了します。

-
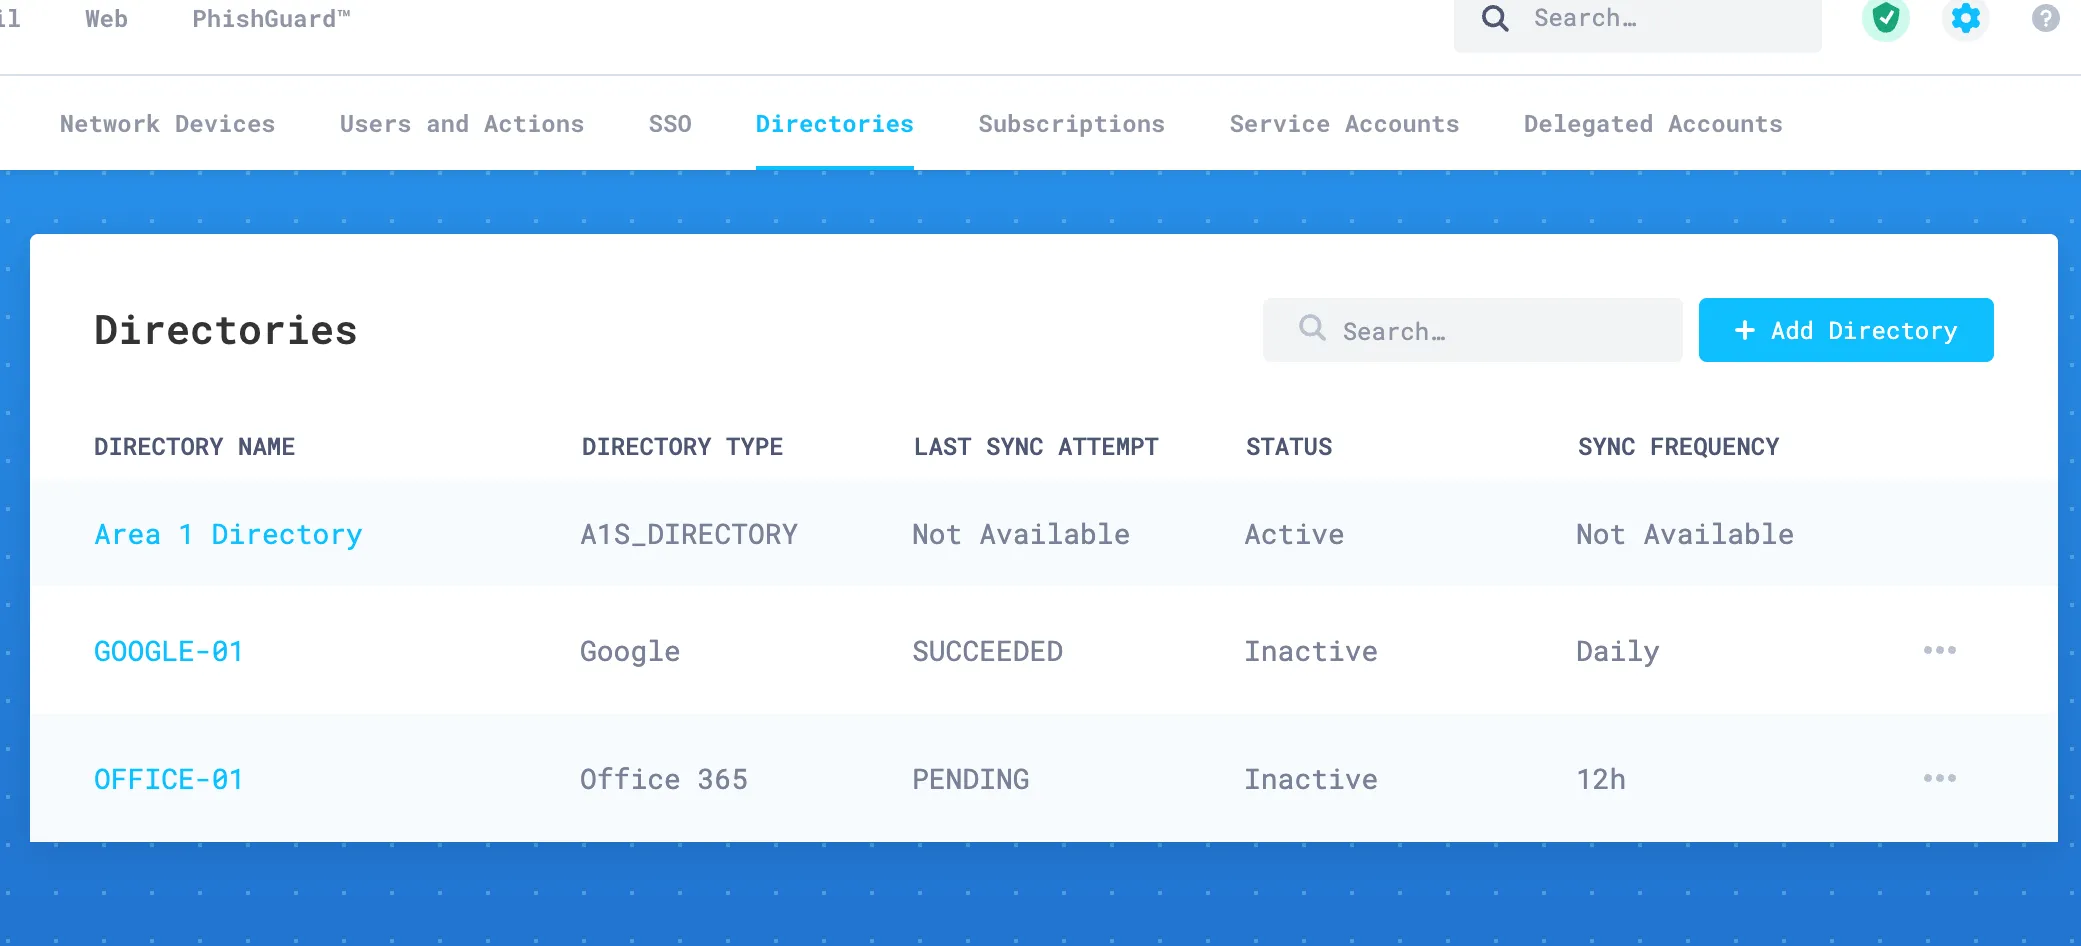
保存が完了すると、新しく構成されたディレクトリが構成されたディレクトリのテーブルに表示されます。
Now that Email Security (formerly Area 1) has been authorized to access and retrieve directory information, you will need to configure the Business Email Compromise list.
-
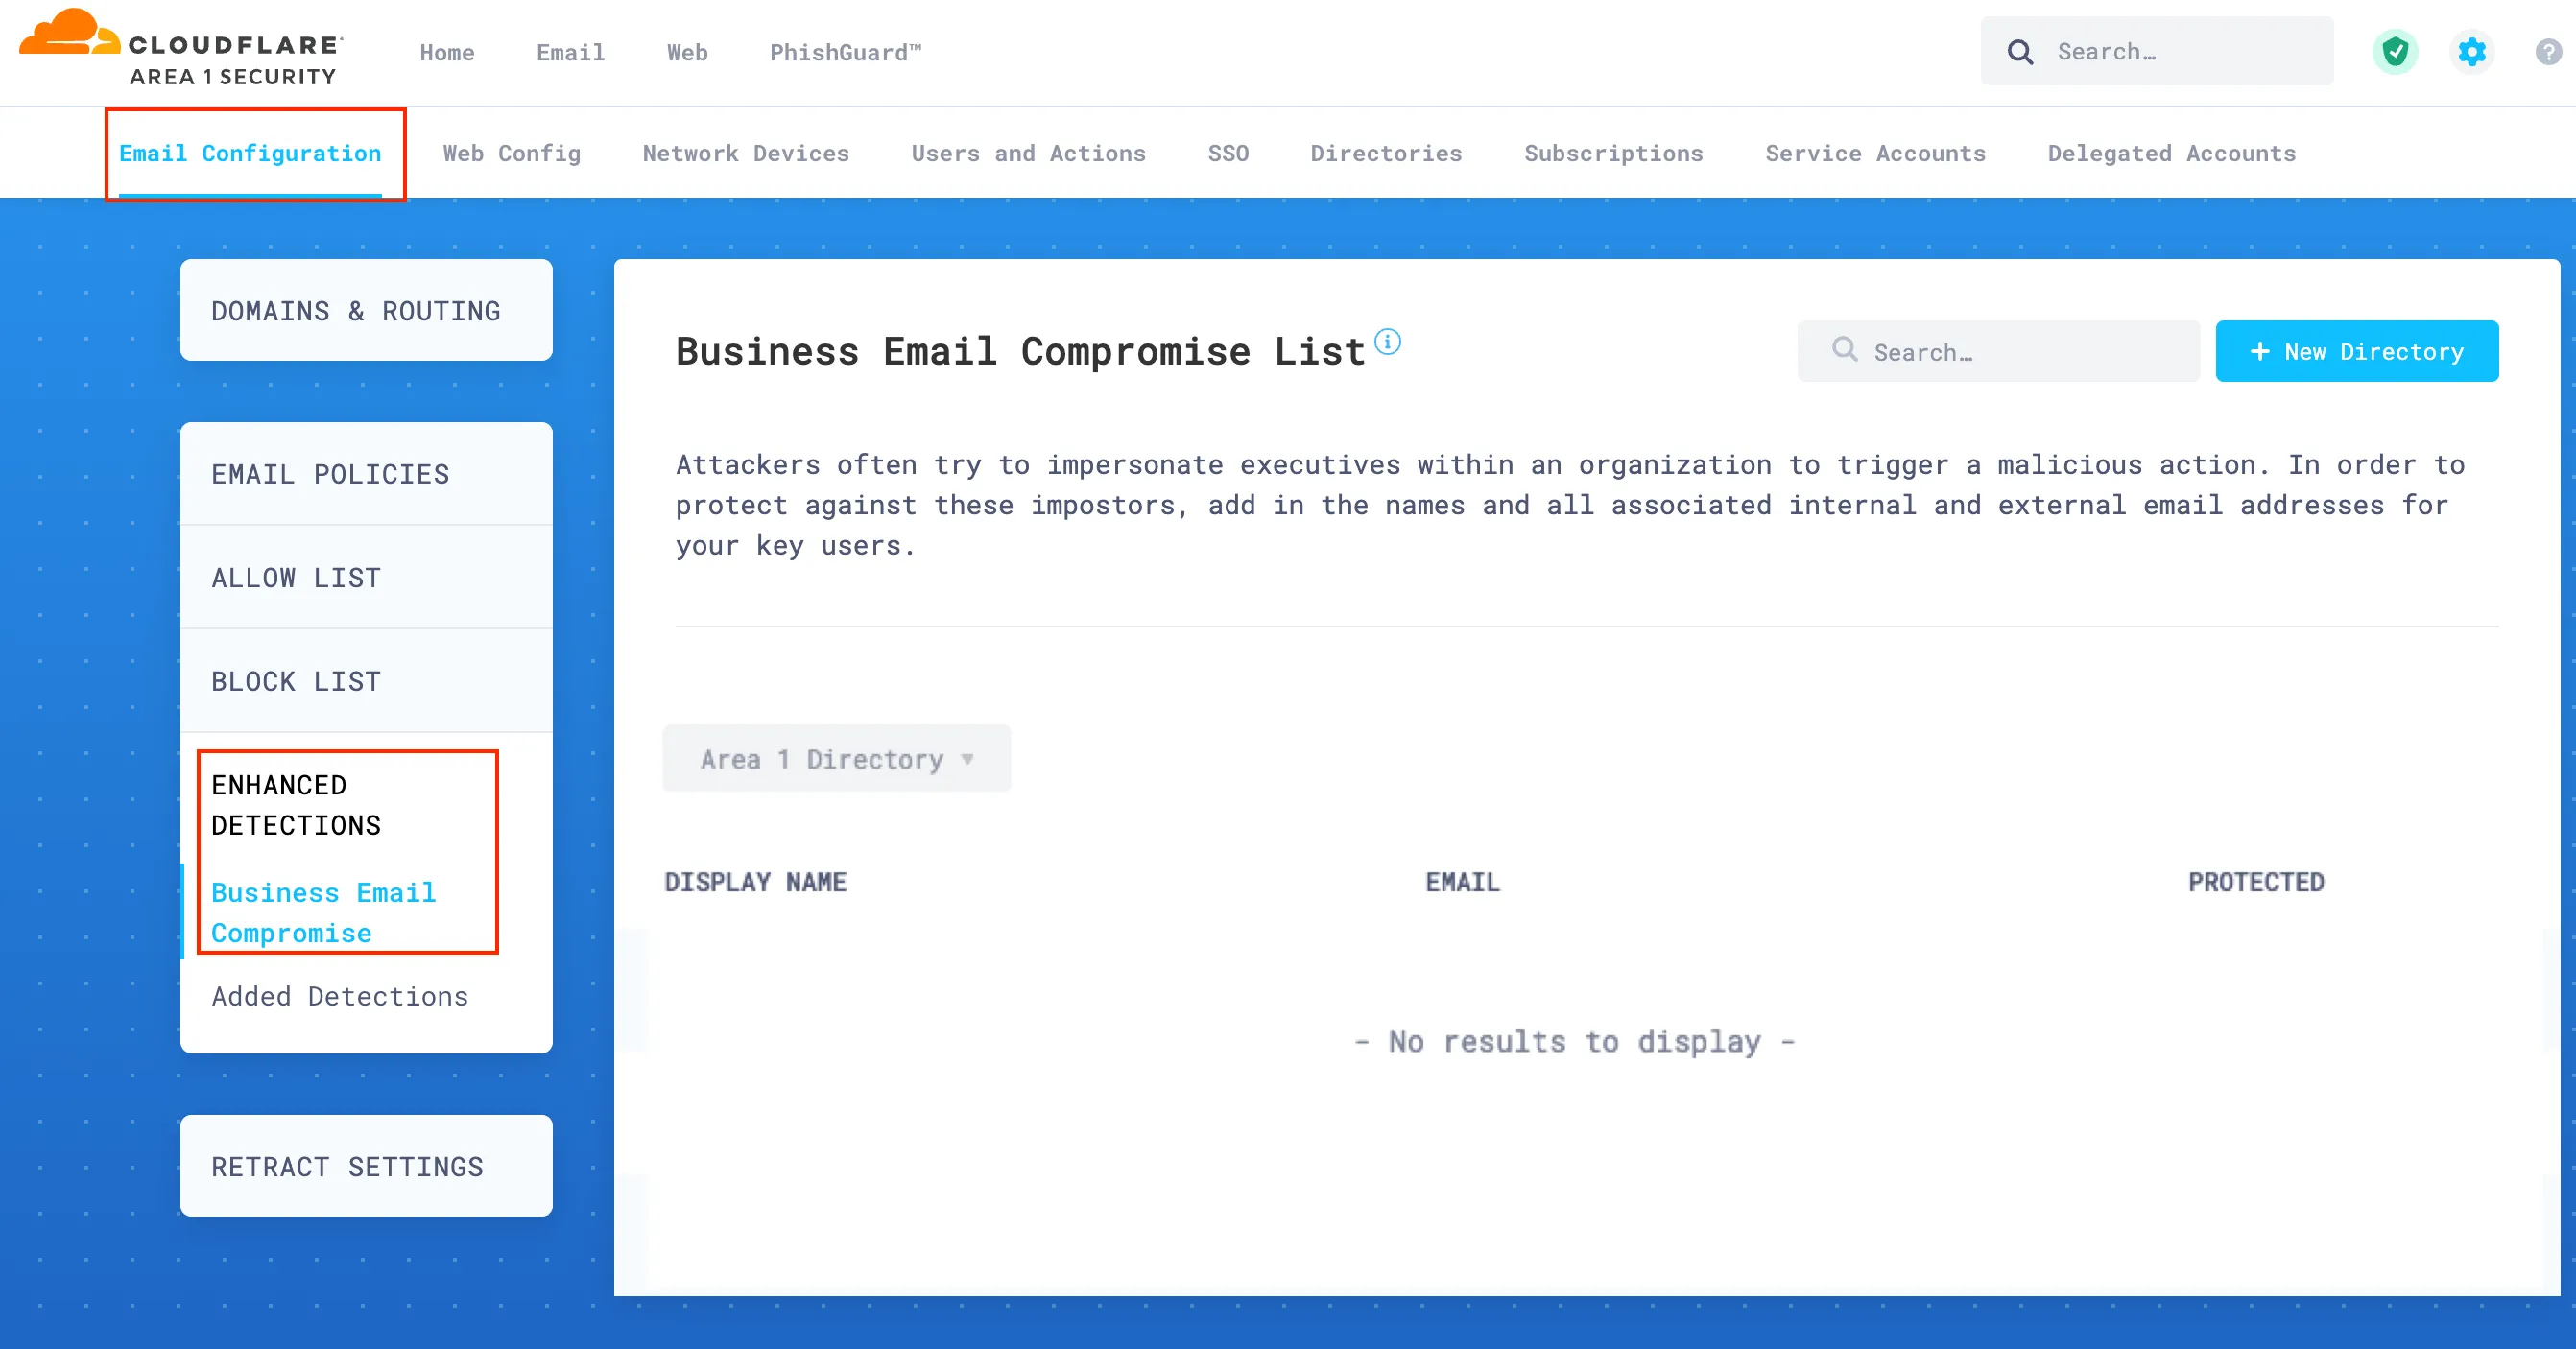
Log in to the Email Security (formerly Area 1) dashboard ↗, and select Settings (the gear icon).
-
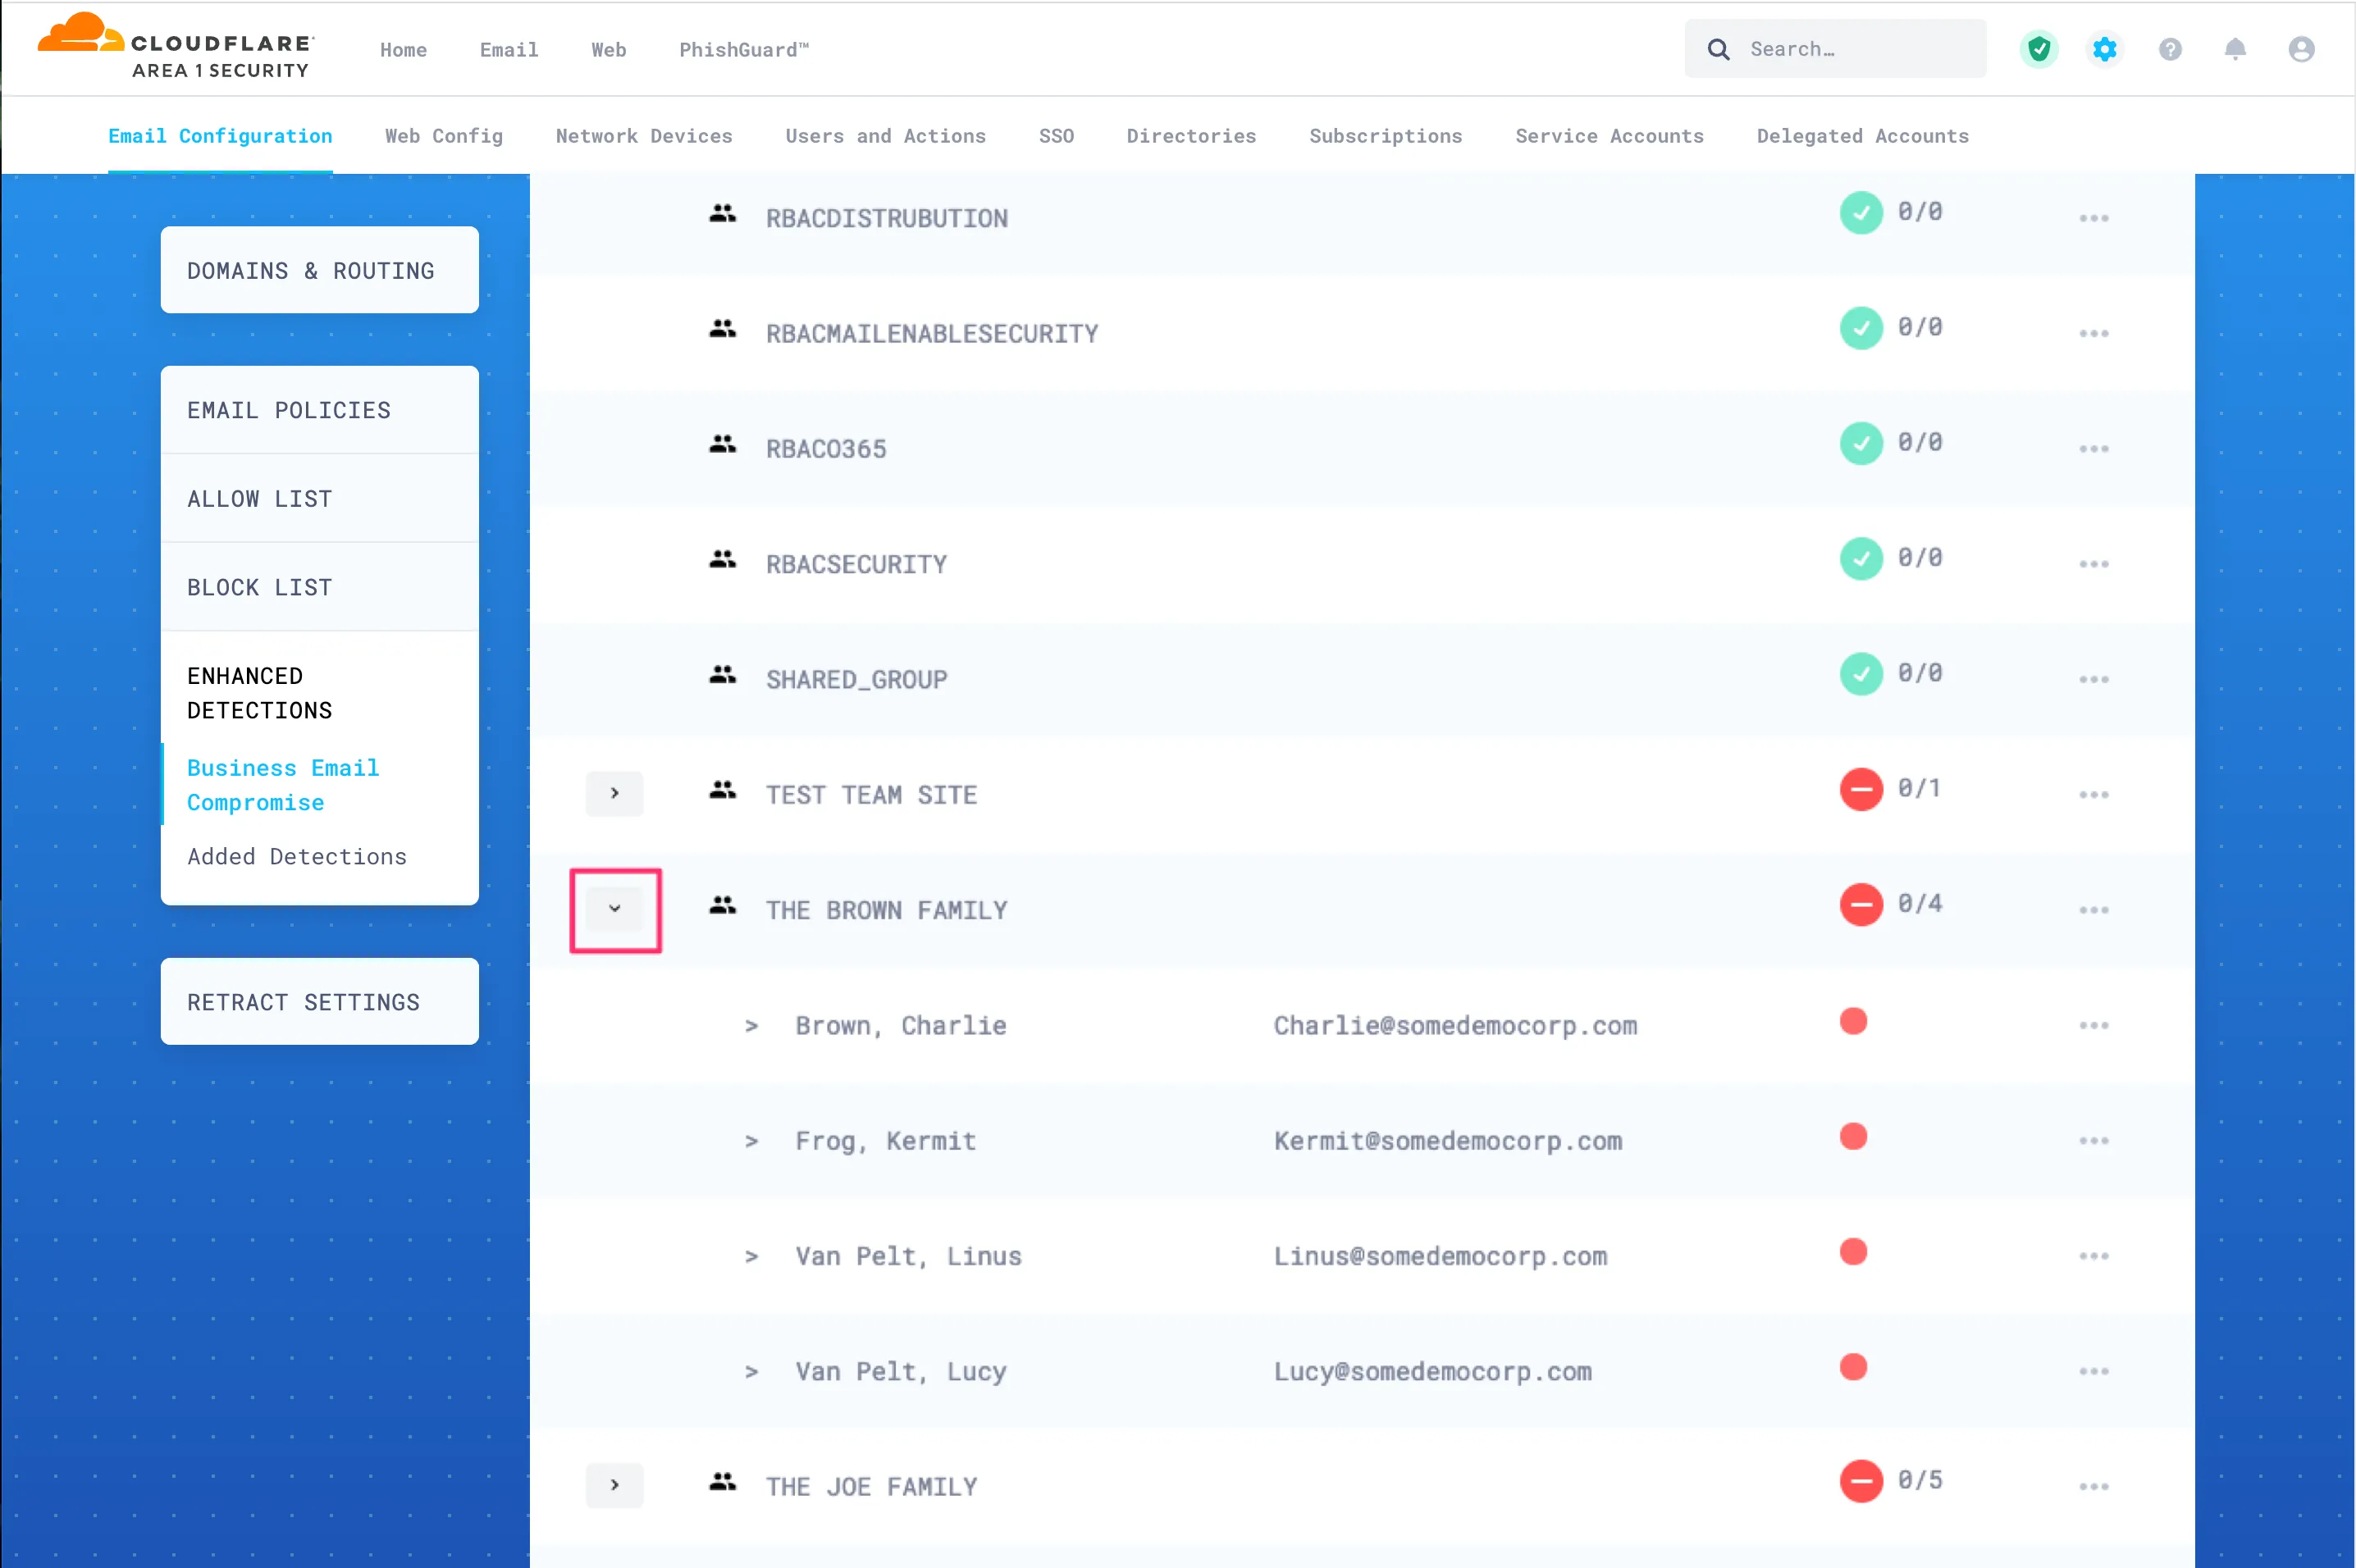
Go to Email Configuration > Enhanced Detections > Business Email Compromise.
-
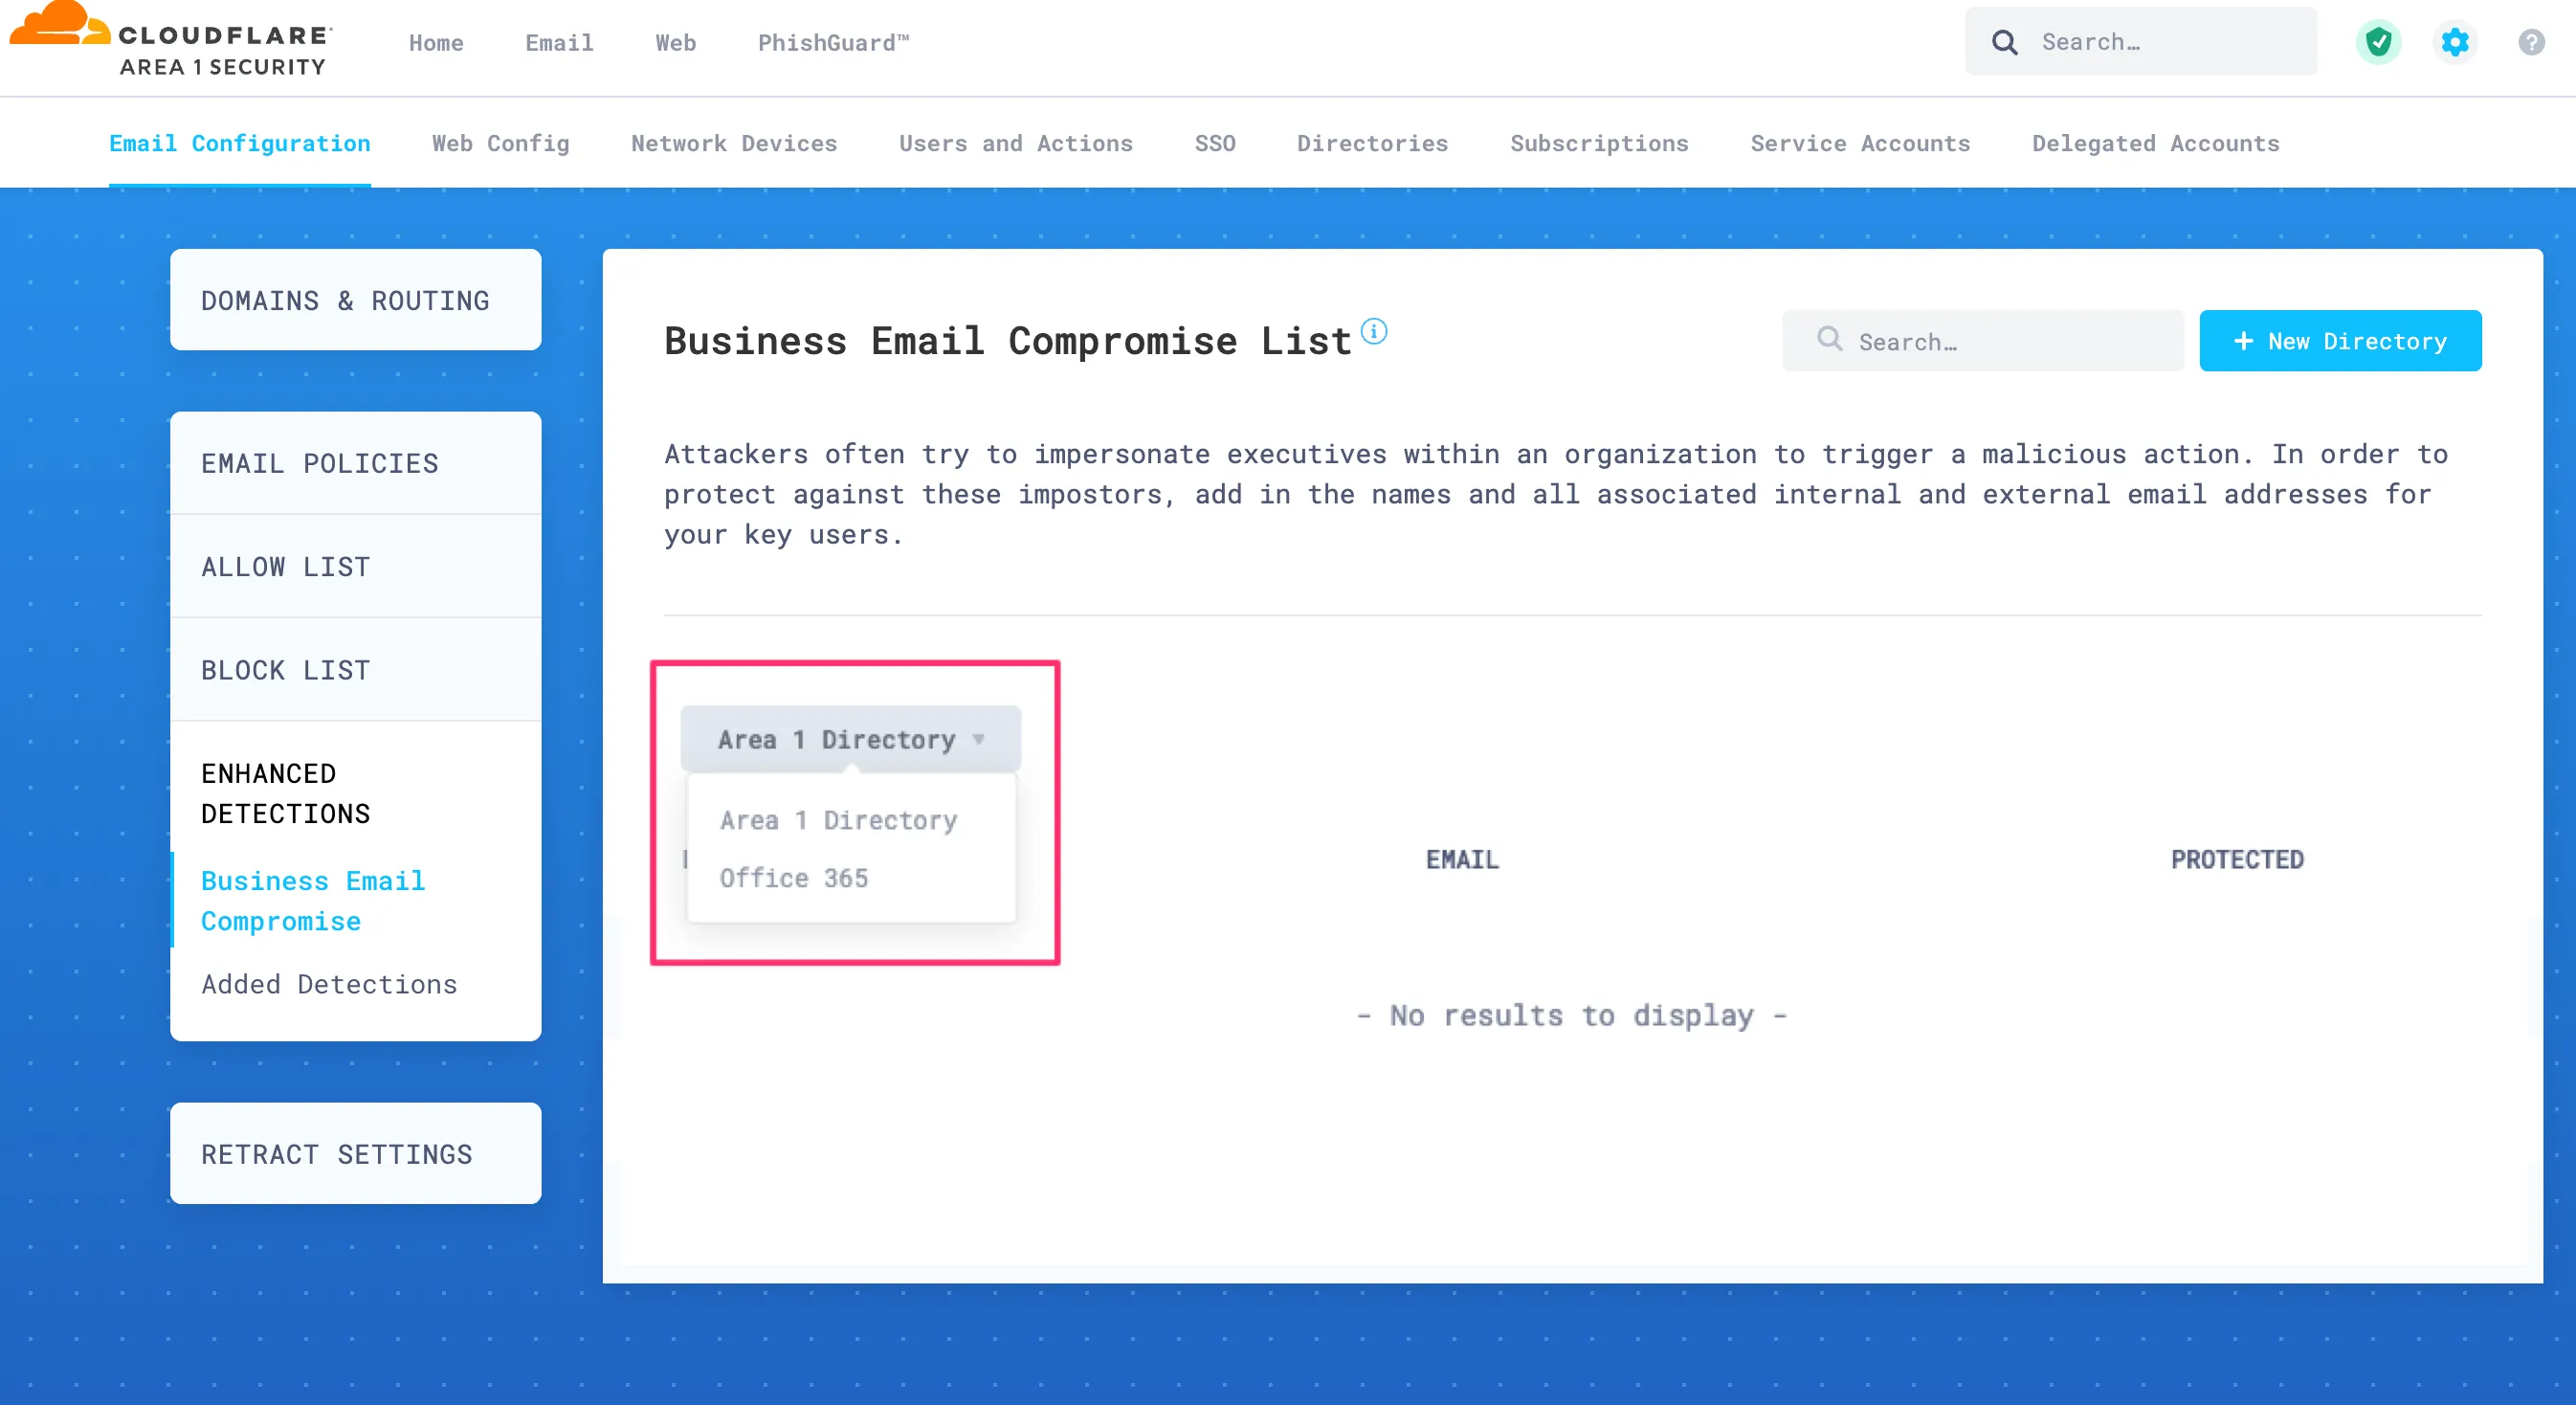
Open the drop-down menu and select the directory you have created in the previous step 3.
-
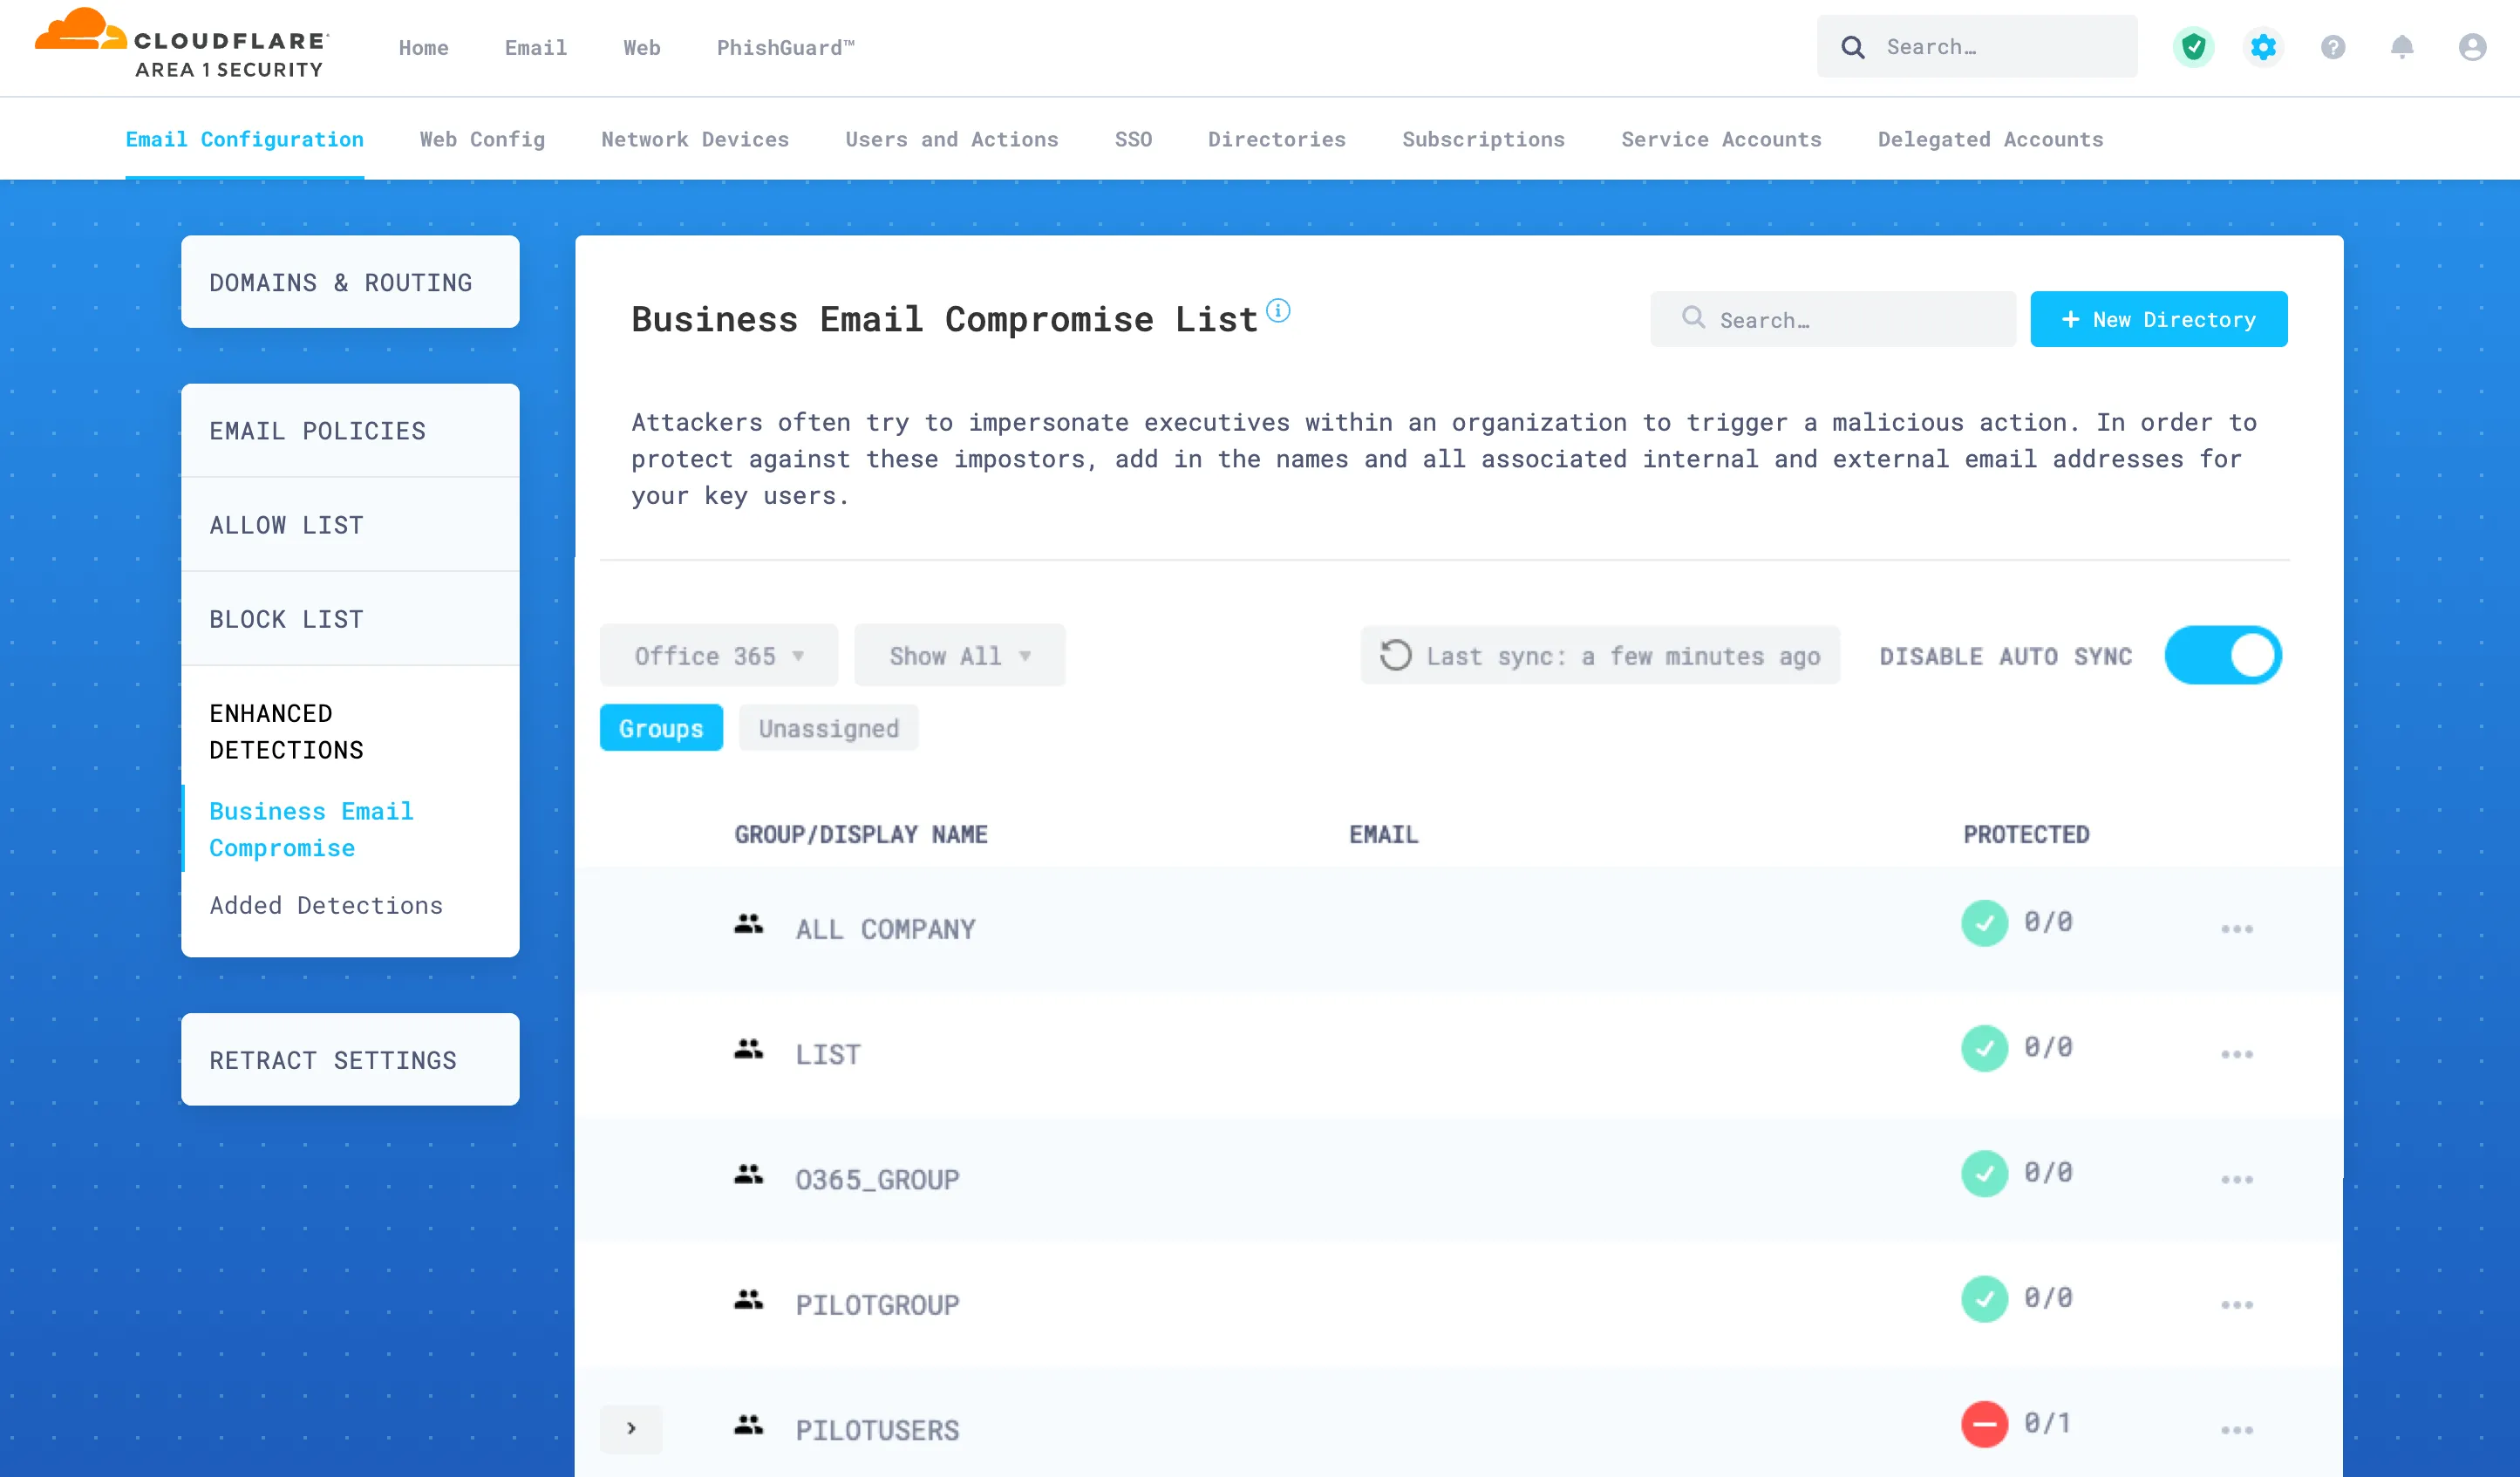
If the initial directory synchronization has completed, the page will refresh and list groups and users. If you do not see any information, wait a few minutes as the system completes processing the initial synchronization.
-
Select the arrow next to a group to expand it and show its members.
-
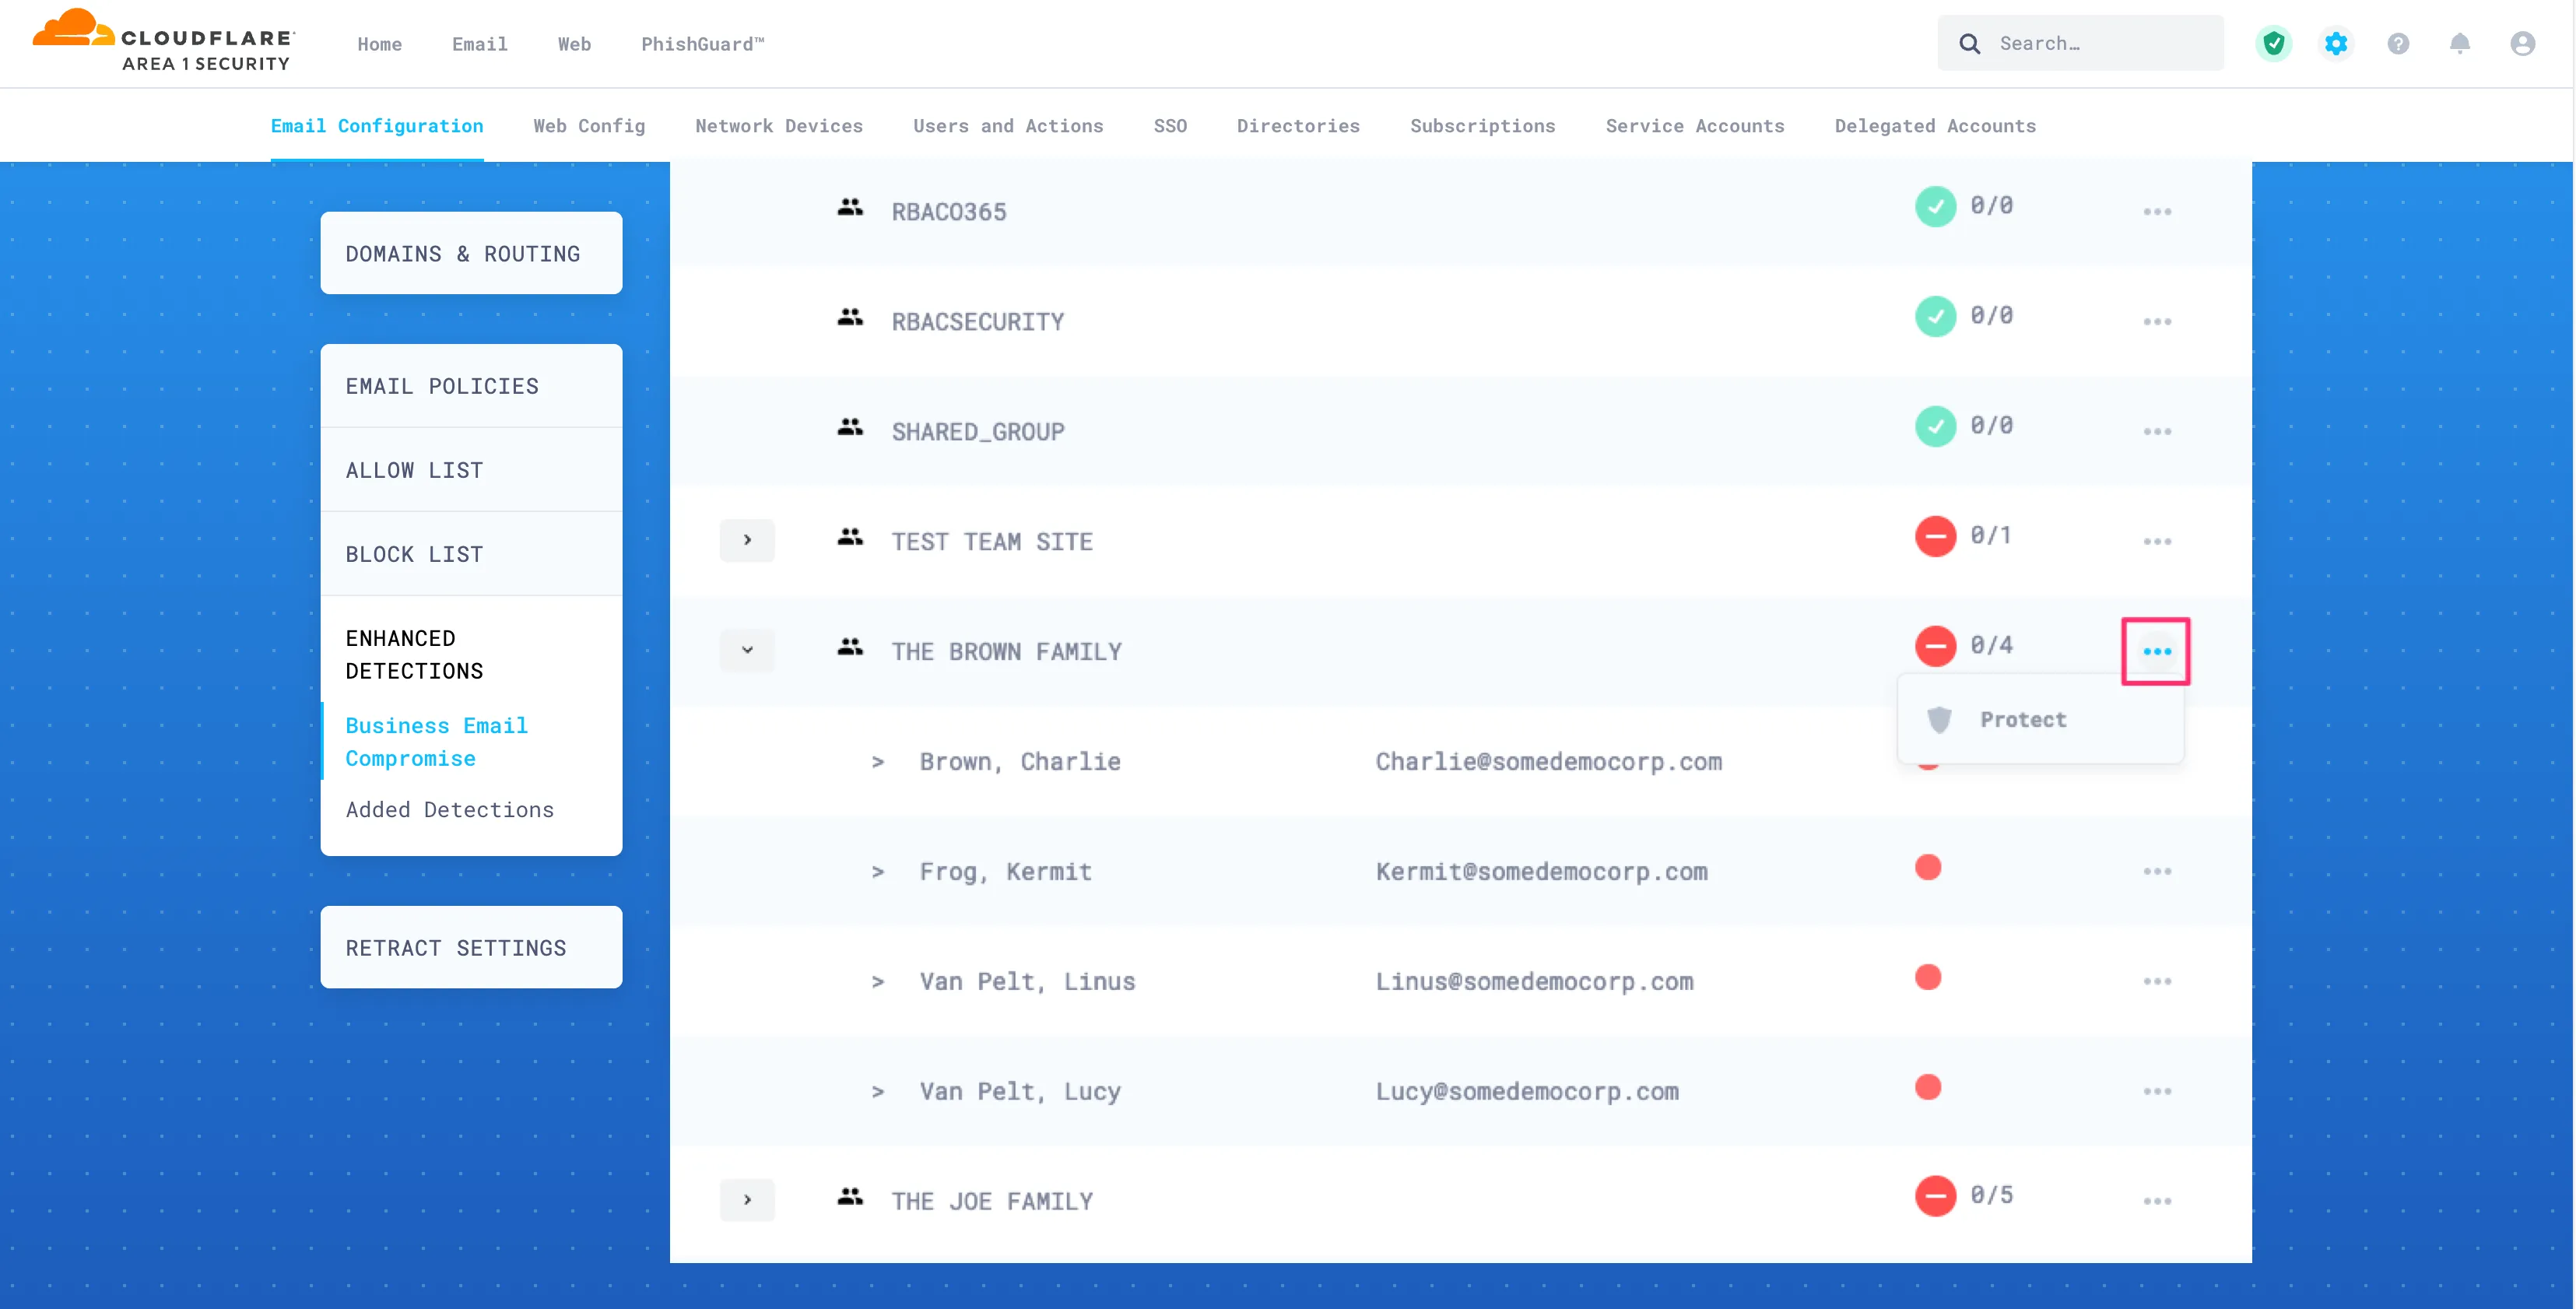
To protect an entire group, select the three-dots button next to it, and then select Protect. When you protect a group, all of its members will be automatically protected. The protection markers will turn green to indicate that protection is active.
-
You can also protect individual users. Select the three-dots button next to each user you want to protect, and then select Protect.
When the Business Email Compromise list is configured, Email Security (formerly Area 1) will enforce the proper match of the sender’s display name and email address. Any variation from this strict requirement will raise a detection event. The reason of detection will be Protected Name <NAME> should not appear as <non-configured email address>.
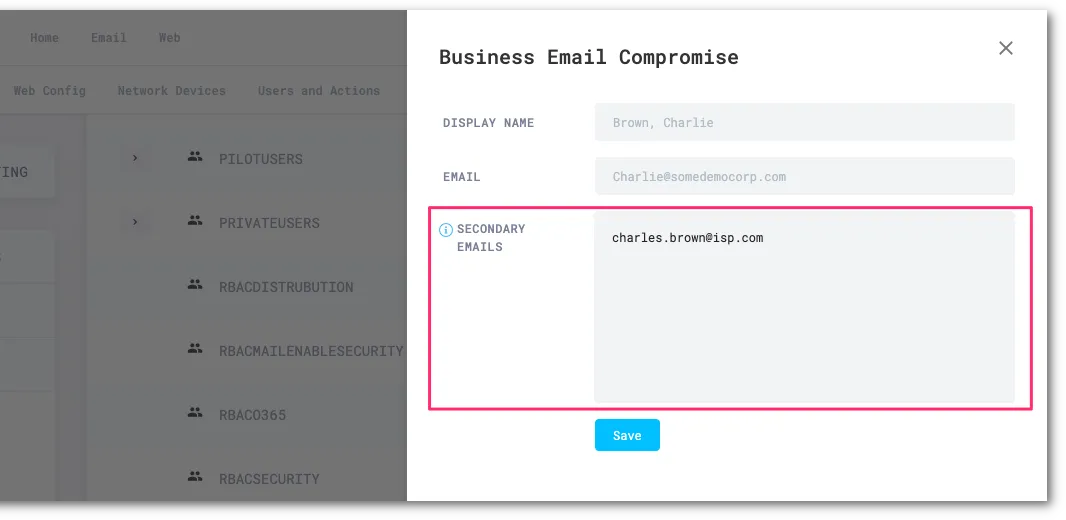
In some instances, you may want to allow your protected users to send emails from an alternate email address (like their personal email address). To configure this alternate address, you will have to add it to their directory entry.
-
Log in to the Email Security (formerly Area 1) dashboard ↗, and select Settings (the gear icon).
-
Go to Email Configuration > Enhanced Detections > Business Email Compromise.
-
Search for the user you want to allow an alternate email address.
-
Select the three-dots button > Edit.

-
In Secondary Emails add the additional email addresses. Place each entry on a new line.
-
Select Save to finish.