Office 365 リトラクション
このチュートリアルでは、Microsoft Office 365 のメールリトラクションを設定する方法を学びます。
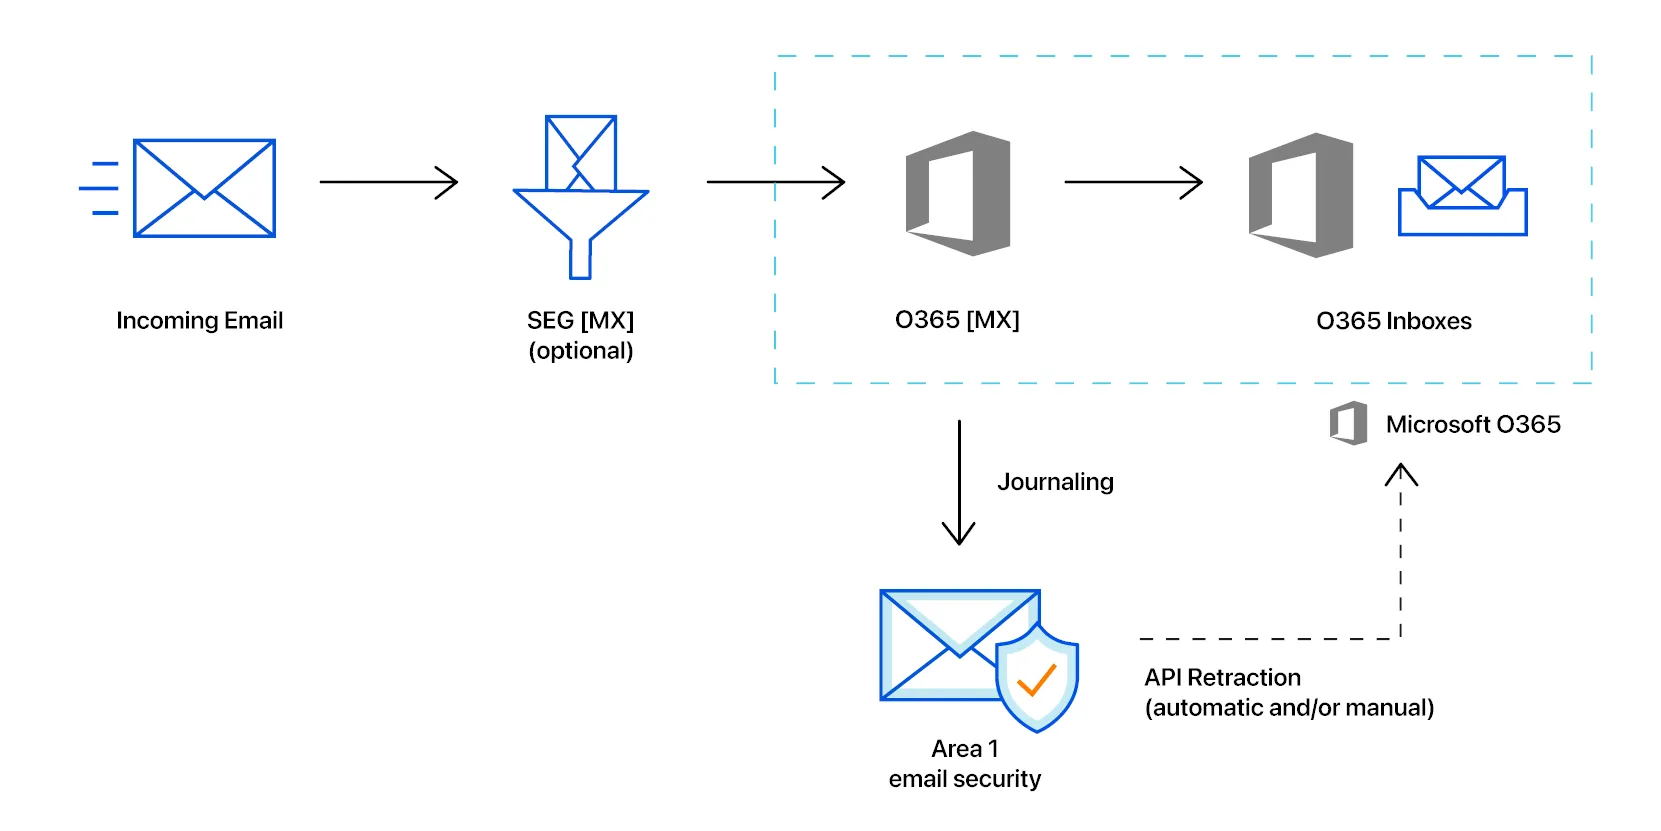
メッセージのリトラクションを成功させるためには、メールセキュリティが Office 365 Graph API アーキテクチャに API コールを行うための認証が必要です。メールセキュリティを認証するために使用するアカウントには、Privileged role admin の役割が必要です。
Office 365 コンソールでユーザーの役割を割り当てる際には、これらの役割は User permissions > Roles configuration > Identity admin roles にあります。
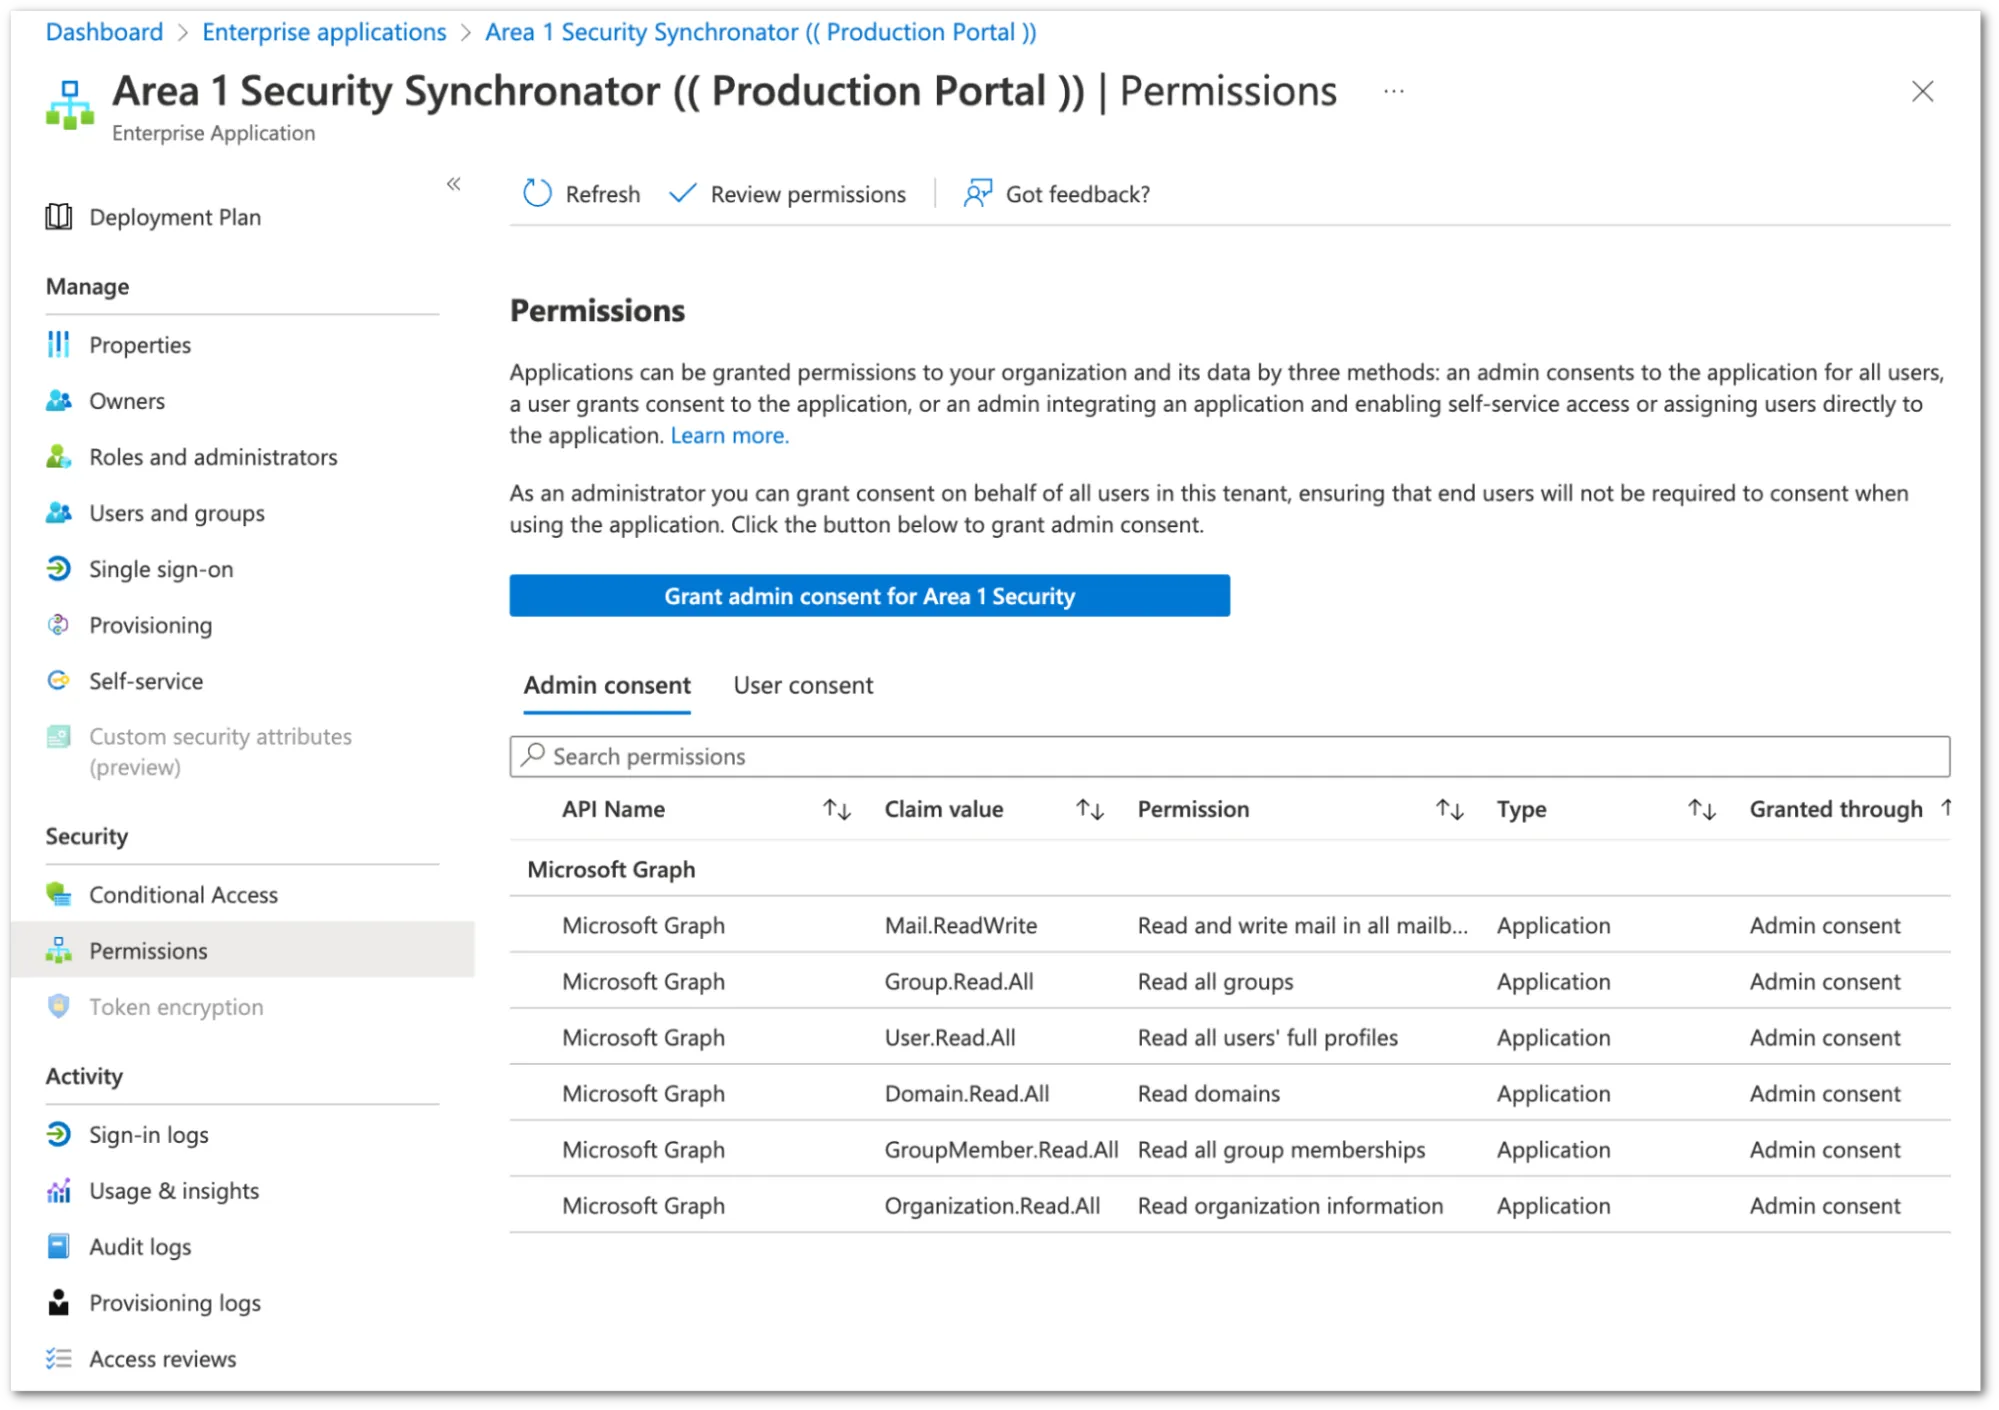
認証プロセスは、メールセキュリティに機能するために必要な最小限の権限で Azure 環境へのアクセスを付与します。メールセキュリティが登録するエンタープライズアプリケーション(メールセキュリティシンクロナイター)は、管理者アカウントに結びついていません。Azure Active Directory 管理センター内で、エンタープライズアプリケーションセクションでアプリケーションに付与された権限を確認できます。
-
メールセキュリティダッシュボード ↗にログインし、設定(ギアアイコン)を選択します。
-
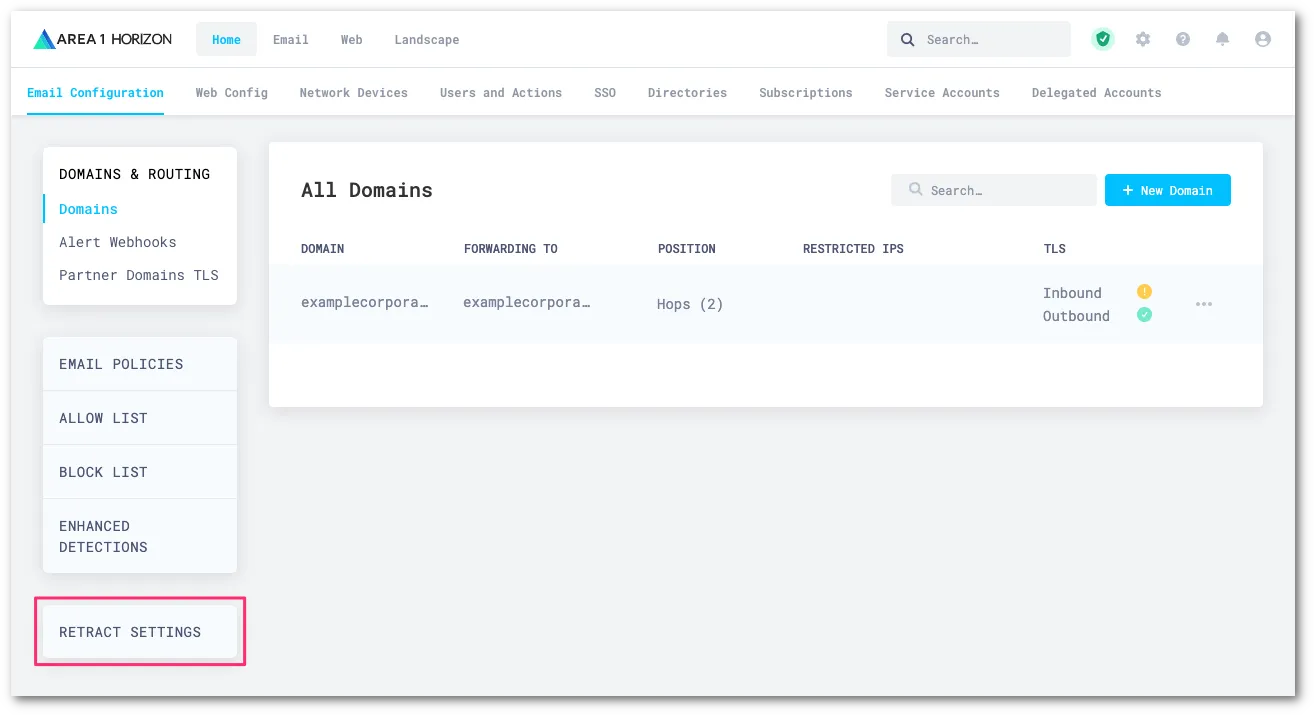
メール設定 > リトラクション設定に移動します。
-
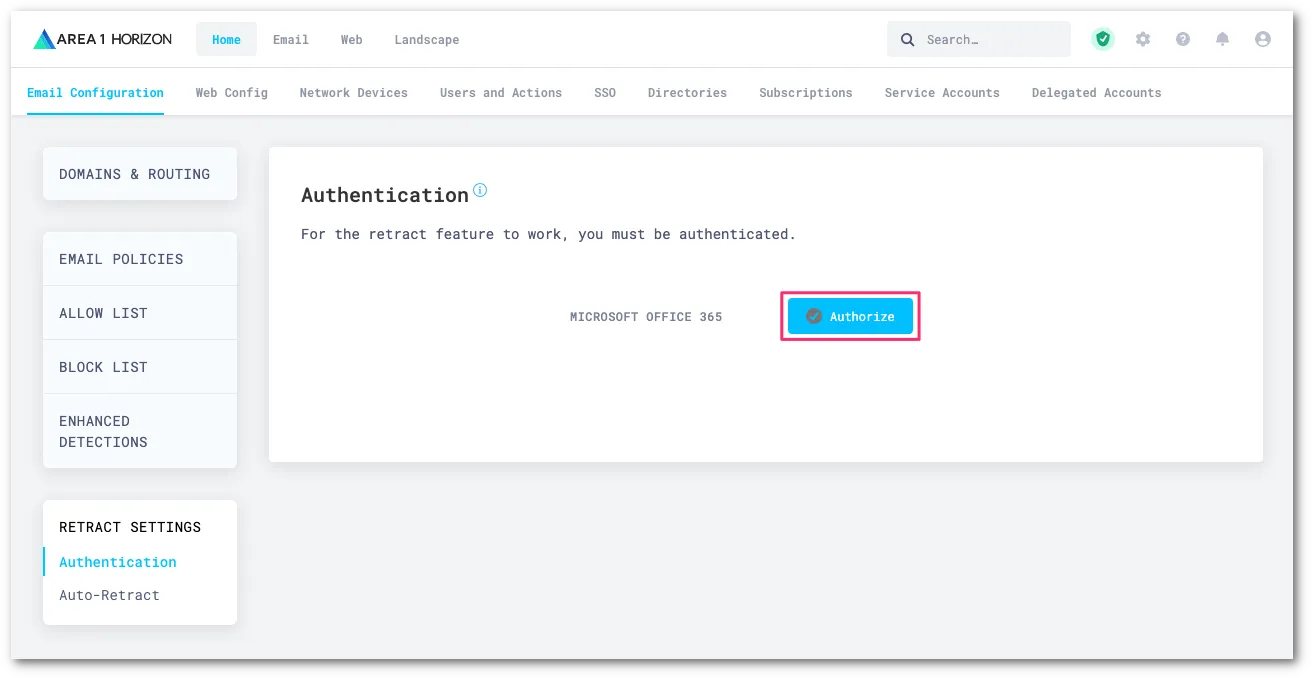
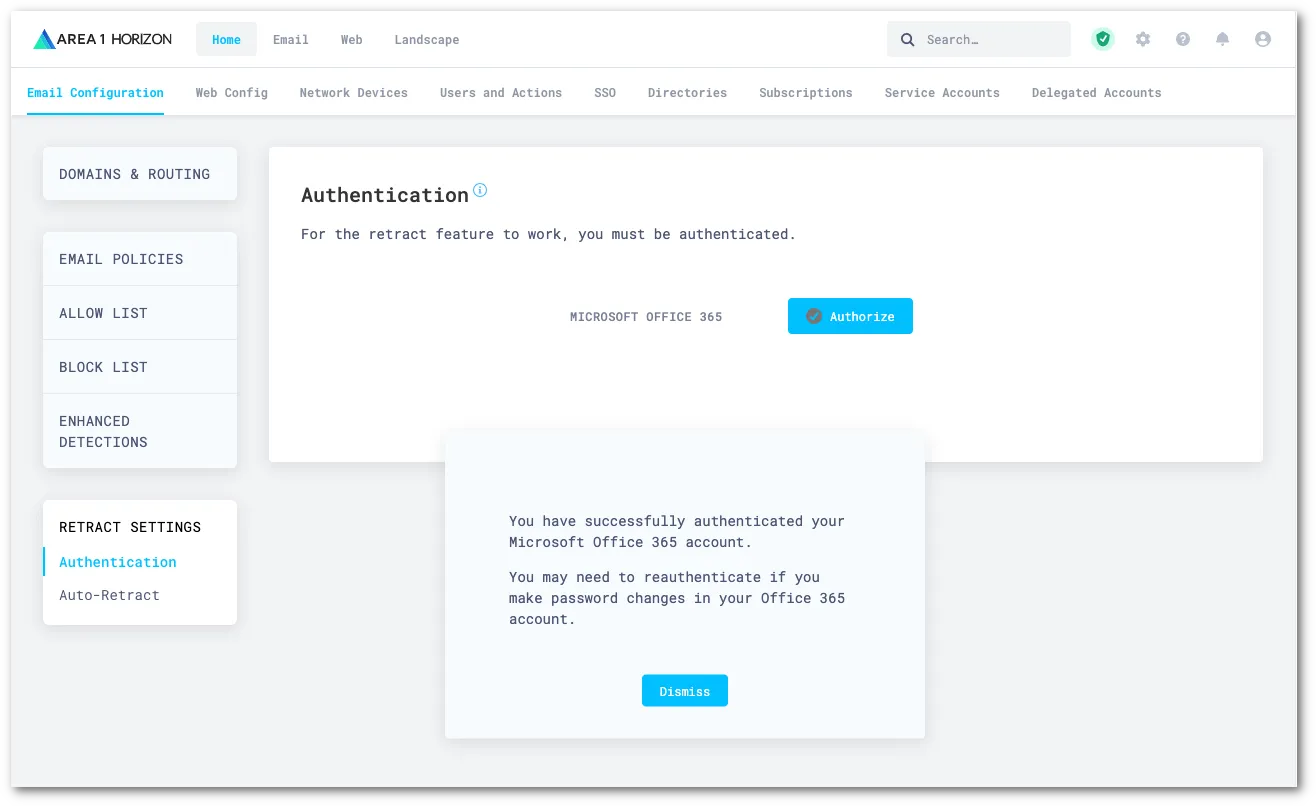
Office 365 の Graph API を通じてリトラクションを実行するために、メールセキュリティを認証する必要があります。認証に使用するアカウントに適切な管理者役割が割り当てられていることを確認してください。認証を選択してプロセスを開始します。
-
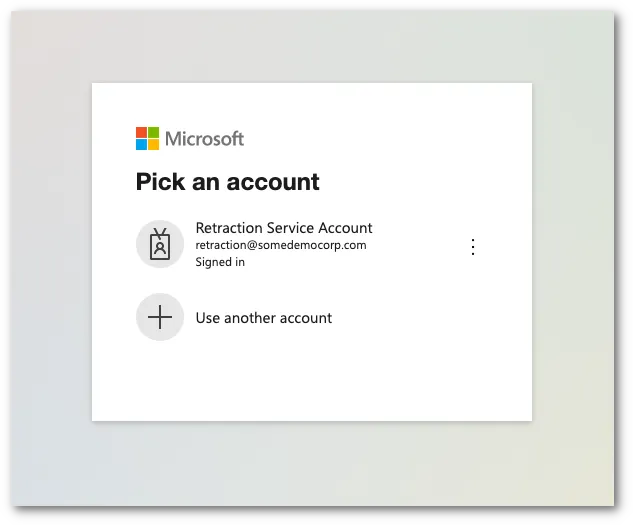
メールセキュリティダッシュボードは、Microsoft のログインページにリダイレクトします。適切なアカウントを選択または入力して認証プロセスを開始します。
-
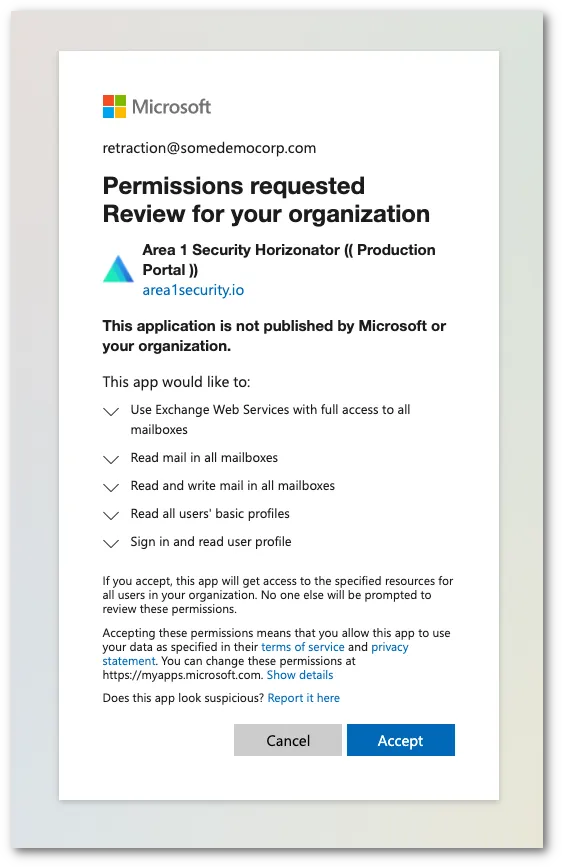
認証が完了すると、システムは要求された権限のリストを含むダイアログボックスを表示します。承認を選択して変更を認証します。
-
認証が完了すると、自動的にメールセキュリティダッシュボードにリダイレクトされ、認証が成功したことを通知するメッセージが表示されます。閉じるを選択して通知を消去します。
You can set up auto-retraction to automatically move messages matching certain dispositions to specific folders within a user’s mailbox.
To set up automatic retraction:
-
Log in to the Email Security (formerly Area 1) dashboard ↗.
-
Go to Settings (the gear icon).
-
On Email Configuration, go to Retract Settings > Auto-Retract.
-
Select Edit.
-
For each disposition, choose which folder the message should be sent to:
- No Action: Do not move the message.
- Junk Email: Sends the message to the junk or spam email folder.
- Trash: Sends the message to the trash or deleted items email folder.
- Soft Delete — user recoverable (Microsoft only): Sends the message to the user’s Deleted Items folder. Messages can be recovered by the user.
- Hard Delete — admin recoverable: Completely deletes messages from a user’s inbox. Office 365 メッセージは、eDiscovery 機能または Exchange 管理センターを使用しない限り、回復できません。詳細については、[ハード削除されたメッセージを回復する](#recover-hard-deleted-messages)を参照してください。
-
Select Update Auto-retract Settings.
Email Security (formerly Area 1) is continuously gathering new information about phishing campaigns. Users might have email messages in their inboxes that were scanned by Email Security (formerly Area 1) but not retracted initially because, at the time of scan, these email messages had not been identified as a threat. To mitigate risk, Email Security (formerly Area 1) offers you tools to re-evaluate email messages at a fixed time interval based on knowledge Cloudflare may have acquired since initial delivery. Any email messages that fit this new threat knowledge will be retracted.
You can enable two options:
- Post Delivery Response: Email Security (formerly Area 1) will continue to re-evaluate emails already delivered to your users’ inboxes at a fixed time interval in search for phishing sites or campaigns not previously known to Cloudflare. If any email messages fitting these new criteria are found, Email Security (formerly Area 1) retracts them.
- Phish Submission Response: Email Security (formerly Area 1) will retract emails already delivered that are reported by your users as phishing, and are found to be malicious by Email Security (formerly Area 1). Retraction will occur according to your configuration.
If your email architecture does not include an outbound gateway, you can skip this step and proceed to the next one.
On the other hand, if your email architecture requires outbound messages to traverse your email gateway, you may want to consider configuring a connector to send the journal messages directly to Email Security.
-
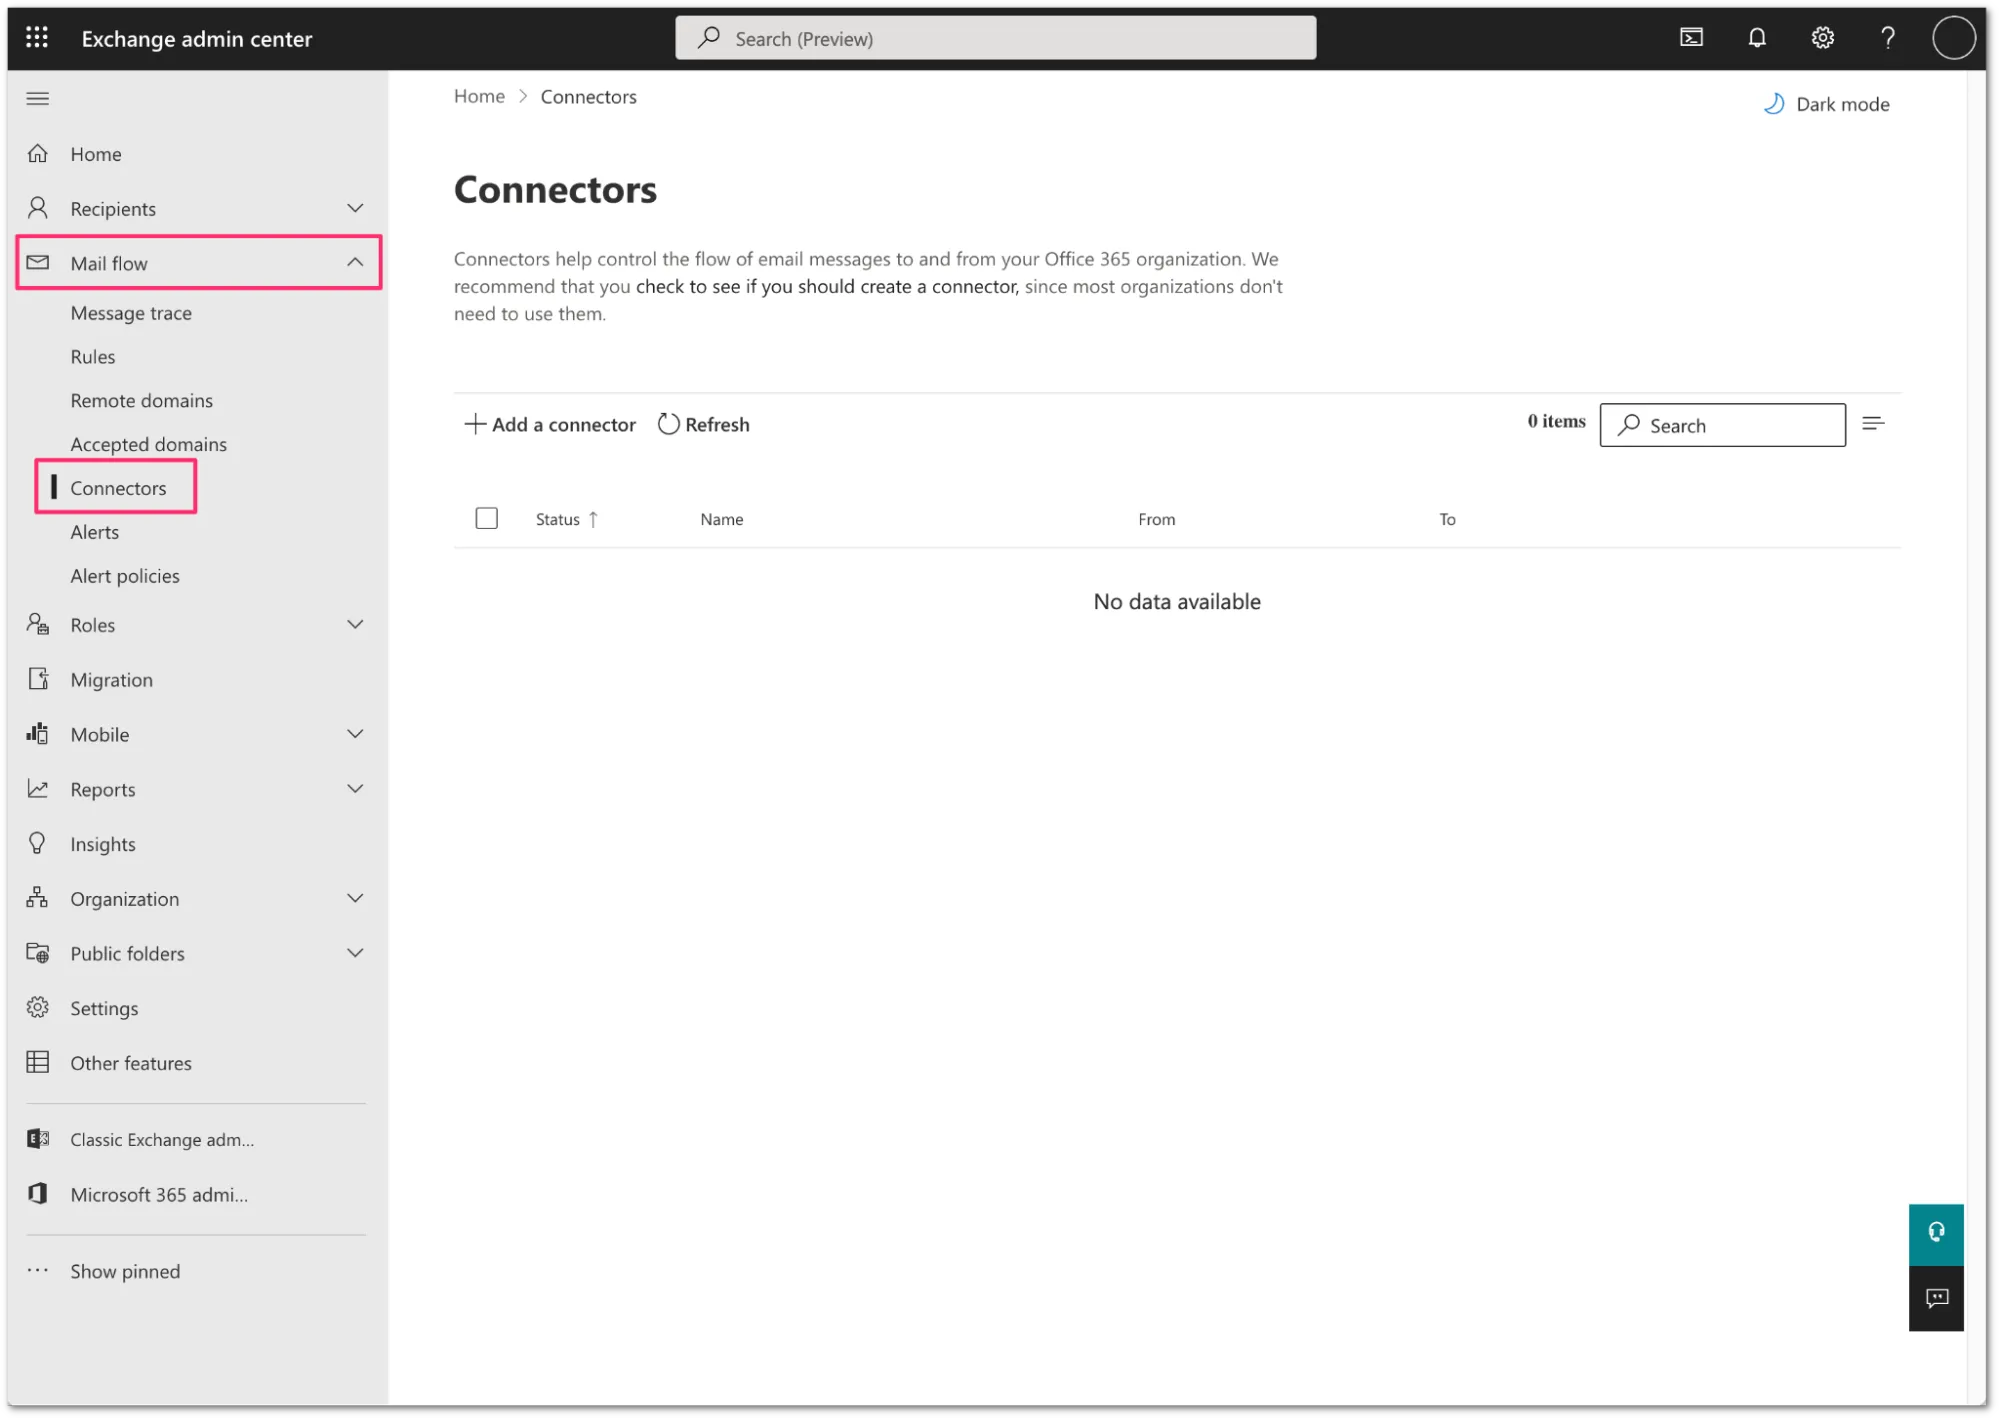
Log in to the Exchange admin center ↗, and go to Mail flow > Connectors.
-
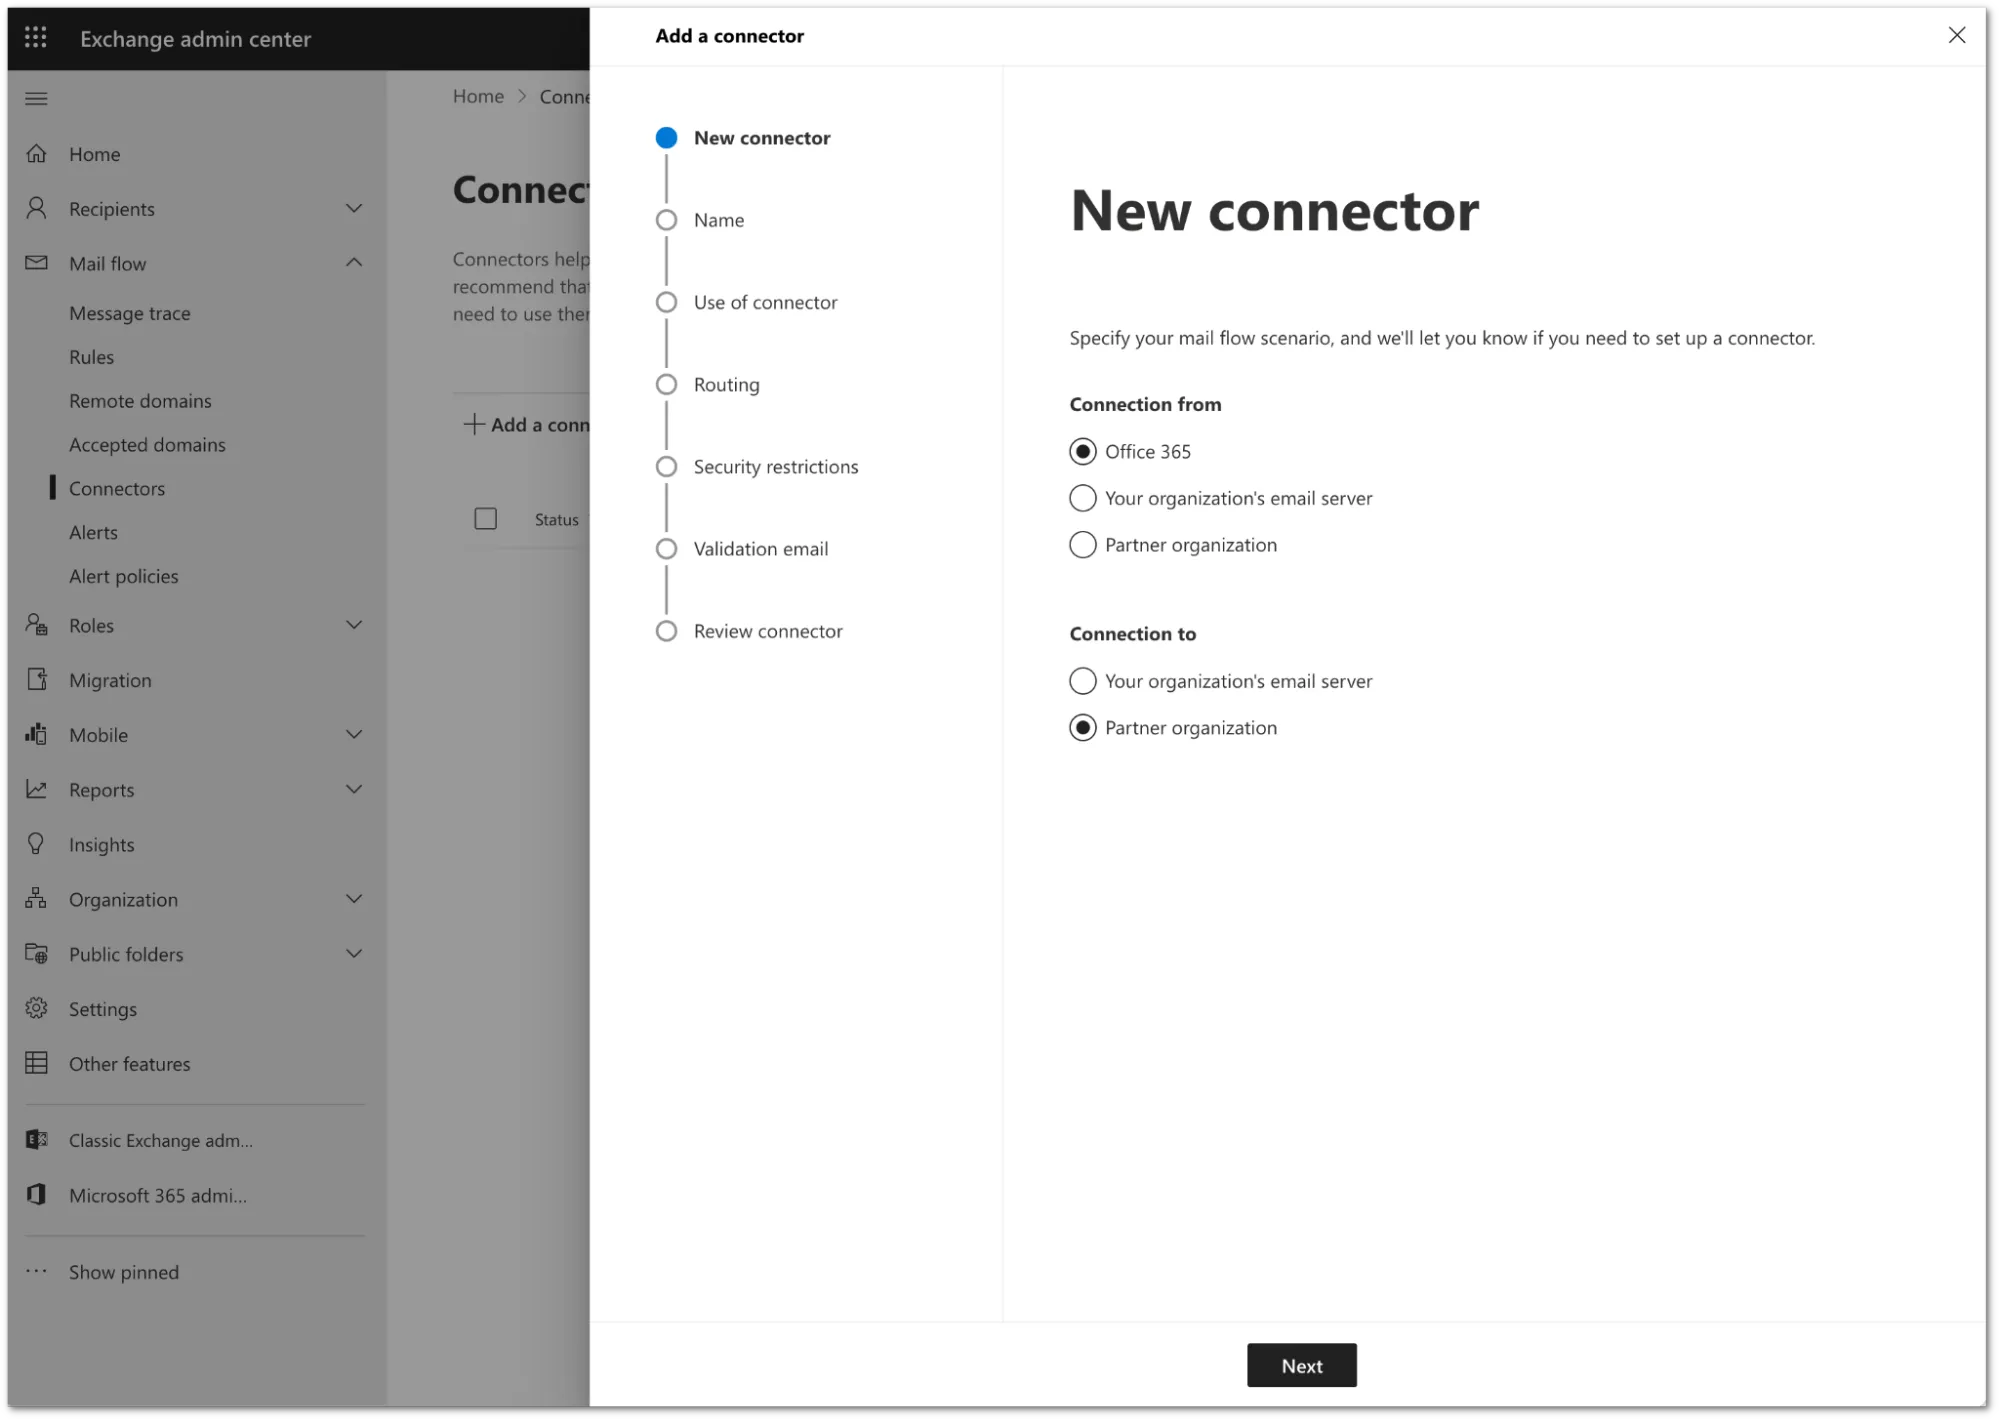
Select Add a connector.
-
Configure the new connector as follows:
- Connection From: Office 365
- Connection to: Partner Organization
-
Select Next.
-
Configure the connector as follows:
- Name:
Deliver journal directly to Area 1 - Description:
Deliver journal directly to Area 1 - Turn it on: Enabled.

- Name:
-
Select Next.
-
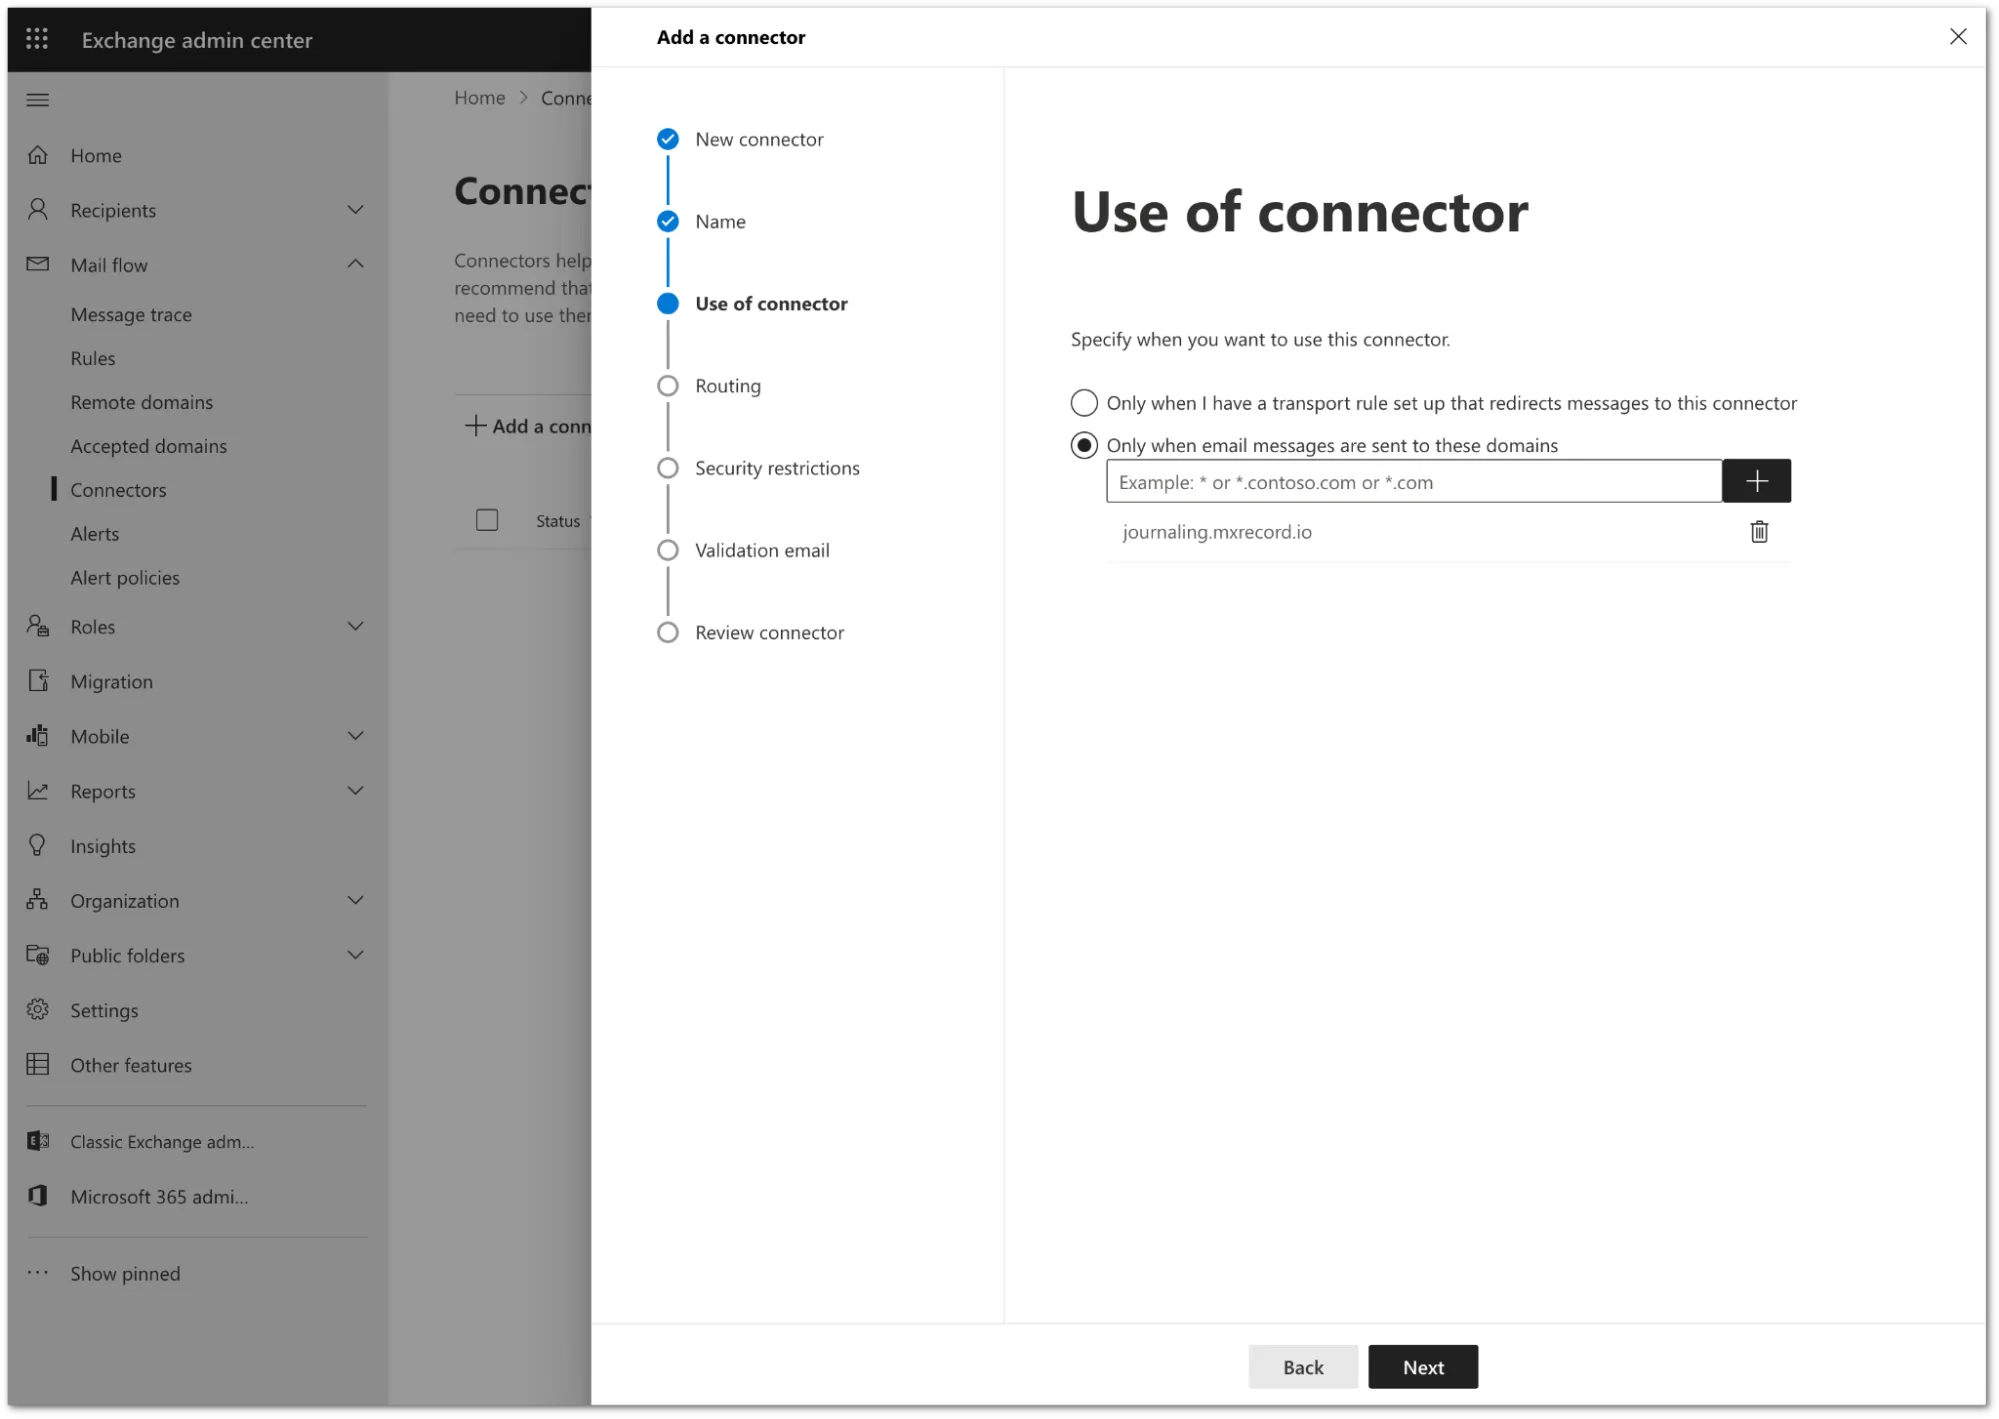
Configure the Use of connector setting as follows:
- Select Only when email messages are sent to these domains.
- In the text field, enter
journaling.mxrecord.ioas the host address, and select + to add the domain.
-
Select Next.
-
Configure the Routing setting as follows:
- Select Route email through these smart hosts.
- In the text field, enter
journaling.mxrecord.ioas the smart host ↗ address, and select + to add the domain.

-
Select Next.
-
In Security restrictions, you need to keep the default TLS configuration. Review the following settings:
- Make sure the Always use Transport Layer Security (TLS) to secure the connection (recommended) checkbox is selected.
- In Connect only if the recipients email server certificate matches this criteria select Issued by a trusted certificate authority (CA).

-
Select Next.
-
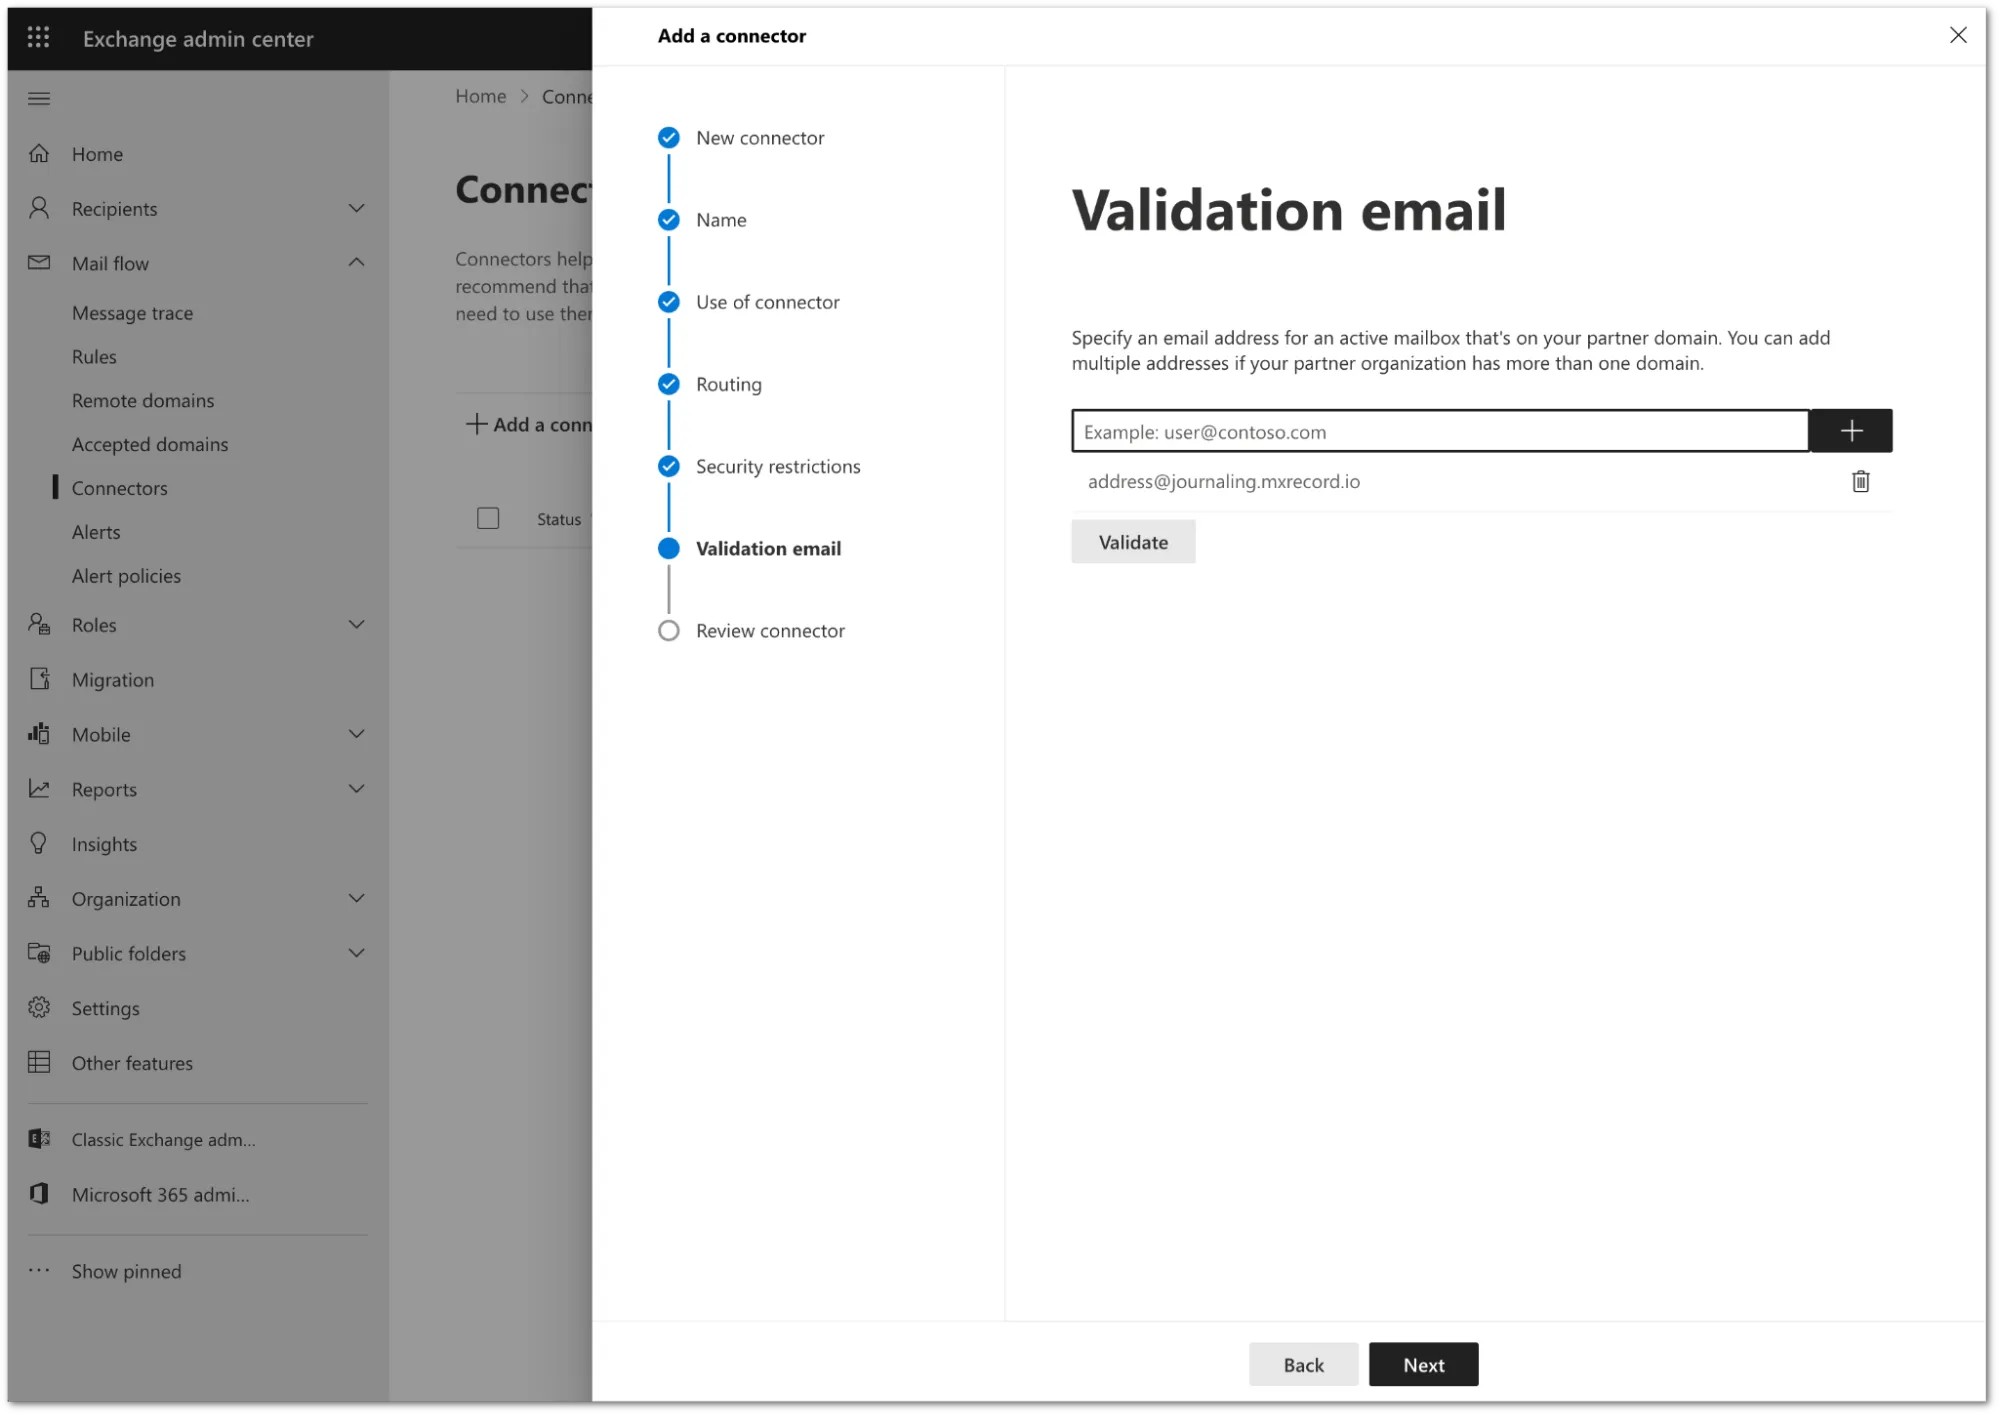
You need to validate the connector by using your tenant’s specific journaling address. To find this address, go to the Email Security dashboard ↗ > Support > Service Addresses page.
-
Add the address and select Validate.
-
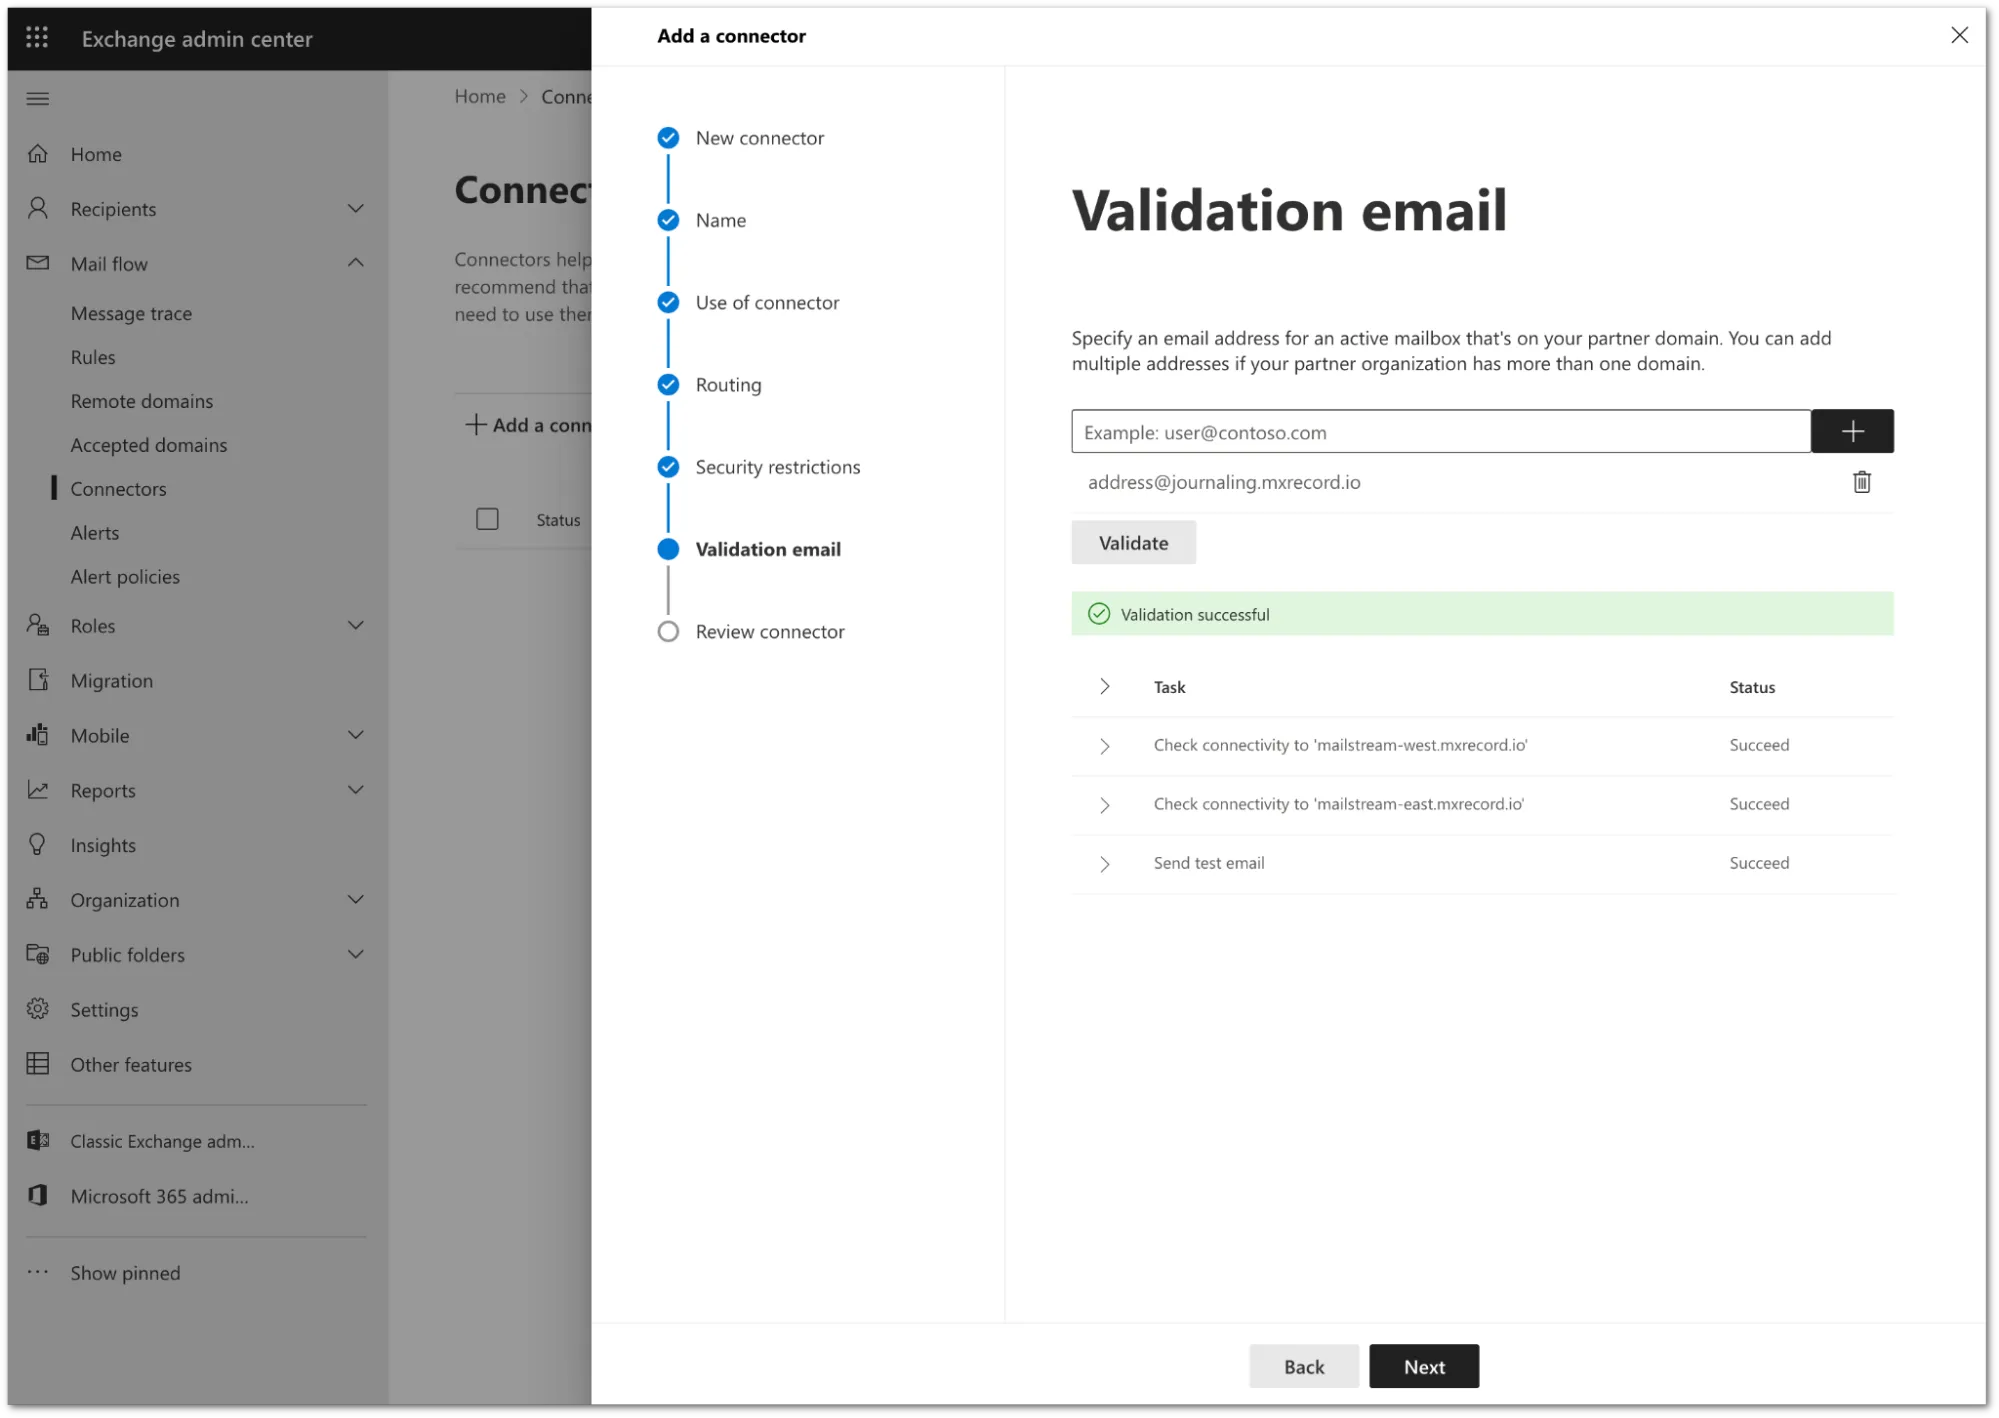
Once the validation completes, you should receive a Succeed status for all the tasks. Select Next.
-
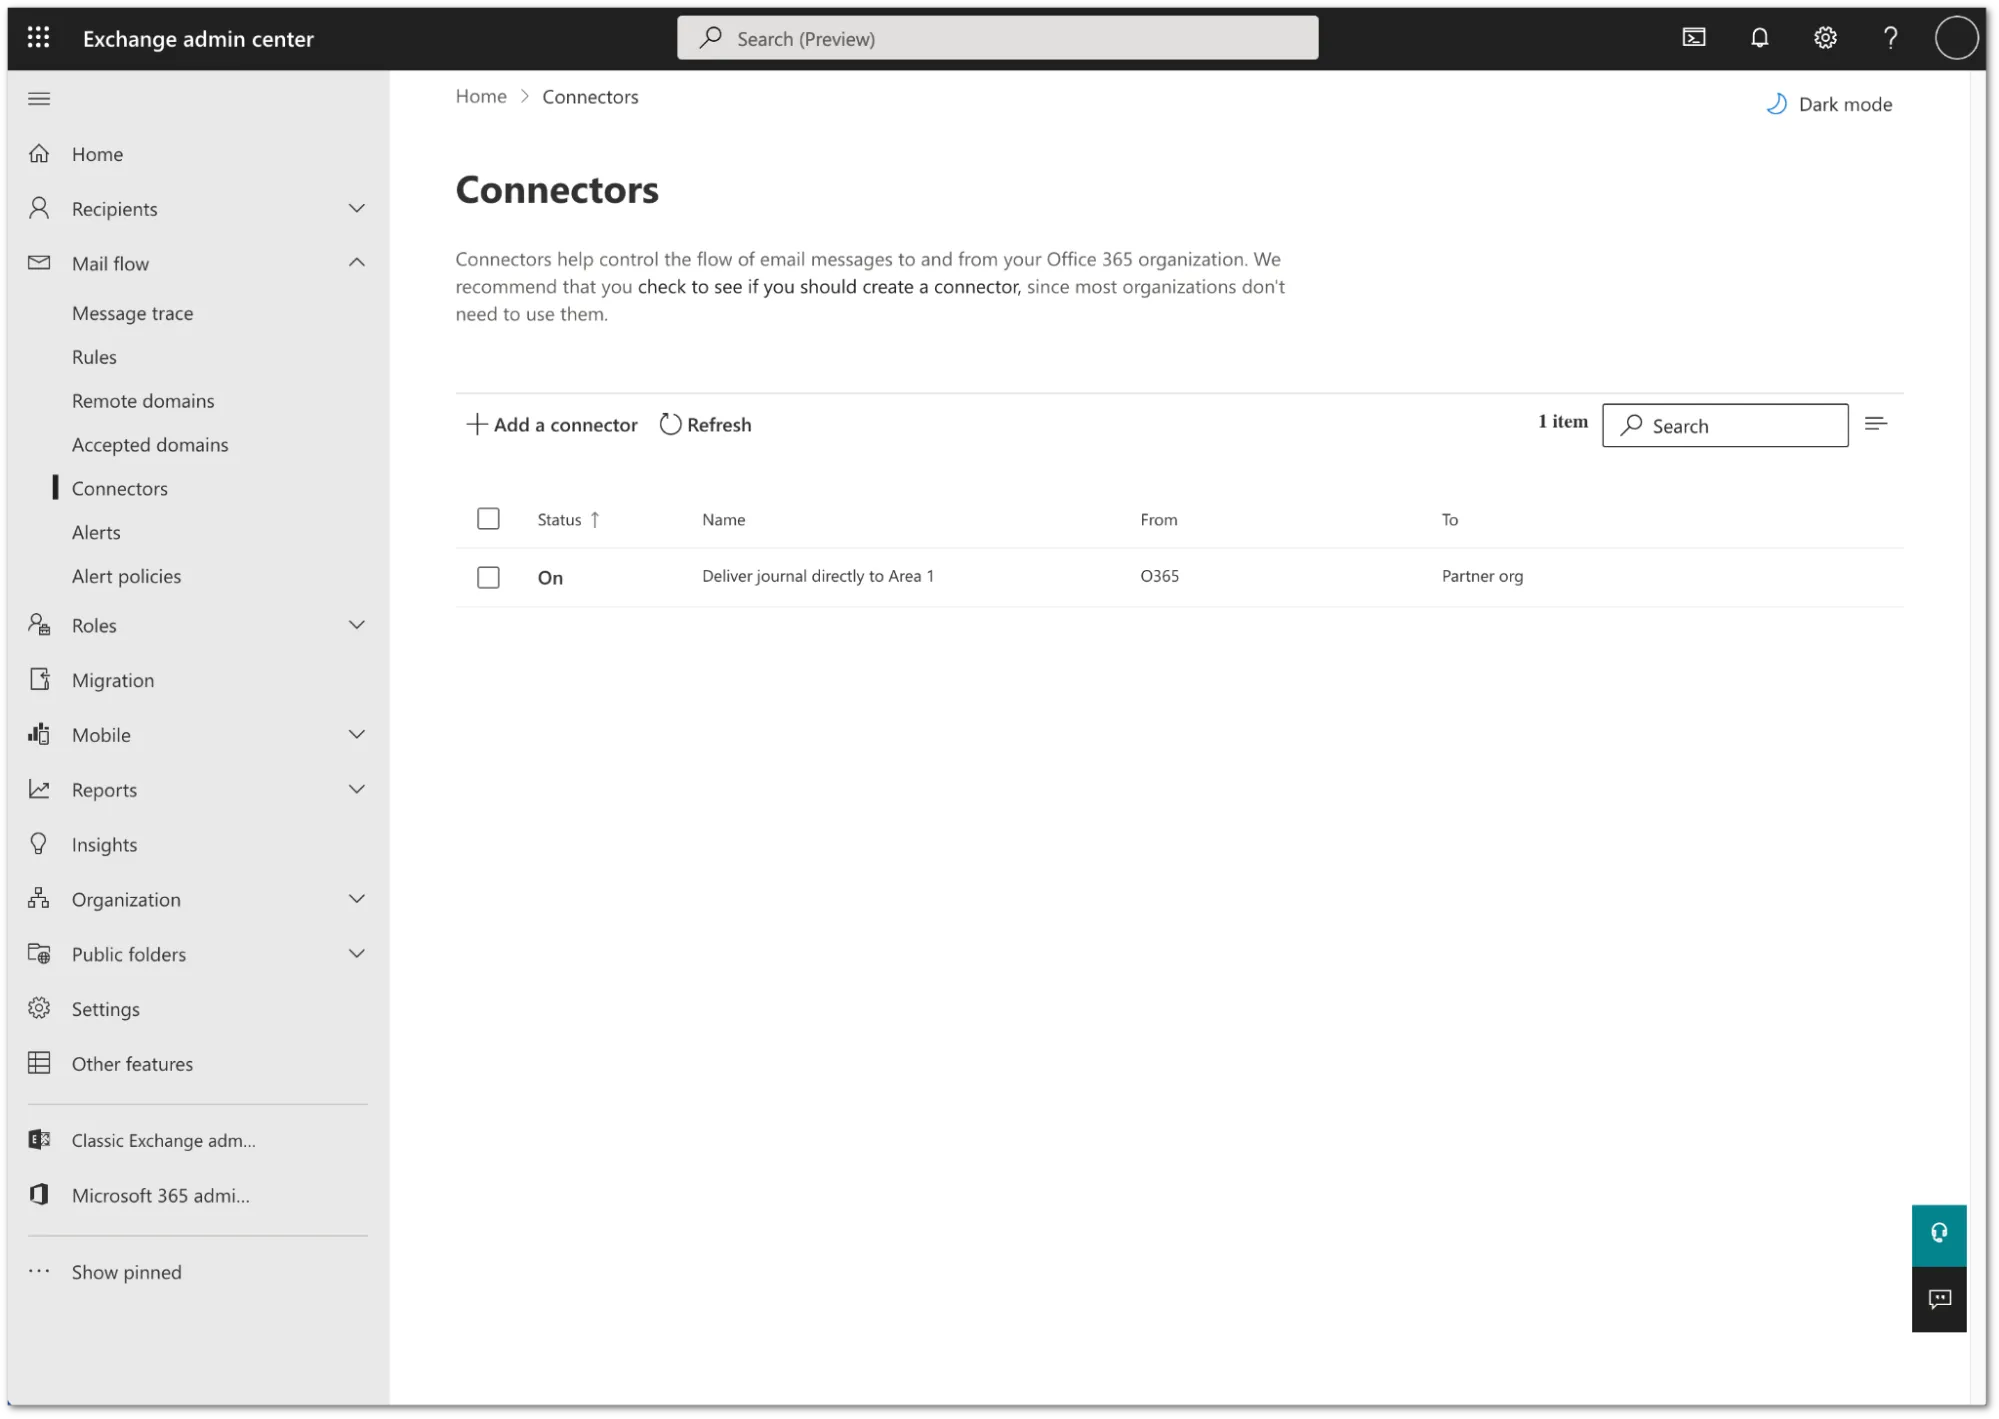
Review the configuration and select Create connector.
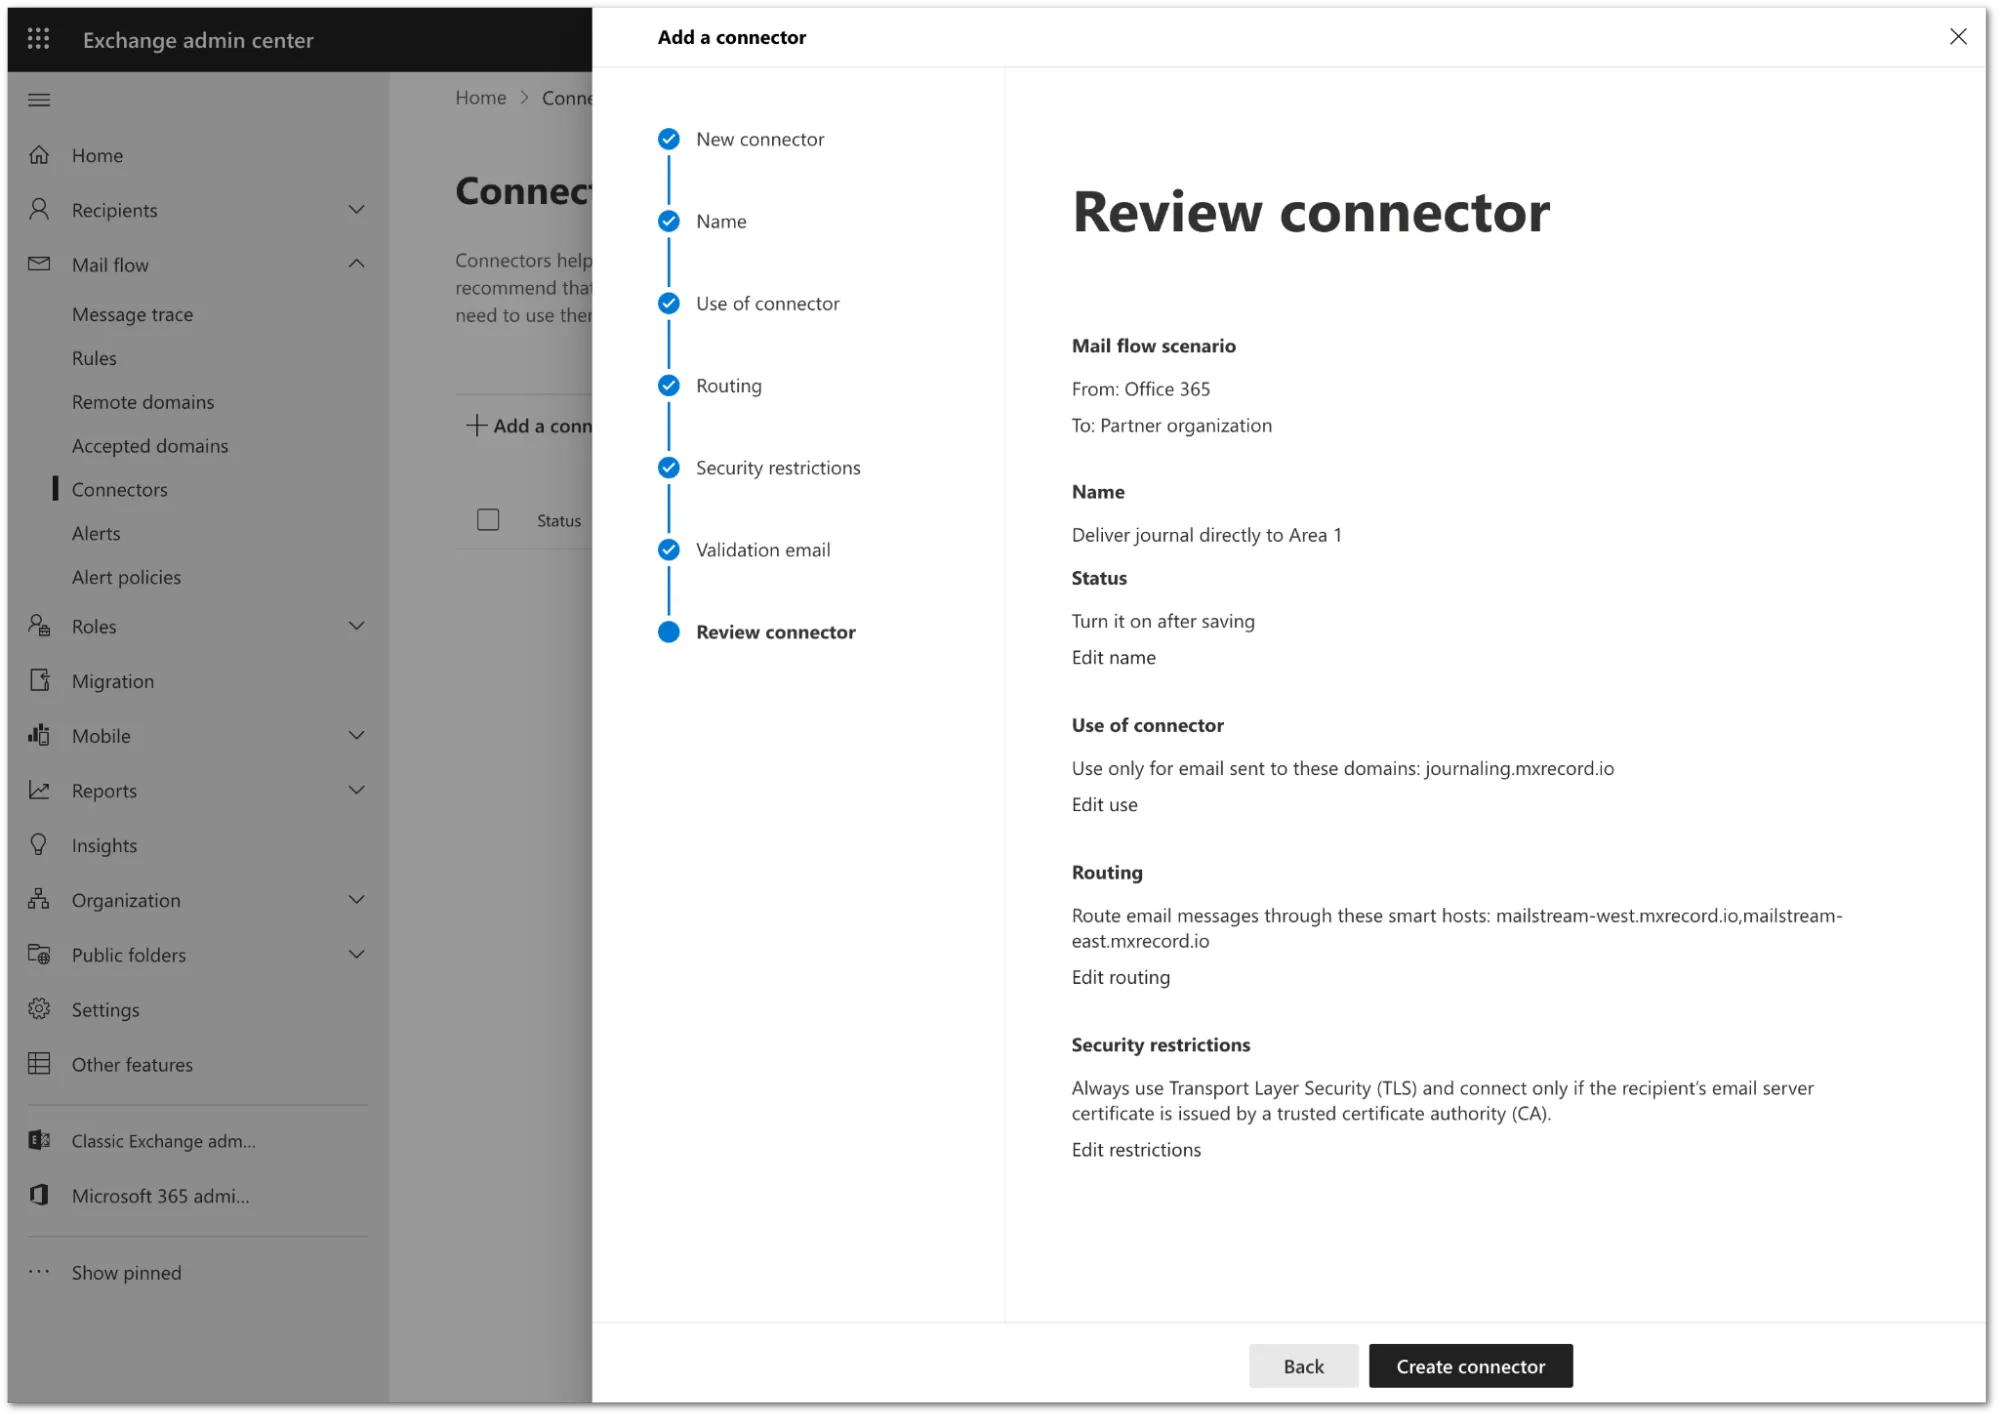
Your connector is now active. You can find it in Exchange admin center > Mail flow > Connectors.
-
Log in to the Microsoft Purview compliance portal ↗.
-
Go to Data lifecycle management > Exchange (legacy).
-
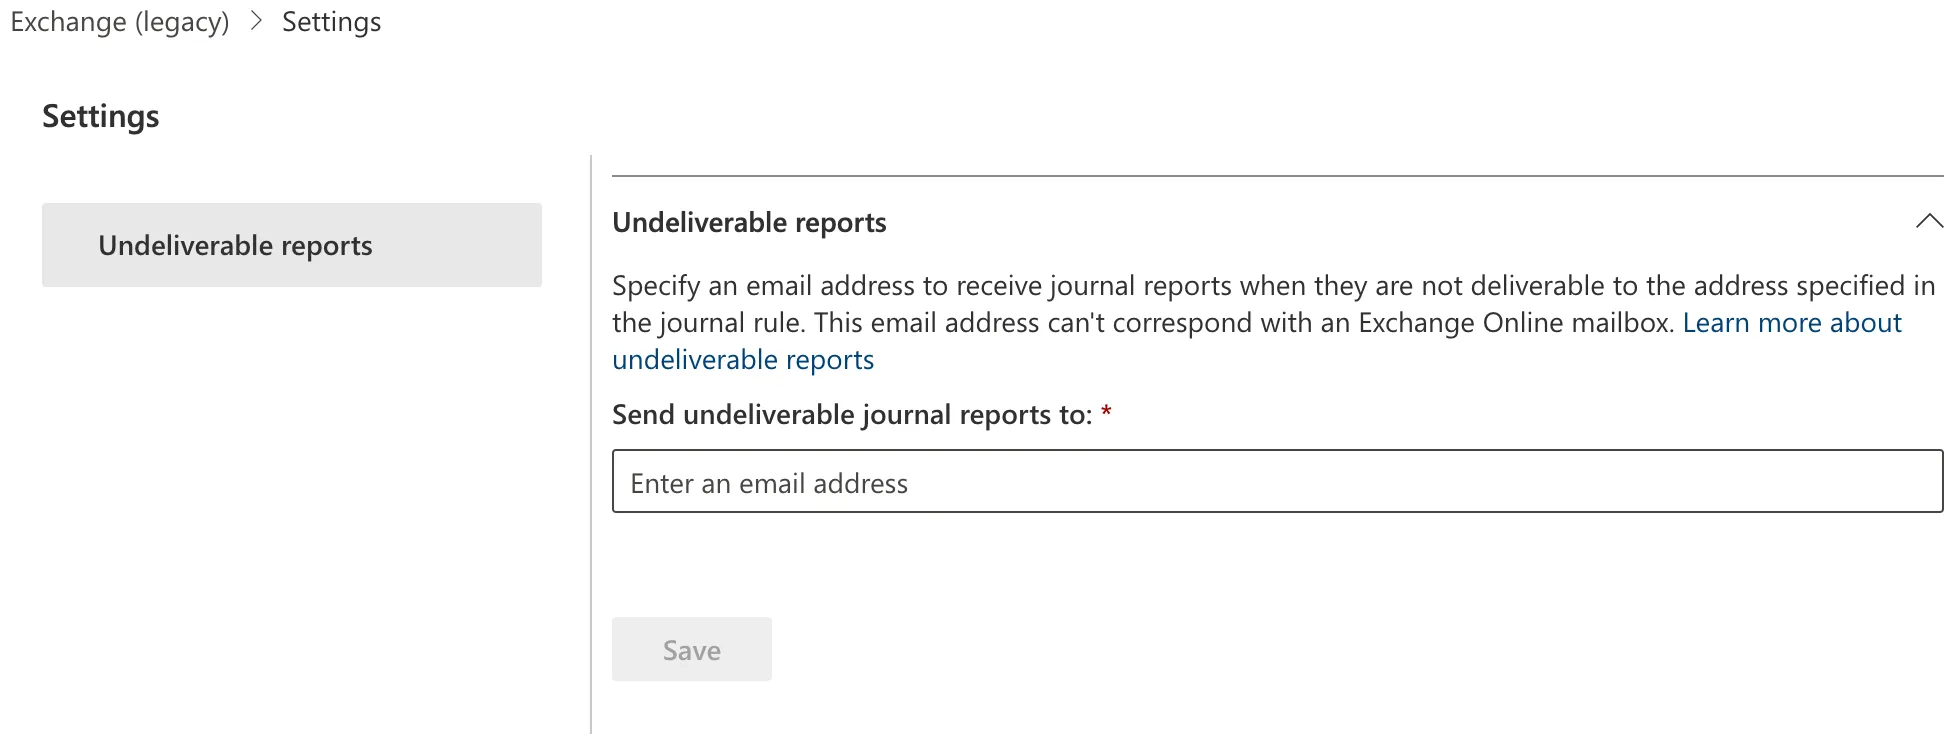
Select Settings (the gear icon).
-
In Send undeliverable journal reports to enter the email address of a valid user account. Note that you cannot use a team or group address.
-
Select Save.
-
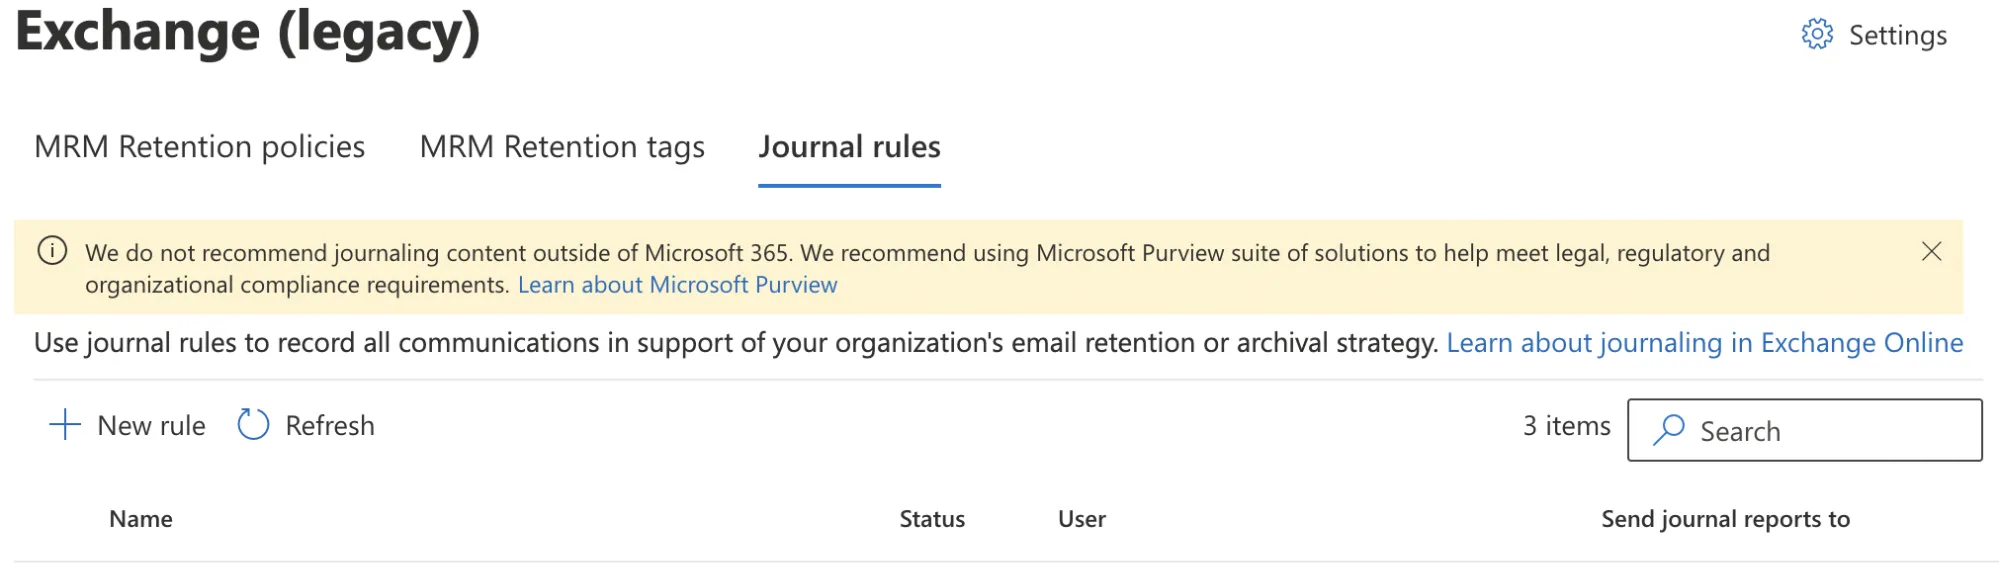
Still in the Exchange (legacy) screen, select Journal Rules.
-
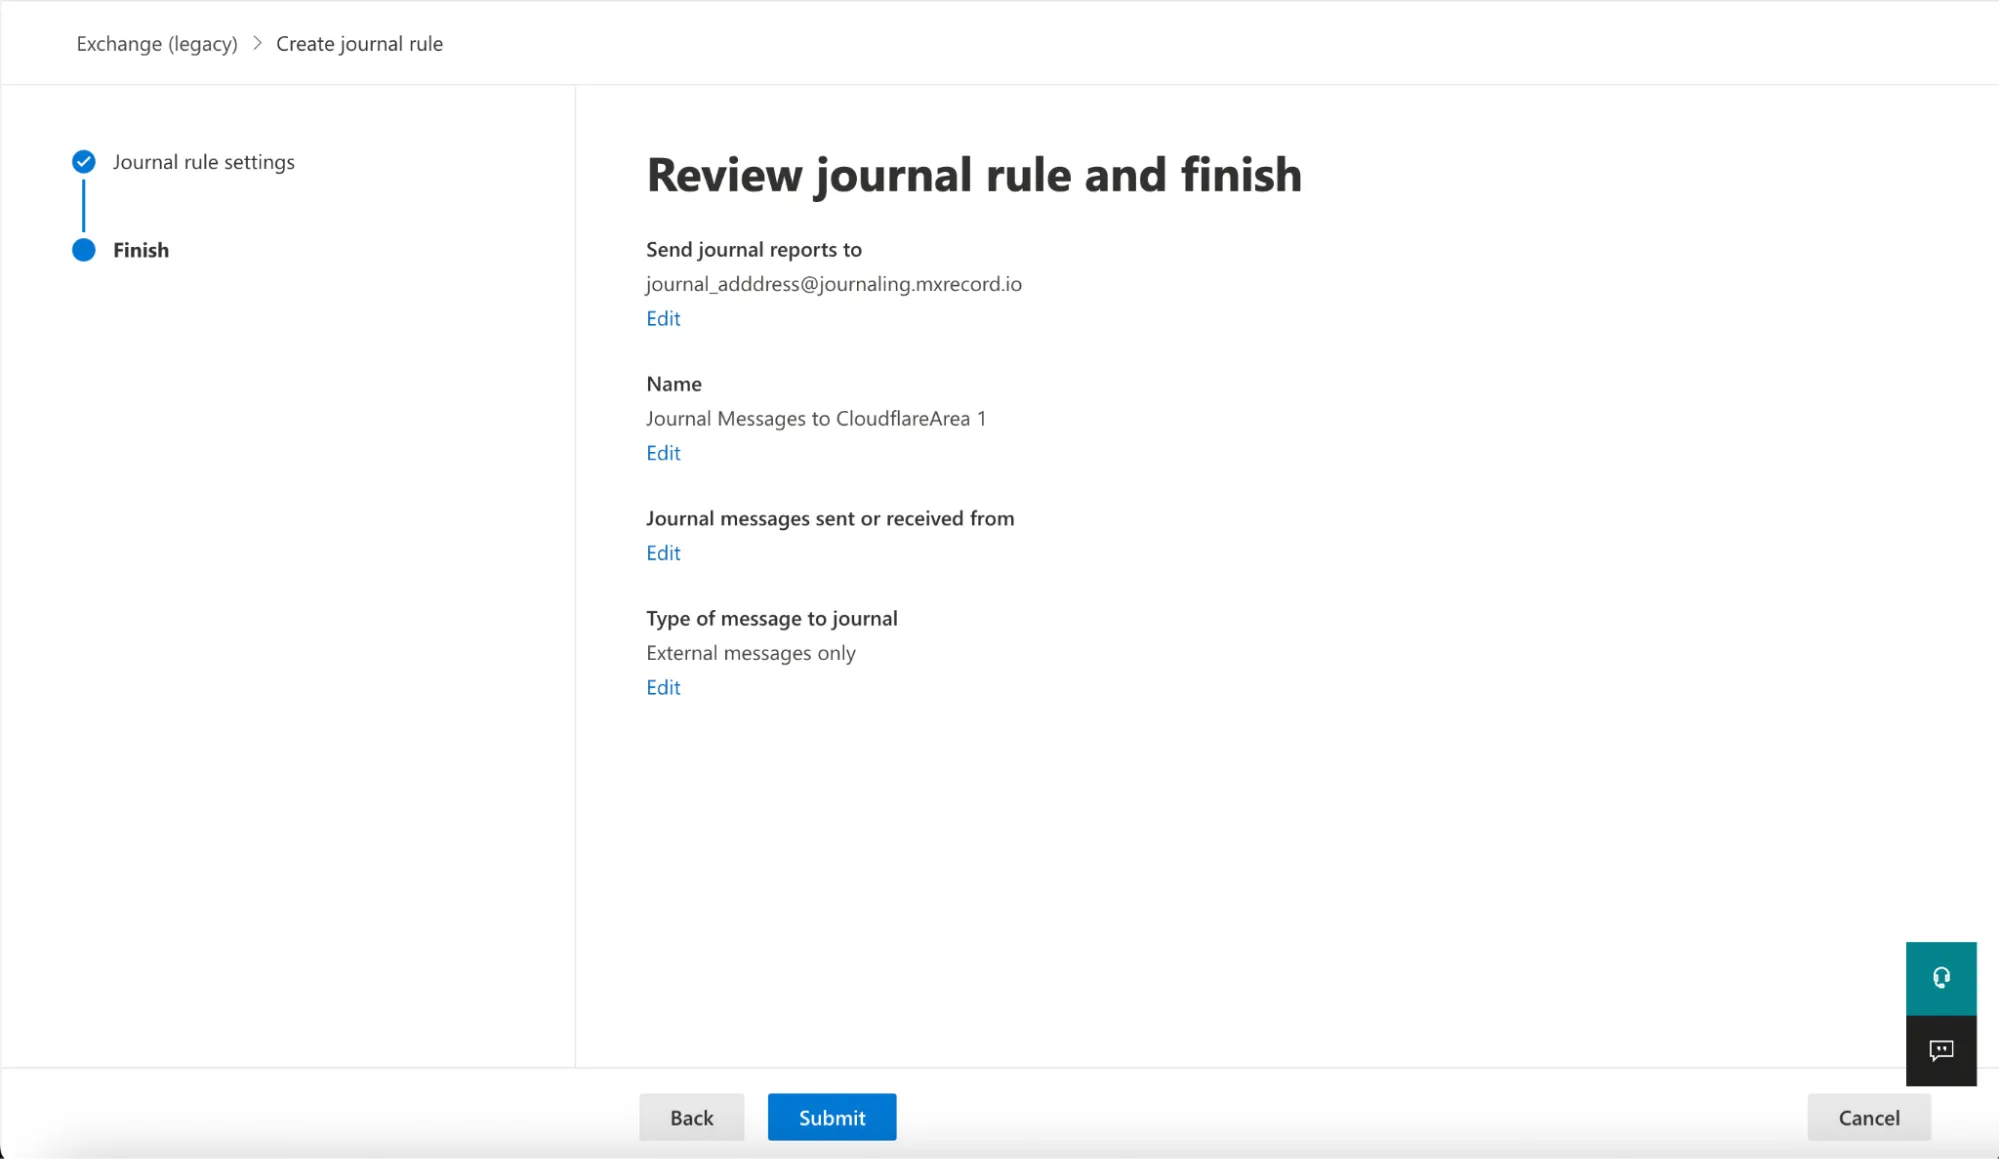
Select New rule to configure a journaling rule, and configure it as follows:
- Send journal reports to: This address is specific to each customer tenant, and can be found in your Email Security dashboard ↗. For example,
<customer_name>@journaling.mxrecord.io. - Journal Rule Name:
Journal Messages to CloudflareArea 1 - Journal messages sent or received from: Everyone
- Type of message to journal: External messages only
- Send journal reports to: This address is specific to each customer tenant, and can be found in your Email Security dashboard ↗. For example,
-
Select Next.
-
Verify the information is correct, and select Submit > Done.
Once saved, the rule is automatically active. However, it may take a few minutes for the configuration to propagate and start pushing messages to Cloudflare Email Security. After it propagates, you can access the Cloudflare Email Security dashboard to check the number of messages processed. This number will grow as journaled messages are sent to Cloudflare Email Security from your Exchange server.
For compliance purposes, you might be required to process emails in certain geographic regions such as India or the EU. If that is your case, you should create Office 365 distribution lists ↗ for each geographic region where you need to process your emails, before configuring your journal rule.
After creating the distribution lists based on regions for your users, configure your journal rule:
-
Log in to the Microsoft Purview compliance portal ↗.
-
Go to Data lifecycle management > Exchange (legacy).
-
Select Settings (the gear icon).
-
In Send undeliverable journal reports to enter the email address of a valid user account. Note that you cannot use a team or group address.
-
Select Save.
-
Still in the Exchange (legacy) screen, select Journal Rules.
-
Select New rule to configure a journaling rule, and configure it as follows:
- Send journal reports to: This address is specific to each customer tenant, and can be found in your Email Security dashboard ↗. If you need to process emails in certain geographic regions, refer to the Geographic locations table for more information on what address you should use.
- Journal Rule Name:
Journal Messages to CloudflareArea 1 - Journal messages sent or received from: A specific user or group and select the user group you created above.
- Type of message to journal: External messages only
-
Select Next.
-
Verify the information is correct, and select Submit > Done.
Once saved, the rule is automatically active. However, it may take a few minutes for the configuration to propagate and start pushing messages to Cloudflare Email Security. After it propagates, you can access the Cloudflare Email Security dashboard to check the number of messages processed. This number will grow as journaled messages are sent to Cloudflare Email Security from your Exchange server.
When retraction is enabled, you can manually retract messages that were not automatically retracted.
-
Log in to the Email Security (formerly Area 1) dashboard ↗.
-
Select the search bar and enter the search parameters to find the emails you are looking for.
-
To retract a single message, select Retract. To retract multiple messages, first select the checkboxes on the messages you want to retract. Then, select Retract.
-
Choose where you want to retract the message to, and select Retract message.

-
If the retraction was successful, there will be positive confirmation on Email Security (formerly Area 1) dashboard.
Office 365 には、ハード削除されたメールメッセージを回復するための2つの方法があります:
削除されたメールメッセージを回復するためにこれらのツールを使用する方法については、Microsoft のドキュメントを参照してください。
Select from the following BCC addresses to process email in the correct geographic location.
| Host | Location | Note |
|---|---|---|
<customer_name>@journaling.mxrecord.io | US | Best option to ensure all email traffic processing happens US data centers. |
<customer_name>@journaling.mailstream-eu-primary.mxrecord.io | EU | Best option to ensure all email traffic processing happens in Germany, with backup to US data centers. |
<customer_name>@journaling.mailstream-eu1.mxrecord.io | EU | Best option to ensure all email traffic processing happens within the EU without backup to US data centers. |
<customer_name>@journaling.mailstream-bom.mxrecord.mx | India | Best option to ensure all email traffic processing happens within India. |
<customer_name>@journaling.mailstream-india-primary.mxrecord.mx | India | Same as mailstream-bom.mxrecord.mx, with backup to US data centers. |
<customer_name>@journaling.mailstream-asia.mxrecord.mx | India | Best option to ensure all email traffic processing happens in India, with Australia data centers as backup. |
<customer_name>@journaling.mailstream-syd.area1.cloudflare.net | Australia / New Zealand | Best option to ensure all email traffic processing happens within Australia. |
<customer_name>@journaling.mailstream-australia.area1.cloudflare.net | Australia / New Zealand | Best option to ensure all email traffic processing happens in Australia, with India and US data centers as backup. |