Cloudflaredに接続する
Cloudflare Tunnelは、ほぼすべてのホストマシンで実行できるアウトバウンド専用のデーモンサービスであり、Cloudflareネットワークから検証された後にローカルトラフィックをプロキシします。WARPエンドポイントクライアントから開始されたユーザートラフィックはCloudflareに接続され、Cloudflare Tunnel接続を通過し、ローカルネットワークで自動的に終了します。内部アプリケーションやサービスに到達するトラフィックは、cloudflaredデーモンを実行しているホストマシンのローカルソースIPアドレスを持ちます。
プライベートネットワークに接続するには:
-
Log in to Zero Trust ↗ and go to Networks > Tunnels.
-
Select Create a tunnel.
-
Choose Cloudflared for the connector type and select Next.
-
Enter a name for your tunnel. We suggest choosing a name that reflects the type of resources you want to connect through this tunnel (for example,
enterprise-VPC-01). -
Select Save tunnel.
-
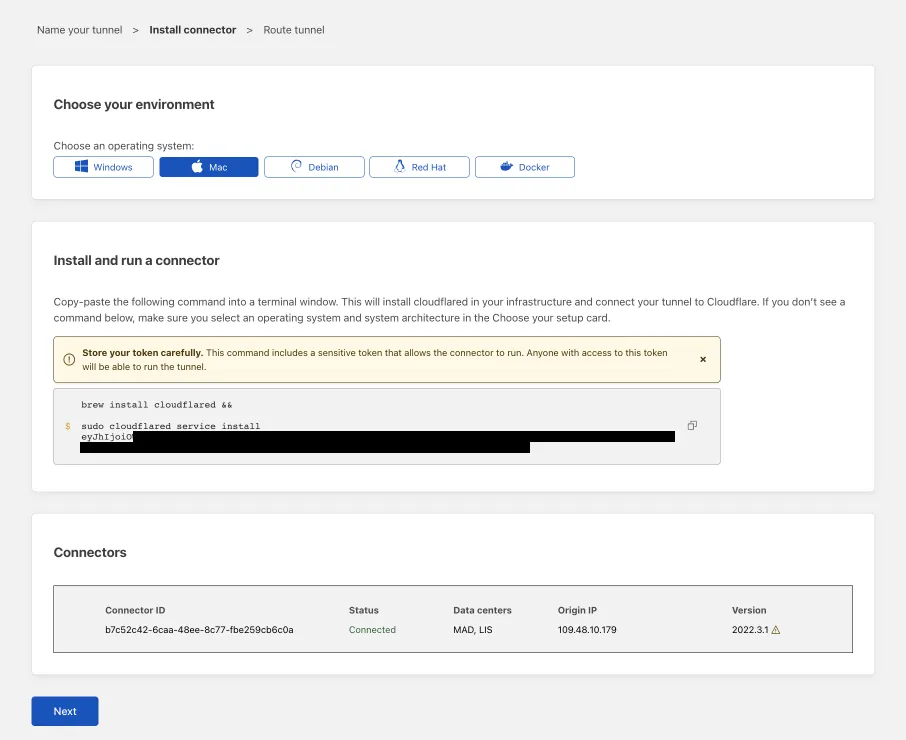
Next, you will need to install
cloudflaredand run it. To do so, check that the environment under Choose an environment reflects the operating system on your machine, then copy the command in the box below and paste it into a terminal window. Run the command. -
Once the command has finished running, your connector will appear in Zero Trust.
-
Select Next.
-
プライベートネットワークタブで、プライベートネットワークのCIDRを入力します(例:
10.0.0.0/8)。 -
トンネルを保存を選択します。
このIP範囲内のすべての内部アプリケーションとサービスは、Cloudflareに接続されました。
- 異なるCloudflareトンネル間で本番環境とステージングトラフィックを分離します。
- 追加の可用性ポイントのために、別のホストマシンに
cloudflaredレプリカを追加します。 - 重要なサービス(例:プライベートDNS、Active Directory、その他の重要なシステム)へのアクセスを異なるトンネルに分散させ、サーバー側の障害が発生した場合の影響範囲を縮小します。
- Cloudflareダッシュボードで通知を有効にすることで、トンネルの健康状態を監視します。
- パフォーマンスメトリクスを監視することで、潜在的なボトルネックを特定します。
- 定期的に
cloudflaredを更新する。