Cloudflareトンネルの作成
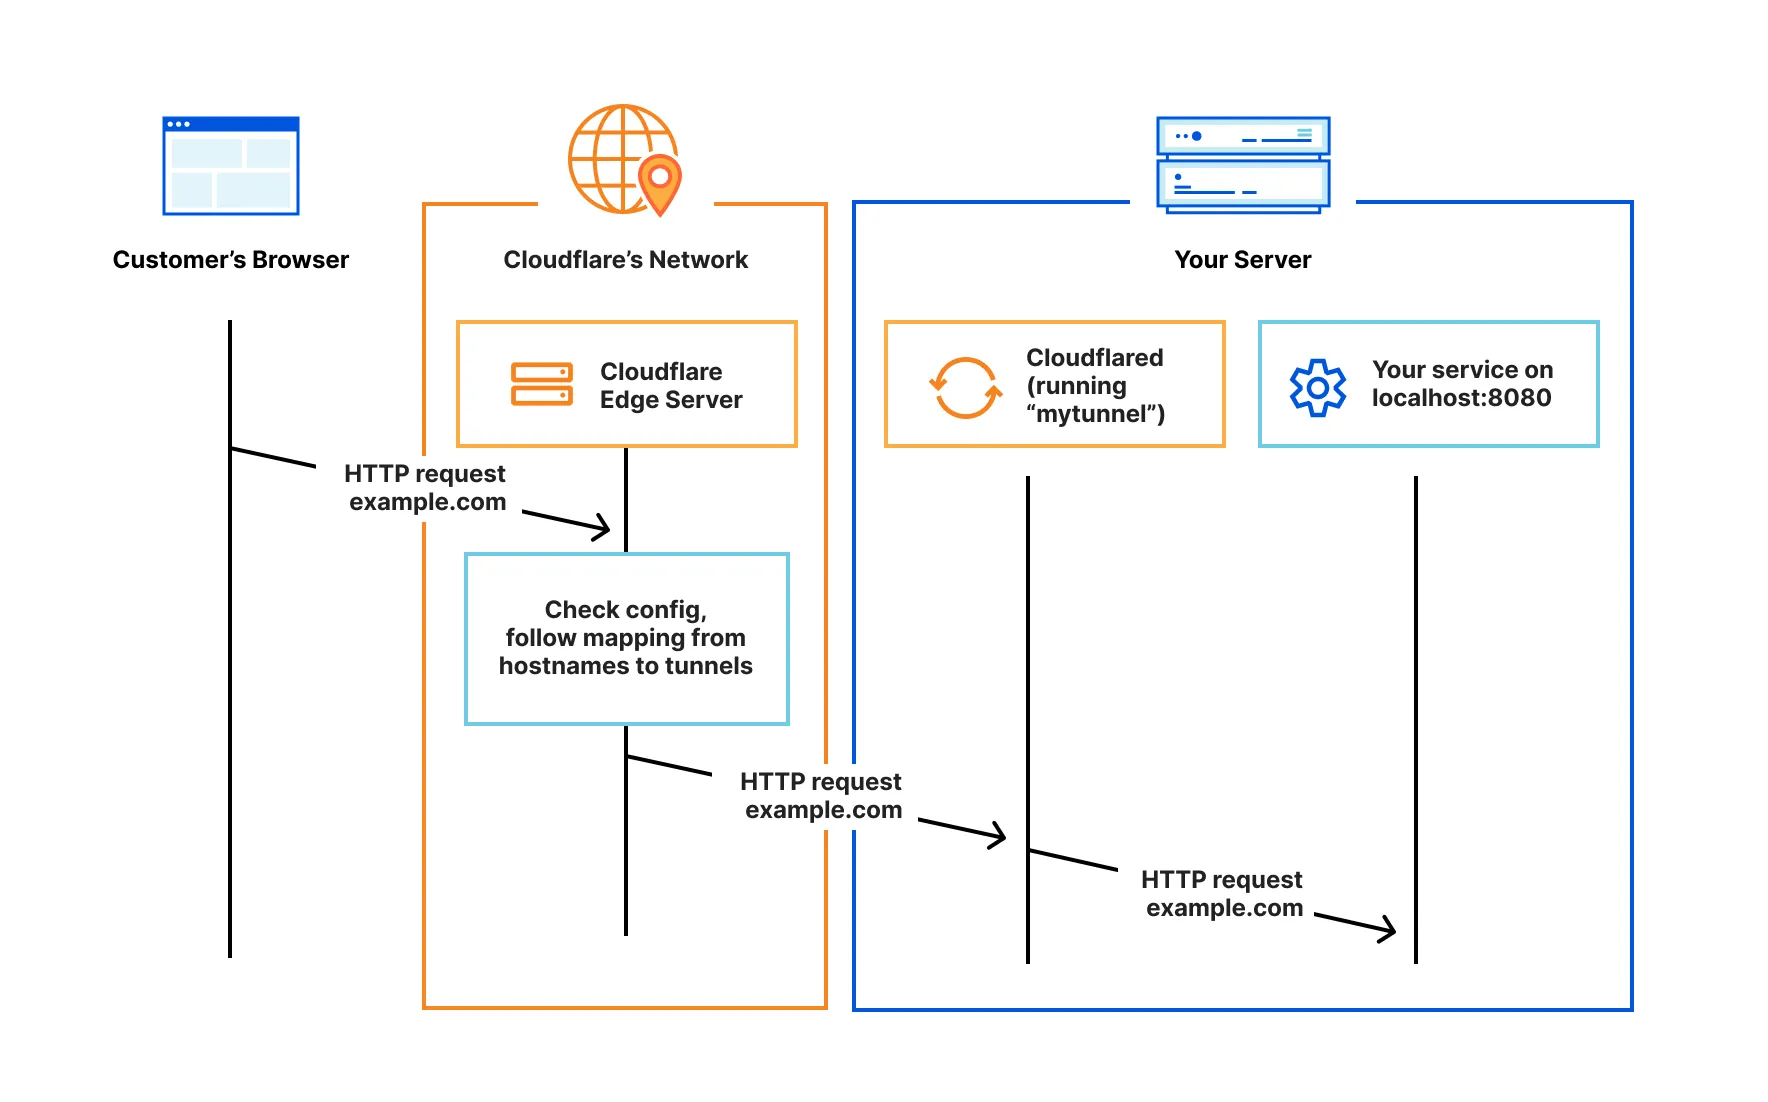
クライアントレスでアプリケーションにアクセスするには、パブリックホスト名ルートを含むCloudflareトンネルを作成する必要があります。パブリックホスト名ルートは、特定のアドレス、プロトコル、およびプライベートアプリケーションに関連付けられたポートにトラフィックをルーティングするパブリックDNSレコードを作成します。たとえば、mywebapp.example.comというパブリックホスト名を定義して、https://localhost:8080で実行されているWebサーバーへのアクセスを提供できます。ユーザーがブラウザでmywebapp.example.comにアクセスすると、そのリクエストは最初にCloudflareデータセンターにルーティングされ、そこで設定されたセキュリティポリシーに対して検査されます。Cloudflareは、検証されたリクエストをトンネル経由でWebサーバーに転送します。
Cloudflareトンネルを作成するには:
-
Log in to Zero Trust ↗ and go to Networks > Tunnels.
-
Select Create a tunnel.
-
Choose Cloudflared for the connector type and select Next.
-
Enter a name for your tunnel. We suggest choosing a name that reflects the type of resources you want to connect through this tunnel (for example,
enterprise-VPC-01). -
Select Save tunnel.
-
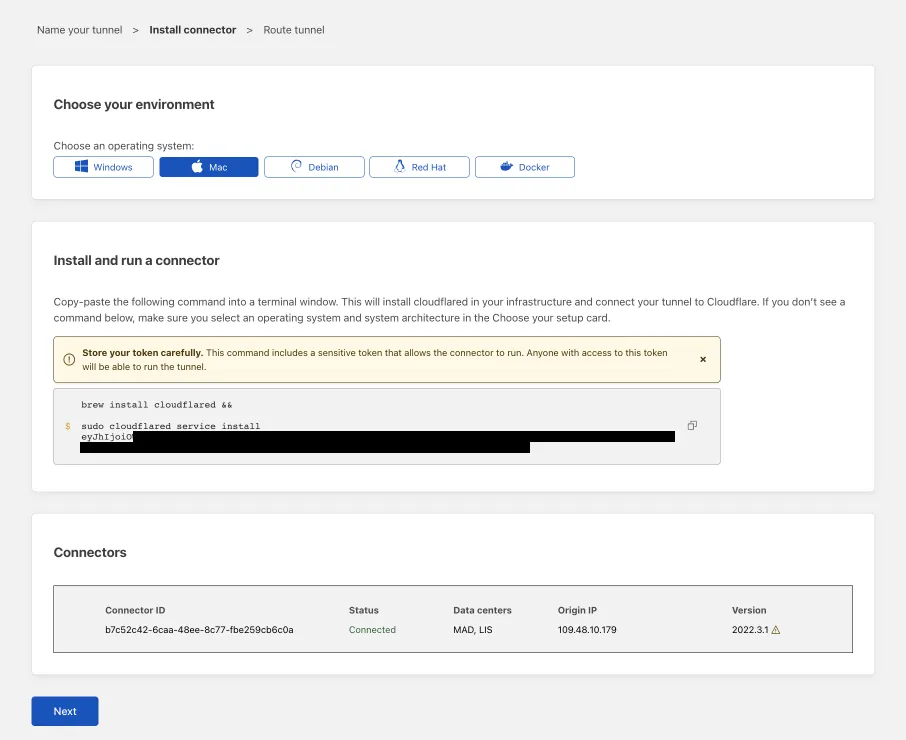
Next, you will need to install
cloudflaredand run it. To do so, check that the environment under Choose an environment reflects the operating system on your machine, then copy the command in the box below and paste it into a terminal window. Run the command. -
Once the command has finished running, your connector will appear in Zero Trust.
-
Select Next.
トンネルにパブリックホスト名ルートを追加するには:
-
In the Public Hostnames tab, choose a Domain and specify any subdomain or path information.
-
Specify a service, for example
https://localhost:8000. -
Under Additional application settings, specify any parameters you would like to add to your tunnel configuration.
-
Select Save tunnel.
インターネット上のすべてのユーザーが、このアプリケーションにパブリックホスト名を介して接続できるようになりました。モジュール4: アプリケーションのセキュリティでは、認可されたユーザーへのアクセスを制限する方法について説明します。
トンネルを通るトラフィックのルーティングをより制御するには、以下のリンクを参照してください: